nail salon business plan sample pdf

Executive Summary

This nail salon business plan outlines the strategy for launching and growing a successful beauty service business, targeting diverse clientele with premium services and unique offerings.

1.1 Business Overview

The nail salon aims to provide high-quality beauty services, including manicures, pedicures, and nail art, targeting a diverse clientele. The salon will emphasize a welcoming environment, premium products, and skilled technicians to ensure customer satisfaction. By offering personalized services and maintaining a clean, modern facility, the salon seeks to establish itself as a trusted beauty destination in the local market, ensuring long-term growth and customer loyalty.

1.2 Founder and Management

The salon is founded by [Founder’s Name], an experienced professional with over 8 years in the beauty industry. The management team includes a salon manager overseeing daily operations and a lead nail technician ensuring service quality. Contract workers, including stylists and therapists, bring diverse expertise, allowing the salon to offer a wide range of services while maintaining flexibility and high standards of professionalism.

1.3 Location and Facilities

The salon will be located in a central, high-traffic area with excellent accessibility. The facility will feature modern, clean spaces equipped with state-of-the-art nail care tools. A welcoming ambiance will be created through ergonomic seating, soothing decor, and ambient lighting. The layout will ensure privacy and comfort, with a dedicated reception area for client check-ins and refreshments, enhancing the overall customer experience while maintaining operational efficiency.

Market Analysis

The nail salon industry is growing, driven by increasing demand for beauty and grooming services. Consumers seek personalized experiences, with a focus on quality, hygiene, and trends like eco-friendly products.

2.1 Industry Overview

The nail salon industry is a rapidly growing sector within the beauty and personal care market. With increasing demand for grooming services, the industry has expanded to offer diverse services such as manicures, pedicures, and nail art. Key trends include a rise in eco-friendly products, personalized services, and advanced techniques. The market is competitive, with both small independent salons and large chains vying for market share. This dynamic environment requires businesses to stay updated on latest trends and customer preferences to remain competitive.

2.2 Target Market

The target market for a nail salon includes a diverse range of customers, primarily women aged 18-45, as well as an increasing number of men seeking grooming services. This demographic includes working professionals, students, and beauty-conscious individuals. The market also encompasses individuals looking for premium services, nail art, and eco-friendly products. Additionally, there is a growing demand for personalized services, making it essential to cater to varied preferences and trends.

2.3 Competitive Analysis

The nail salon industry is highly competitive, with numerous local and chain salons offering similar services. Key competitors include established salons known for their quality and reputation, as well as newer, trendy spots offering unique experiences. To stand out, our salon will focus on exceptional customer service, a clean and inviting environment, and innovative offerings like eco-friendly products and customizable nail art, ensuring a memorable experience for clients.

Services and Pricing

Our nail salon offers a variety of services, including manicures, pedicures, gel extensions, and nail art, with pricing structured to cater to both budget-conscious and premium clients.
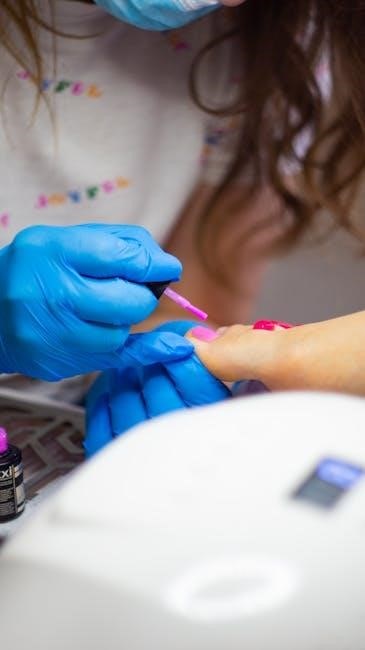
3.1 Core Services

The nail salon will provide essential services such as basic manicures, pedicures, gel and acrylic nail applications, and nail repairs. These services form the foundation of our offerings, ensuring consistent quality and customer satisfaction. Additional options like nail art and express services will cater to diverse client preferences, enhancing the overall experience and driving repeat business.

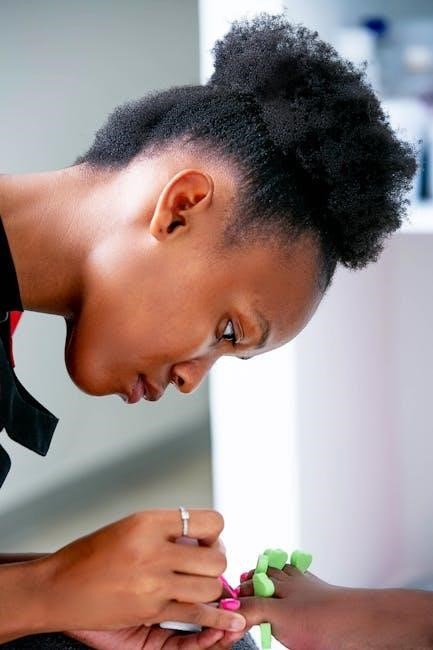
3.2 Additional Services

Beyond core offerings, the salon will provide premium add-ons like luxury manicures, pedicures with reflexology, and high-end nail art. To enhance client comfort, services such as complimentary refreshments and soothing hand or foot massages will be available. These extras aim to elevate the salon experience, fostering loyalty and encouraging higher spending. Additional services are designed to meet the evolving demands of beauty-conscious clients.

3.3 Pricing Strategy

The salon will implement a tiered pricing structure, offering competitive rates for standard services and premium pricing for luxury treatments. Discounts will be available for first-time clients, students, and seniors. Loyalty programs and referral incentives will encourage repeat business. Transparent pricing ensures clarity, while flexible packages cater to diverse budgets, ensuring affordability without compromising quality or profitability.

Marketing and Sales Strategy

Focused on building brand awareness, the strategy includes digital marketing, social media engagement, and local partnerships to attract and retain clients through personalized promotions and exceptional service.

4.1 Brand Identity

Establishing a strong brand identity is crucial for differentiation. The salon will emphasize modern elegance, hygiene, and personalized care. A clean, sophisticated logo and vibrant color scheme will reflect the brand’s commitment to quality and style. Social media and local partnerships will reinforce this identity, creating a memorable and trustworthy presence in the beauty service market, ensuring client loyalty and attraction.

4.2 Marketing Plan

The marketing strategy focuses on digital engagement and community outreach. Utilizing social media platforms for promotions, before-and-after showcases, and client testimonials will build an online presence. Local partnerships with beauty suppliers and wellness centers will enhance visibility. Regular promotions and referral programs incentivize repeat business, fostering customer loyalty and driving growth in a competitive market, ensuring sustainable expansion and brand recognition over time.

4.3 Sales Strategy

The sales strategy emphasizes personalized client experiences, upselling premium services, and leveraging booking systems to manage appointments efficiently. Staff will be trained in consultative selling to enhance service offerings and increase average ticket size. Additionally, loyalty programs, seasonal discounts, and special packages will be implemented to attract new customers and retain existing ones, ensuring consistent revenue growth and customer satisfaction in a competitive beauty industry landscape.

Operations Plan

The operations plan focuses on efficient salon management, including location setup, equipment maintenance, and staff scheduling. It ensures smooth daily operations, safety protocols, and quality service delivery.

5.1 Location and Layout

The salon will be located in a high-traffic area, ensuring visibility and accessibility. The layout will feature a spacious reception, manicure and pedicure stations, private rooms for specialized services, and a retail section for beauty products. The design will prioritize customer comfort, with modern furniture and soothing decor. Key areas will include a storage room for supplies and a waste disposal area to maintain hygiene and safety standards.

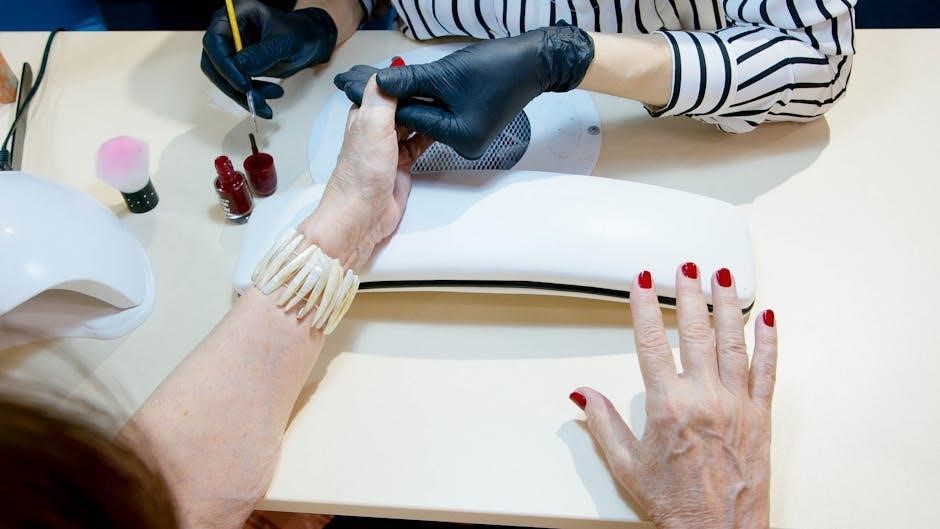
5.2 Salon Equipment and Supplies

The salon will invest in high-quality equipment, including manicure tables, UV lamps, nail dryers, and sterilization units. Essential supplies like nail polishes, removers, and disposable tools will be sourced from reputable brands. A consistent supply chain will ensure availability of products. Regular maintenance of equipment and timely restocking of supplies will be prioritized to uphold service quality and customer satisfaction, ensuring a seamless operation.

5.3 Staffing and Training

The salon will recruit experienced nail technicians, stylists, and support staff to ensure high-quality services. Comprehensive training programs will focus on advanced nail techniques, product knowledge, and customer service. Ongoing education will keep staff updated on trends and industry standards. Certification programs will be encouraged to enhance expertise. Regular workshops and team-building activities will foster a skilled and motivated team, ensuring exceptional service delivery and customer satisfaction.

Financial Plan

The financial plan outlines revenue projections, startup costs, and funding requirements, ensuring stability and growth for the nail salon business.

6.1 Revenue Projections

Revenue projections for the nail salon are based on service demand, pricing, and market growth. The salon anticipates generating $250,000 in the first year, with a 10% annual increase. Income sources include basic and premium nail services, memberships, and retail product sales. Conservative estimates project steady growth, ensuring financial stability and scalability.

6.2 Startup Costs

Startup costs for the nail salon are estimated at $150,000, covering lease deposits, renovations, equipment, and initial supplies. Key expenses include $50,000 for salon equipment, $30,000 for facility setup, $20,000 for marketing, and $15,000 for legal and licensing fees. Additional funds will be allocated for staff training and initial operational costs, ensuring a smooth launch and readiness for customer service.

6.3 Funding Requirements

The nail salon requires $120,000 in initial funding to cover startup costs, with $70,000 allocated for facility renovations and equipment. An additional $30,000 will support marketing and operational expenses. Funding sources include a combination of personal savings, bank loans, and investor contributions. A detailed breakdown of expenses and funding allocations is provided to ensure transparency and secure necessary investments for a successful launch.

Growth Strategy

The salon aims to expand its customer base by introducing loyalty programs and exploring new market opportunities, ensuring steady growth and long-term success in the beauty industry.

7.1 Short-Term Goals

The salon plans to achieve 20% monthly revenue growth, establish a loyal customer base within the first year, and introduce seasonal promotions to attract new clients and increase foot traffic. These goals will be supported by effective marketing campaigns and continuous improvements in service quality to build a strong reputation in the local beauty industry.

7.2 Long-Term Goals

The salon aims to expand its presence by opening two additional locations within five years, increasing its service offerings to include advanced beauty treatments, and building a strong online presence through e-commerce and booking systems. Long-term sustainability will be achieved by maintaining high customer satisfaction, investing in staff development, and staying ahead of industry trends to solidify its position as a market leader.

7.3 Expansion Opportunities

The salon plans to explore franchising opportunities, expand its product line with branded merchandise, and introduce mobile services for events and corporate clients. Partnerships with beauty schools and influencers will enhance visibility. Additionally, offering online booking and at-home treatment options will cater to a wider audience, ensuring steady growth and diversification of revenue streams while maintaining high service standards and customer loyalty.

miller dynasty 200 manual

Welcome to the Miller Dynasty 200 Series, a high-performance welding system designed for precision and reliability. This series includes the SD and DX models, offering advanced TIG welding capabilities. The manual is essential for optimizing machine performance and ensuring safety during operations. With its robust features and user-friendly interface, the Dynasty 200 Series is ideal for both professionals and enthusiasts seeking consistent and high-quality welds.

1.1 Overview of the Miller Dynasty 200 SD and DX Models

The Miller Dynasty 200 SD and DX models are advanced TIG welding systems designed for precision and versatility. Both models offer superior arc stability and consistent performance, catering to industrial and professional applications. The SD model focuses on standard TIG welding, while the DX model includes additional features like AC TIG capabilities with balance control. These models are built for reliability, with user-friendly interfaces and adjustable controls to enhance productivity. The manual provides detailed guidance for optimal setup and operation.

1.2 Importance of the Manual for Optimal Use

The manual is crucial for unlocking the full potential of the Miller Dynasty 200 Series. It provides detailed safety precautions, installation guidelines, and operational instructions to ensure safe and efficient use. By following the manual, users can properly set up the machine, troubleshoot common issues, and maintain optimal performance. Adhering to the manual’s recommendations helps maximize productivity, reliability, and longevity of the welding system, while minimizing risks associated with improper usage.

Safety Precautions and Operational Guidelines

This section outlines critical safety practices and operational guidelines for the Miller Dynasty 200 Series. Adherence to these protocols ensures safe and efficient welding operations, minimizing risks and enhancing productivity. Always refer to the manual for detailed safety instructions and hazard prevention strategies.

2.1 General Safety Instructions for Welding Operations

Always follow safety guidelines when operating the Miller Dynasty 200 Series. Wear proper protective gear, including welding helmets, gloves, and fire-resistant clothing. Ensure the work area is well-ventilated and free from flammable materials. Avoid welding in wet conditions or with damaged equipment. Keep bystanders away from the welding arc to prevent exposure. Never bypass safety features or ignore warning signs. Adherence to these protocols minimizes risks of injury or equipment damage, ensuring safe and efficient welding operations.

2.2 Installation and Setup Safety Recommendations

Ensure proper installation and setup of the Miller Dynasty 200 Series to maintain safety and performance. Connect the machine to a suitable power supply, adhering to voltage and current requirements. Ground the unit correctly to prevent electrical hazards. Install in a well-ventilated, dry area, away from flammable materials. Avoid overloading circuits and keep the machine away from water. Use genuine Miller accessories for compatibility. Follow manual guidelines for proper setup, and ensure all connections are secure before operation to prevent accidents and ensure reliable performance.

Features and Benefits of the Miller Dynasty 200 Series

The Miller Dynasty 200 Series offers advanced TIG welding solutions with the SD and DX models. It provides consistent arc performance, reliable starts, and adjustable controls for enhanced productivity. These features ensure superior weld quality and user satisfaction across various applications.

3.1 AC TIG Features and Balance Control

The Miller Dynasty 200 Series excels in AC TIG welding with precise balance control, allowing for adjustable penetration and cleanliness. This feature enhances weld quality by optimizing the arc for various materials. The system ensures consistent arc starts, minimizing downtime and improving productivity. With advanced inverter technology, it delivers stable performance across different input voltages. The balance control is user-friendly, enabling welders to fine-tune their settings for optimal results. This combination makes the Dynasty 200 Series a versatile tool for both thin and thick materials.

3.2 Consistent Arc Starts and Reliability

The Miller Dynasty 200 Series ensures consistent arc starts, enhancing welding efficiency and reducing downtime. Its advanced arc initiation system provides reliable performance, even in challenging conditions. The machine’s design minimizes maintenance and extends equipment lifespan. With superior reliability, it delivers consistent results across various welding applications, making it a trusted choice for professionals. This feature-rich system is built to handle demanding industrial environments while maintaining precision and durability.

3.4 Adjustable Controls for Enhanced Productivity

The Miller Dynasty 200 Series offers adjustable controls that enhance productivity by allowing precise customization of welding parameters. Features like balance control enable fine-tuning of AC TIG welding for optimal results. The intuitive interface simplifies setup, reducing downtime and improving efficiency. These controls empower users to tailor their welding experience, ensuring consistent and high-quality outcomes across various projects. Adjustable settings also accommodate different welding techniques and materials, making the Dynasty 200 Series versatile for diverse applications.

Technical Specifications of the Miller Dynasty 200

The Miller Dynasty 200 Series features a robust design with advanced inverter technology, supporting various welding processes. It offers flexible power output, compatibility with multiple welding techniques, and optional accessories for enhanced functionality, ensuring versatility for both industrial and professional use.

4.1 Voltage Range and Input Compatibility

The Miller Dynasty 200 Series supports a wide voltage range, including 115V to 460V, ensuring compatibility with various power sources. It accommodates both single-phase and three-phase input, offering flexibility for different welding environments. The system features automatic voltage sensing, eliminating the need for manual adjustments. This adaptability makes it suitable for a range of applications, from small workshops to large industrial settings, while maintaining consistent performance and reliability across varying power conditions.

4.2 Duty Cycle and Power Output

The Miller Dynasty 200 Series offers a robust duty cycle of 60% at 200 amps for TIG welding, ensuring prolonged operation without overheating. It delivers a maximum power output of 200 amps, providing ample capacity for demanding welding tasks. The machine is designed to handle both light-duty and industrial applications efficiently. With its high-duty cycle and consistent power delivery, the Dynasty 200 Series ensures reliable performance, making it suitable for continuous use in professional and production environments.

4.3 Dimensions and Weight

The Miller Dynasty 200 Series is designed to be compact and lightweight, making it easy to transport and place in various work environments. The unit measures approximately 24.5 inches in width, 14.5 inches in height, and 20 inches in depth. It weighs around 120 pounds, ensuring portability without compromising durability. This design allows for efficient use of space in workshops and job sites, while its robust construction ensures long-term reliability and performance.

Manual Content Structure

The manual is organized into clear sections, covering safety, installation, features, technical specs, operation, maintenance, and troubleshooting, ensuring easy navigation for optimal machine usage and understanding.

5.1 Overview of the Manual Sections

The manual is divided into comprehensive sections to guide users effectively. It begins with safety precautions and operational guidelines, followed by detailed features and technical specifications. The structure includes installation and setup instructions, maintenance routines, and troubleshooting tips. Additionally, it covers warranty information, parts diagrams, and appendices for reference. Each section is designed to provide clear, step-by-step guidance, ensuring users can optimize their welding experience with the Miller Dynasty 200 Series.

5.2 Detailed Operating Instructions

The manual provides step-by-step instructions for operating the Miller Dynasty 200 Series. It covers setup, parameter adjustments, and welding techniques. Detailed guides for AC TIG and DC TIG modes are included, along with balance control settings. The instructions emphasize proper machine configuration, arc initiation, and shut-down procedures. Troubleshooting sections help diagnose common issues, ensuring optimal performance. Clear diagrams and practical examples aid in understanding complex settings, making the manual an essential resource for mastering the welding process.

5.3 Maintenance and Troubleshooting Guidelines

The manual includes detailed maintenance routines to ensure optimal performance. Regular cleaning of cooling vents and checking wire feed systems are recommended. Troubleshooting sections address common issues like inconsistent arc starts or error codes. Step-by-step solutions and diagnostic charts help users identify and resolve problems quickly. Proper storage and handling guidelines are also provided to extend equipment lifespan. This section is crucial for maintaining the welder’s efficiency and reliability over time.

Advantages of the Miller Dynasty 200 Series

The Miller Dynasty 200 Series offers improved arc stability, consistent performance, and enhanced reliability, making it ideal for industrial and professional welding applications.

6.1 Improved Arc Stability and Performance

The Miller Dynasty 200 Series excels in delivering exceptional arc stability and performance, ensuring precise and consistent welds. The SD and DX models feature advanced AC TIG capabilities with balance control, allowing for adjustable arc characteristics. This results in superior weld quality, especially on thin materials and intricate joints. The system’s consistent arc starts and reliability minimize downtime, making it ideal for demanding industrial applications. Enhanced performance is further supported by user-friendly controls, enabling operators to fine-tune settings for optimal results.

6.2 User-Friendly Interface and Controls

The Miller Dynasty 200 Series boasts a user-friendly interface designed to simplify operation and enhance productivity. Intuitive controls and a clear display enable quick parameter adjustments, while clearly labeled settings ensure ease of use. The interface minimizes complexity, allowing operators to focus on precision welding. This design caters to both experienced professionals and newcomers, providing a seamless experience. The straightforward layout and responsive controls ensure efficient workflow, making the Dynasty 200 Series a preferred choice for welders seeking reliability and ease of operation.

6.3 Enhanced Reliability for Industrial Applications

The Miller Dynasty 200 Series is engineered for exceptional reliability, making it ideal for demanding industrial environments. With advanced inverter technology, it delivers consistent performance and durable operation. The system’s robust design ensures minimal downtime, while its reliable arc starting and stable output provide precision in high-volume welding tasks. Designed to withstand rigorous use, the Dynasty 200 Series is a dependable choice for industries requiring consistent and high-quality welding results over extended periods.

disguise a turkey free printable pdf

The Disguise a Turkey Project is a fun and educational Thanksgiving activity where kids creatively transform a plain turkey template into a unique character, fostering creativity and problem-solving while engaging the whole family in a delightful holiday tradition.

1.1 What is the Project?

The Disguise a Turkey Project is a creative Thanksgiving activity where kids decorate a turkey template to save it from being eaten. Based on the book Turkey Trouble, it encourages children to design unique disguises using craft materials. The project fosters creativity, problem-solving, and family involvement, allowing kids to transform a plain turkey into a character like a pirate, superhero, or snowman. It can be completed in class or at home with free printable templates.

1.2 How Does it Work?

The project involves downloading a free turkey template, printing it, and letting kids decorate it with creative disguises. Children use craft materials like markers, glue, and accessories to transform the turkey into a unique character, such as a superhero or pirate. The goal is to save the turkey from Thanksgiving dinner by making it unrecognizable. This activity sparks creativity, problem-solving, and imagination while providing a fun, interactive experience for kids to enjoy individually or with family and friends.

Benefits for Kids

The Disguise a Turkey project fosters creativity, problem-solving, and motor skills through cutting, coloring, and crafting. It encourages teamwork and family bonding, making learning fun and engaging.

2.1 Creativity and Motor Skills Development

The Disguise a Turkey project sparks creativity as kids design unique outfits and characters. Cutting, coloring, and assembling the templates enhances fine motor skills. Using materials like markers, glue, and scissors, children express their imagination while developing hand-eye coordination. This engaging activity fosters artistic expression and dexterity, making it both fun and educational. The variety of templates and accessories encourages kids to think creatively, turning a simple turkey into a personalized masterpiece. This hands-on learning experience is perfect for developing young minds.

2.2 Teamwork and Family Involvement

The Disguise a Turkey project encourages collaboration, making it a great family or classroom activity. Kids often work with parents or classmates to create elaborate disguises, fostering teamwork and communication. Family members can take on different roles, from cutting templates to designing outfits, creating a shared goal of saving the turkey. This interactive process strengthens bonds and turns a simple craft into a memorable, collaborative experience, promoting unity and creativity among participants of all ages.

Finding Free Printable Templates

Discover a variety of free turkey disguise templates online, offered by popular educational and craft websites like Pinterest, Teachers Pay Teachers, and Etsy, in both color and black-and-white formats, perfect for creative customization.

3.1 Websites Offering Free Downloads

Popular websites like Pinterest, Teachers Pay Teachers, and Etsy offer a wide range of free turkey disguise printable PDF templates. These platforms provide colorful and black-and-white designs, perfect for classroom or home use. Many templates include multiple outfits and accessories, allowing kids to customize their turkeys creatively. Additionally, some sites offer exclusive freebies for newsletter subscribers, making it easy to find the perfect disguise for your Thanksgiving project. These resources are ideal for educators and parents seeking fun, engaging activities.

3.2 Subscription Options for More Content

Subscription options on platforms like Teachers Pay Teachers, Etsy, and Pinterest provide access to exclusive turkey disguise templates. These premium resources often include additional designs, themes, and customization options. Subscribing can enhance your project with unique and diverse outfits for your turkey. Ideal for educators and parents seeking extensive creative options, these subscriptions offer a convenient way to expand your printable collection for Thanksgiving activities.

How to Download the PDF

Downloading the turkey disguise PDF is straightforward. Click the download button, wait for the file to process, and save it to your device. It’s free and instantly accessible for printing.

4.1 Step-by-Step Download Instructions

To download the turkey disguise PDF, visit a trusted website offering the template. Locate the download button, usually labeled “Download Now” or “Get Free PDF.” Click on it to initiate the process. Some sites may require entering an email address to access the file. Once prompted, click the confirmation link sent to your email. The PDF will automatically download to your device. Ensure a stable internet connection and sufficient storage for a smooth experience. Open the file to print and start crafting your disguised turkey!

4.2 Tips for Printing the Best Quality

For optimal results, print the turkey disguise PDF on high-quality paper or cardstock. Ensure your printer settings are adjusted for vibrant colors and crisp details. Select the “Best Quality” option in your printer settings. Print at the correct size to avoid pixelation. Use genuine ink cartridges for richer colors. Allow the ink to dry completely before handling. For black-and-white templates, choose a laser printer for sharper lines. Always preview the print layout to ensure proper alignment and margins.

Popular Disguise Ideas

Popular disguises include Cowboy Sheriff, Ninja Turtle, and Snowman outfits, offering creative and fun ways to transform your turkey into a unique character, encouraging imaginative play and family fun.

5.1 Cowboy Sheriff Disguise

The Cowboy Sheriff disguise transforms your turkey into a rugged lawman. Use a tiny cowboy hat, boots, and bandana to create a Wild West look. Add a toy badge for authenticity. This disguise is perfect for kids who love adventure and storytelling. The printable template includes cowboy-themed accessories, making it easy to assemble. Let your turkey sheriff keep the peace this Thanksgiving with a fun, creative twist that sparks imagination and laughter.

5.2 Ninja Turtle Disguise

Transform your turkey into a heroic Ninja Turtle using green-colored feathers and a ninja mask. Add a belt and small weapon accessories for a crime-fighting look. This disguise is ideal for kids who love superhero themes. The printable template includes ninja gear, making it easy to create a stealthy, green turkey ready to save the day. It’s a fun way to blend pop culture with creativity, ensuring your turkey stands out this Thanksgiving.

5.3 Snowman Turkey Disguise

Transform your turkey into a snowman with a winter-themed disguise. Use white cotton balls to create a snowman body, a mini scarf, and a tiny top hat. Add buttons and a small carrot nose for a festive look. Draw on coal eyes or use small stones. Attach sticks for arms to complete the snowman effect. This disguise turns your turkey into a charming winter character, perfect for Thanksgiving themed crafts.

Materials Needed

Essential materials include scissors, glue, markers, colored pencils, and the printable turkey template. Additional craft items like cotton balls, scarves, and hats can enhance creativity.

6.1 List of Required Craft Items

Scissors, glue, markers, colored pencils, and the turkey template are essential. Additional items like cotton balls, mini scarves, hats, stickers, and construction paper can enhance creativity. Other craft supplies such as pipe cleaners, ribbons, and small accessories may also be used to create unique disguises. Ensure all materials are age-appropriate and easily accessible for kids to enjoy the activity. Having these items ready will help children create their own distinctive turkey disguises effectively.

Step-by-Step Instructions

Print the turkey template, color it, and cut out the disguise pieces. Assemble the outfit by gluing the pieces onto the turkey. Encourage creativity and fun!

7.1 Assembly Guide for the Disguise

Begin by printing and cutting out the turkey template and disguise accessories. Use glue to attach the chosen outfit pieces to the turkey. Add details like hats, scarves, or glasses for a personalized look. Ensure all parts are securely fastened. Encourage creativity by mixing and matching accessories to create a unique character. Once complete, display the disguised turkey proudly, showcasing the finished masterpiece with pride.

Educational Value

The Disguise a Turkey project enhances creativity, problem-solving, and fine motor skills. It encourages teamwork and family involvement, blending art and storytelling while fostering imagination and collaborative learning.

8.1 Learning Through Crafts

Engaging in the Disguise a Turkey project fosters creativity, problem-solving, and motor skills. By decorating the turkey, kids explore various materials and techniques, enhancing their critical thinking. This activity also promotes collaboration, as children often work in groups or with family members to design the perfect disguise. It aligns with Thanksgiving themes, teaching kids about the holiday while encouraging imaginative learning through hands-on crafts. This project seamlessly blends fun with education, making it a valuable and memorable experience for young learners.

Variations and Customization

The Disguise a Turkey project offers multiple templates and accessories, allowing kids to create unique disguises. From pirates to astronauts, the customization options inspire creativity and individuality, making each turkey one-of-a-kind.

9.1 Exploring Different Outfits and Templates

The Disguise a Turkey project offers a variety of outfits and templates, allowing kids to explore different themes. From cowboy sheriffs to ninja turtles and snowmen, each template provides endless customization. Children can mix and match accessories to create unique disguises, fostering creativity. The availability of both colored and black-and-white templates caters to different preferences, making the activity versatile and engaging for all participants. This encourages imaginative thinking and personal expression, ensuring each turkey disguise is distinct and fun.

The Disguise a Turkey project is a delightful, creative activity that fosters imagination and family bonding while teaching kids about problem-solving and self-expression during Thanksgiving.

10.1 Final Thoughts on the Project

The Disguise a Turkey project is a charming and engaging activity that sparks creativity, teamwork, and learning. With its free printable PDF templates, it offers an accessible way for kids to explore their imagination while bonding with family. The project’s educational value lies in its ability to blend fun with skill development, making it a meaningful and memorable Thanksgiving tradition for children of all ages.

Additional Resources

Explore more Thanksgiving activities, coloring pages, and educational printables to complement the Disguise a Turkey project, offering a variety of creative and learning opportunities for children.

11.1 More Thanksgiving Activities

Beyond the Disguise a Turkey project, explore additional Thanksgiving activities like themed coloring pages, word searches, and craft ideas. These resources provide engaging ways for kids to celebrate the holiday while learning. Discover printable templates for decorations, gratitude journals, and educational games that enhance creativity and understanding of Thanksgiving traditions. These activities complement the turkey disguise project, offering a well-rounded and enjoyable experience for children and families alike during the festive season.

schedule a form 990 instructions

Schedule A (Form 990) is a critical document for nonprofits and tax-exempt organizations to establish public charity status and report public support. Filed with Form 990 or 990-EZ‚ it ensures compliance with IRS requirements.

Overview of Schedule A

Schedule A (Form 990) is a document required for tax-exempt organizations‚ particularly those classified under Section 501(c)(3)‚ to report their public charity status and public support. It is filed alongside Form 990 or Form 990-EZ and provides essential financial and operational insights. This schedule helps the IRS and the public assess the organization’s compliance with tax-exempt requirements and its financial standing.

Importance of Schedule A in Tax-Exempt Filings

Schedule A (Form 990) is crucial for tax-exempt organizations to demonstrate compliance with IRS regulations and maintain public charity status. It verifies public support‚ ensuring transparency and accountability. Accurate filing helps avoid penalties and is essential for maintaining tax-exempt status‚ while also building donor confidence and public trust in the organization’s financial integrity and operations.

Structure of Schedule A

Schedule A (Form 990) is attached to Form 990 or 990-EZ‚ detailing public charity status‚ financial data‚ and governance; Its structured sections ensure compliance and transparency for tax-exempt organizations.

Sections and Parts of Schedule A

Schedule A includes multiple sections: Part I for public support calculation‚ Part II for identifying governing documents‚ and Part III for compliance with IRS rules. Each part ensures nonprofits accurately report financial and operational details‚ maintaining transparency and compliance. Proper completion of all sections is essential for verifying public charity status and adhering to tax-exempt requirements.

Key Components to Be Reported

Schedule A requires reporting public support calculations‚ financial disclosures‚ and governance details. Organizations must provide total support amounts‚ contributions‚ and revenue streams. Additionally‚ they must disclose financial statements‚ governance policies‚ and compliance with IRS rules. Accurate reporting of these components ensures transparency and verifies the organization’s eligibility for tax-exempt status under Section 501(c)(3).

Eligibility Criteria for Filing Schedule A

Schedule A is required for Section 501(c)(3) organizations classified as public charities. All 501(c)(3) entities filing Form 990 or 990-EZ must complete and attach Schedule A.

Organizations Required to File Schedule A

Schedule A is mandatory for Section 501(c)(3) organizations classified as public charities. All 501(c)(3) entities filing Form 990 or 990-EZ must complete and attach Schedule A to ensure compliance with IRS requirements. This includes organizations that are not automatically classified as public charities and need to demonstrate their public support. Filing Schedule A is essential for maintaining tax-exempt status and verifying public charity status.

Thresholds and Exceptions for Filing

Schedule A filing is generally required for organizations with gross receipts exceeding $200‚000 or total assets over $500‚000. However‚ certain entities‚ such as churches and government-affiliated organizations‚ are exempt. Additionally‚ organizations classified as private foundations or 501(c)(3) entities automatically deemed public charities may not need to file Schedule A. Specific exceptions apply based on IRS guidelines.

Public Support Calculation and Reporting

Public support includes donations‚ grants‚ and membership fees‚ comprising at least 33.33% of total revenue to maintain public charity status. Accurate reporting is essential for compliance.

Understanding Public Support and Its Significance

Public support refers to contributions from diverse sources‚ such as donations‚ grants‚ and membership fees‚ which are crucial for maintaining a nonprofit’s public charity status. It demonstrates community engagement and financial diversity. Organizations must meet specific thresholds‚ typically 33.33% of total revenue‚ to qualify as publicly supported‚ ensuring tax-exempt status under Section 501(c)(3). Accurate calculation and reporting are essential for compliance and maintaining public trust.

Methods for Calculating Public Support

Public support is calculated by summing contributions from diverse sources‚ such as donations‚ grants‚ and membership fees‚ excluding government grants. Organizations must meet specific thresholds‚ typically 33.33% of total revenue‚ to qualify as publicly supported under Section 501(c)(3). Accurate calculation involves including qualifying contributions and comparing them to total revenue‚ ensuring compliance with IRS guidelines for public charity status.

Instructions for Completing Schedule A

Completing Schedule A involves determining public charity status‚ calculating public support‚ and ensuring accurate reporting. Adhere to IRS guidelines for compliance.

Step-by-Step Guide to Filling Out Schedule A

Filling out Schedule A requires determining your organization’s public charity status and calculating public support. Start by identifying your organization type under IRC Section 501(c)(3). Calculate total support by summing contributions‚ gross income‚ and other receipts. Complete Parts I through V‚ ensuring accuracy in reporting financial data. Attach required documentation and verify compliance with IRS guidelines before submission.

Specific Instructions for Each Part of Schedule A

Part I confirms the organization’s public charity status under IRC Section 501(c)(3). Part II details public support‚ including donations‚ membership fees‚ and grants. Part III reports gross income from specific activities like interest and rents. Part IV calculates total support‚ distinguishing between lines 11 and 12. Part V requires certification‚ ensuring a responsible official signs and dates the form.

Common Challenges and Solutions

Common challenges include accurately calculating public support and understanding complex reporting requirements. Solutions involve meticulous record-keeping‚ IRS guidance consultation‚ and seeking professional expertise for compliance.

Overcoming Difficulties in Schedule A Preparation

Common difficulties in Schedule A preparation include accurately calculating public support and interpreting complex IRS guidelines. Organizations can overcome these challenges by maintaining detailed financial records‚ consulting IRS resources‚ and seeking professional advice to ensure compliance and avoid errors in reporting public charity status and support.

Frequently Encountered Issues and Resolutions

Common issues include accurately calculating public support‚ interpreting complex IRS guidelines‚ and ensuring compliance with reporting requirements. Resolutions involve consulting IRS resources‚ maintaining detailed financial records‚ and seeking professional guidance to address errors or misunderstandings‚ ensuring accurate and timely filing of Schedule A.

Filing Requirements and Deadlines

Schedule A must be submitted with Form 990 or 990-EZ annually. File electronically or mail to the IRS address listed in the instructions. Late filings may result in penalties.

Where and How to Submit Schedule A

Schedule A must be submitted with Form 990 or 990-EZ. File electronically through the IRS e-file system or mail to the address listed in the Form 990 instructions. Ensure the correct IRS address is used based on your organization’s location. Late submissions may result in penalties. Always verify the IRS website for the most current filing address and requirements to avoid errors or delays.

Important Dates and Deadlines for Filing

The deadline for filing Schedule A with Form 990 or 990-EZ is typically May 15th or the 15th day of the 5th month after the tax year ends. Extensions are available by filing Form 8868‚ granting an additional 6 months. Late filings may incur penalties of $20 per day‚ up to $10‚000 or $5‚000 for smaller organizations. Always verify the IRS website for the most current deadlines to ensure compliance and avoid errors.

Public Disclosure Requirements

Schedule A must be made publicly available upon request‚ ensuring transparency in public charity status and support. Compliance with IRS disclosure rules is mandatory to maintain tax-exempt accountability.

Making Schedule A Publicly Available

Schedule A must be made available to the public upon request‚ ensuring transparency in public charity status and support. Organizations must provide copies promptly without charge‚ as required by IRS rules. This ensures accountability and compliance with disclosure regulations‚ maintaining public trust in tax-exempt entities. The IRS mandates this accessibility to uphold transparency standards for nonprofit operations and financial disclosures.

Compliance with IRS Disclosure Rules

Compliance with IRS disclosure rules is essential for maintaining tax-exempt status. Organizations must accurately report public support and governance practices on Schedule A. Failure to comply may result in penalties or loss of exempt status. Understanding IRS guidelines ensures proper disclosure and avoids legal complications‚ maintaining trust and accountability in nonprofit operations.

Consequences of Errors or Non-Compliance

Consequences of errors or non-compliance with Schedule A include IRS penalties‚ loss of tax-exempt status‚ and legal complications. Inaccuracies can lead to audits and reputational damage‚ emphasizing the importance of accurate and timely filings.

Risks Associated with Inaccurate or Late Filings

Inaccurate or late filings of Schedule A can result in IRS penalties‚ audits‚ and potential loss of tax-exempt status. Errors may lead to reputational damage‚ legal complications‚ and financial repercussions. Organizations must ensure timely and accurate submissions to avoid these risks and maintain compliance with IRS regulations. Proper preparation and review are essential to mitigate these consequences effectively.

Penalties for Non-Compliance with Schedule A Requirements

Non-compliance with Schedule A requirements can lead to penalties‚ including fines and loss of tax-exempt status. The IRS may impose monetary penalties for late or inaccurate filings. Organizations may face audits‚ reputational damage‚ and legal consequences. Timely and accurate submissions are crucial to avoid these penalties and maintain compliance with IRS regulations. Proper preparation and review are essential to ensure adherence to all requirements.

Examples and Illustrations

Examples of completed Schedule A sections demonstrate proper reporting of public support and revenue calculations. Illustrations include sample calculations for public charity status and revenue thresholds‚ ensuring clarity in compliance with IRS requirements.

Sample Completed Sections of Schedule A

Sample sections of Schedule A provide clear examples of how to report public support and revenue calculations. For instance‚ Part II illustrates the calculation of public support percentages‚ while Part III shows detailed financial disclosures. These examples help organizations ensure accurate reporting of contributions‚ grants‚ and program-related income‚ aligning with IRS guidelines.

Case Studies for Better Understanding

Case studies provide practical insights into completing Schedule A. For example‚ a small public charity reporting $500‚000 in total support‚ with $300‚000 from public donations‚ calculates a 60% public support ratio. This demonstrates how organizations can apply IRS guidelines to maintain tax-exempt status and ensure compliance with reporting requirements.

Additional Resources and Guidance

IRS publications and support materials‚ such as instructions for Form 990-EZ and Schedule A‚ provide detailed guidance. Visit www.irs.gov for official resources and compliance support.

IRS Publications and Support Materials

The IRS provides comprehensive resources‚ including detailed instructions for Form 990 and Schedule A‚ to guide nonprofits in accurate reporting. Visit www.irs.gov for access to official documents‚ such as the Instructions for Schedule A and related forms. These materials ensure compliance and clarify reporting requirements for public charity status and public support calculations.

Recommended Tools and References for Schedule A Preparation

Utilize IRS resources like www.irs.gov for detailed instructions and forms. Tax software‚ such as TurboTax or specialized nonprofit tools‚ can streamline preparation. Additionally‚ consult the IRS Instructions for Schedule A and related publications for clarity. The Form 990 and 990-EZ instructions are also essential references. Leverage IRS guidelines on public support calculations and consider professional tax advice for complex scenarios to ensure accuracy.

Best Practices for Schedule A Preparation

Thoroughly review IRS guidelines and ensure accurate calculation of public support. Understand compliance requirements and seek professional advice for complex scenarios to maintain precision and avoid errors.

Strategies for Accurate and Timely Filing

Consult IRS guidelines thoroughly to ensure compliance with all requirements.
Accurately calculate public support using detailed financial records.
Submit Schedule A with Form 990 or 990-EZ by the designated deadline.
Highlight compliance with IRS rules to avoid penalties.
Seek professional advice for complex calculations or interpretations.
Regularly review and update processes to maintain accuracy and efficiency.

Professional Advice and Consultation

Consulting tax professionals or legal advisors ensures accurate completion of Schedule A.
Expert guidance helps navigate complex IRS requirements and avoid errors.
Utilize IRS publications and webinars for detailed instructions.
Professional review enhances compliance and minimizes penalty risks.
Collaborate with experts to interpret financial data and ensure timely filing.

middle earth role playing game pdf

Middle-earth Role Playing (MERP) is a tabletop RPG set in J.R.R. Tolkien’s iconic world, offering fans a immersive way to explore Middle-earth’s rich lore and adventures. PDF versions of the core rulebook and supplements are now widely available, making it accessible to new generations of players and enthusiasts.

Overview of MERP and Its Significance in Tolkien’s World

Middle-earth Role Playing (MERP) stands as the first officially licensed RPG set in J.R.R. Tolkien’s Middle-earth, capturing the essence of his legendary world. Published in 1984, it adapted the Rolemaster system, offering a detailed framework for exploration and adventure across Middle-earth’s four ages. Its significance lies in bridging Tolkien’s lore with tabletop gaming, allowing fans to immerse themselves in iconic regions and stories. Despite newer adaptations, MERP remains a cherished gateway to Middle-earth’s rich history and lore.

History of Middle-earth Role Playing Game

Middle-earth Role Playing (MERP) was first published in 1982 by Iron Crown Enterprises (ICE), marking the first licensed tabletop RPG set in Tolkien’s Middle-earth. It remained popular until ICE lost the license in 1999, transitioning its mechanics to standalone systems like Rolemaster and HARP.

Origins and Development of MERP

Middle-earth Role Playing (MERP) was first introduced in 1982 by Iron Crown Enterprises (ICE), marking a significant milestone in tabletop gaming. It was built upon ICE’s Rolemaster system, offering a detailed framework for players to explore J.R.R. Tolkien’s Middle-earth. Over the years, MERP evolved through two major editions, with the second edition released in 1993, incorporating feedback and refining its mechanics. Its development was supported by numerous supplements and modules, enriching the game’s depth and lore.

Impact of MERP on the Role-Playing Game Industry

MERP was the first licensed RPG set in J.R.R. Tolkien’s Middle-earth, paving the way for future adaptations. Its detailed world-building and lore adherence raised the bar for licensed RPGs, influencing games like The One Ring and Adventures in Middle-earth. MERP’s success demonstrated the viability of setting fantasy RPGs in rich literary worlds, inspiring other developers to create immersive, story-driven experiences. Its legacy endures as a foundational title in the RPG industry.

Core Mechanics and Game System

MERP is based on the Rolemaster system, offering a complex tabletop RPG experience with detailed charts and tables for character creation, combat, and skill progression in Middle-earth.

Rolemaster System and Its Adaptation for MERP

The Rolemaster system, developed by Iron Crown Enterprises (ICE), was adapted for MERP to create a detailed and complex tabletop RPG experience. Known for its extensive charts and tables, the system provided robust mechanisms for character creation, skill development, and combat resolution. While it offered depth, some critics argued that its high-magic and intricate rules clashed with Tolkien’s lore, which emphasizes a lower-magic setting. Despite this, the adaptation remained faithful to Middle-earth’s themes and provided a structured framework for immersive storytelling.

Unique Features of MERP Compared to Other RPGs

MERP stands out for its intricate Rolemaster system, featuring detailed charts and tables that provide depth to character development and combat. Unlike other RPGs, MERP is entirely set within Tolkien’s Middle-earth, offering a rich, lore-heavy environment. Its focus on storytelling and immersive role-playing aligns with Tolkien’s themes, making it a unique choice for fans of narrative-driven games. The system’s complexity and customization options set it apart from simpler RPG frameworks.

Editions of MERP

MERP was first published in 1982, introducing a comprehensive system for Middle-earth adventures. A second edition followed in 1993, offering refined rules and expanded content. Both editions were published by Iron Crown Enterprises until the license expired in 1999. Today, MERP is available as a PDF, preserving its legacy for new generations of players.

First Edition (1982) and Its Influence

The first edition of Middle-earth Role Playing (MERP) was published in 1982 by Iron Crown Enterprises, marking the first officially licensed RPG set in J.R.R. Tolkien’s Middle-earth; Based on the Rolemaster system, it provided a detailed framework for character creation, combat, and magic, allowing players to immerse themselves in Tolkien’s world. The rulebook became a cornerstone for Middle-earth RPGs, influencing later adaptations and remaining a beloved classic among fans. Its PDF release ensures its legacy endures for modern players.

Second Edition (1993) and Major Updates

The second edition of Middle-earth Role Playing was released in 1993, refining the original 1982 version. It retained the Rolemaster system but introduced streamlined rules, expanded character options, and enhanced compatibility with other Middle-earth supplements. This edition also updated the presentation, improving clarity and organization. The second edition remains popular among fans, and its PDF availability has made it accessible to modern players seeking a classic Tolkien-inspired RPG experience with refined mechanics and expanded lore integration.

Supplements and Modules

MERP is supported by a wide range of supplements and modules, offering detailed campaign settings like Mirkwood and Harad. These expand the game’s depth and lore, providing players with diverse adventures across Middle-earth. PDF versions of these resources are now readily available, ensuring accessibility for both veteran players and newcomers to Tolkien’s realm.

Popular Supplements and Their Contributions

Popular MERP supplements like Mirkwood and Harad expand the game’s depth, offering detailed settings and adventures. These resources enrich gameplay by providing unique character options, regional lore, and scenarios. PDF versions of these supplements are widely available, allowing players to easily access and integrate them into their campaigns. They contribute significantly to the game’s longevity and appeal, offering fresh content for both new and veteran players to explore Tolkien’s vast world.

Notable Modules and Campaign Settings

MERP’s notable modules, such as the Mirkwood and Harad campaign settings, offer expansive narratives and detailed regional lore. These modules provide players with immersive adventures, deepening their connection to Tolkien’s world. PDF versions of these modules are widely accessible, enabling easy integration into modern campaigns. They remain essential resources for fans seeking to explore Middle-earth’s untapped regions and uncover its hidden stories.

Middle-earth Settings in MERP

MERP faithfully adapts J.R.R. Tolkien’s Middle-earth, offering richly detailed settings like Mirkwood, Harad, and Gondor. PDF versions of these settings provide vibrant lore and immersive regions for players to explore.

Key Regions and Their Significance

MERP explores iconic regions like Mirkwood, Harad, and Gondor, each steeped in Tolkien’s lore. These settings provide diverse environments for adventures, from the shadowy forests of Mirkwood to the vast deserts of Harad. PDF modules detail these areas, offering players rich cultural and historical contexts that enhance gameplay. These regions are central to Middle-earth’s identity, allowing players to immerse themselves in its epic history and diverse landscapes.

Historical Context and Timeline in MERP

MERP is set in J.R.R. Tolkien’s Middle-earth, spanning its four ages. Players can explore events before, during, and after the War of the Ring. The PDF rulebooks detail historical timelines, allowing campaigns to align with key moments in Middle-earth’s lore. This chronological depth enriches gameplay, enabling players to interact with iconic events and characters. The system’s adaptability ensures that adventures can fit seamlessly into Tolkien’s sprawling narrative, making it a unique storytelling experience.

Character Creation and Development

Character creation in MERP involves selecting races, classes, and assigning stats. The PDF rulebooks provide detailed systems for skill progression and development, enhancing depth and customization in Middle-earth adventures.

Character Stats, Races, and Classes

Character stats in MERP are determined through a point-based system, allowing players to customize abilities. Races include Men, Elves, Dwarves, Hobbits, and others, each with unique traits. Classes range from Warriors and Mages to Rangers and Rogues, offering diverse playstyles. The PDF rulebooks detail these options, ensuring players can craft characters that align with Middle-earth’s lore and their preferred adventures, enhancing immersion in Tolkien’s world.

Skill Systems and Character Progression

MERP’s skill system is detailed, with skills advancing through experience points earned in play. Character progression is gradual, with players allocating points to improve abilities or acquire new skills. The PDF rulebooks provide extensive tables and guidelines for skill development, ensuring a balanced and immersive experience. This system rewards specialization while allowing flexibility, making it ideal for crafting unique characters that grow within Middle-earth’s storied world.

Community and Fan Support

The MERP community thrives through fan-driven content and online forums, where enthusiasts share custom modules and tips. PDF availability has also bolstered its accessibility and longevity among fans.

Community-Driven Content and Modifications

The MERP community has created a wealth of custom content, including new scenarios, character options, and rule adaptations. Fans often share their creations online, inspired by Tolkien’s lore. The availability of PDF versions of the game has further fueled community-driven projects, allowing enthusiasts to modify and expand the system. This collaborative spirit ensures MERP remains vibrant, even years after its initial release, with a dedicated fan base continually shaping its legacy.

Role of Fan Forums and Online Resources

Fan forums and online resources play a vital role in sustaining MERP’s popularity. Websites and communities dedicated to Middle-earth RPGs offer downloads, modifications, and discussions about the game. These platforms allow players to share custom content, seek advice, and connect with fellow enthusiasts. The availability of MERP PDFs online has also made it easier for new players to discover and engage with the game, ensuring its legacy endures in the digital age.

MERP in the Digital Age

MERP has embraced the digital era, with PDF versions of its rulebooks and supplements widely available online, ensuring accessibility for both new and veteran players alike.

Availability of MERP as PDF

MERP is now widely available as PDF downloads, allowing fans to access the core rulebooks and supplements with ease. Platforms like DriveThruRPG and official archives offer these digital versions, preserving the game’s legacy for modern players. The PDF format ensures that Middle-earth’s rich lore and gameplay mechanics remain accessible to new generations of enthusiasts, enabling seamless sharing and storage. This digital adaptation has revitalized interest in MERP, making it easier than ever to embark on Middle-earth adventures.

Modern Tools and Platforms for MERP

Modern tools have breathed new life into MERP, with digital platforms offering innovative ways to play. Virtual tabletops like Roll20 and Fantasy Grounds enable online play, while PDF rulebooks and supplements are easily accessible. Community-driven platforms host custom content, and forums like Reddit and Discord foster collaboration. These tools make MERP more accessible and engaging, ensuring its legacy endures in the digital age while staying true to its tabletop roots.

Comparison with Other Middle-earth RPGs

MERP stands out among Middle-earth RPGs like Adventures in Middle-earth and The One Ring for its depth and complexity. While AiME offers a D&D 5e-based system, MERP’s Rolemaster roots provide a richer, more intricate gameplay experience. TOR excels in storytelling and lore adherence, but MERP’s extensive modules and supplements make it a treasure trove for fans seeking a immersive Middle-earth adventure, even if its high-magic system sometimes diverges from Tolkien’s lore.

Adventures in Middle-earth (AiME) and The One Ring

Adventures in Middle-earth (AiME) and The One Ring are distinct yet captivating entries in the Middle-earth RPG landscape. AiME seamlessly integrates the familiar D&D 5e system, offering a comfortable experience for D&D enthusiasts while exploring Tolkien’s world. In contrast, The One Ring is crafted specifically for Middle-earth, emphasizing narrative depth and lore fidelity. Both games cater to different preferences, providing rich experiences for fans seeking immersive adventures in Middle-earth.

Differences in Mechanics and Lore Adherence

MERP and modern Middle-earth RPGs like The One Ring and Adventures in Middle-earth differ significantly in mechanics and lore fidelity. MERP, based on the Rolemaster system, features complex rules and high-magic elements, which often clash with Tolkien’s low-magic setting. In contrast, The One Ring emphasizes storytelling and lore adherence, while AiME adapts D&D 5e mechanics to fit Middle-earth’s narrative tone. These games balance accessibility with fidelity to Tolkien’s world, catering to diverse player preferences while staying true to the source material.

MERP remains a beloved classic, offering a detailed Middle-earth experience. Its legacy endures through PDF releases, inspiring future Tolkien-based RPGs with its rich lore and gameplay.

Legacy of MERP and Its Future Prospects

MERP stands as a pioneering RPG, deeply rooted in Tolkien’s lore, influencing many subsequent Middle-earth games. Its detailed Rolemaster system, while complex, offered richness and depth. Although its active development ceased, PDF releases ensure accessibility. While modern titles like Adventures in Middle-earth and The One Ring have evolved the genre, MERP remains a cherished classic, appreciated for its fidelity to Tolkien’s world and its enduring impact on tabletop gaming culture;

thereye ice maker manual

Product Information

The Thereye Ice Maker is a countertop nugget ice maker model ER-IM03, producing up to 30 pounds of ice daily with a 3Qt water reservoir capacity.

1.1 Model Overview and Key Features

The Thereye Ice Maker model ER-IM03 is a compact countertop nugget ice maker designed for household use. It features a 3-quart water reservoir and produces up to 30 pounds of ice per day. The machine is equipped with a self-cleaning mode, automatic water-adding functionality, and a stainless steel finish for durability. It operates quietly and includes a control panel with intuitive buttons for starting, stopping, and cleaning. The ice maker is user-friendly, with indicators for water level and ice bin status, ensuring efficient operation. Its compact size makes it ideal for kitchens, bars, or small spaces.

Safety Precautions

Use the appliance only for household purposes as described. Avoid damaged cords or plugs. Keep away from water and heat sources. Never use with extension cords.

2.1 Important Safety Instructions

Always follow these safety guidelines to ensure safe operation. Avoid using damaged cords or plugs and never operate the appliance if it is malfunctioning or damaged. Keep the ice maker away from water sources, heat, or open flames. Do not immerse the unit in water. Ensure the appliance is placed on a stable, level surface. Never use extension cords or relocatable power taps. Avoid overloading the electrical outlet. Keep children away from the appliance during operation. Read the user manual thoroughly before first use. If the appliance is dropped or damaged, disconnect it immediately and contact customer support.

2.2 Installation Guidelines

Place the ice maker on a stable, level surface to ensure proper operation. Avoid installing near direct sunlight, heat sources, or open flames. Plug the appliance directly into a grounded wall outlet; never use extension cords or power strips. Ensure the drain plug is firmly inserted before first use. Position the unit at least 4 inches away from any walls or obstructions to allow proper airflow. Keep the ice maker away from water sources to prevent electrical hazards. Follow the manufacturer’s guidelines for placement and installation to maintain safety and efficiency. Ensure all components are securely attached before operation.

Control Panel and Display

The control panel features intuitive buttons for Start/Stop, Self-Cleaning, and Mute functions. The display shows operational status, water level indicators, and ice-making progress for easy monitoring.

3.1 Components Overview

The Thereye Ice Maker control panel includes a power button, a self-cleaning button, and a mute function. The display provides status updates, water level indicators, and ice-making progress. The panel is designed for easy navigation, with clear indicators for operation modes. Additional components include a water reservoir with a clear viewing window, an ice bin, and a drain plug for easy maintenance. The machine also features a built-in water pump for efficient water circulation. These components work together to ensure seamless ice production and maintenance, making the appliance user-friendly and efficient for daily use. The design emphasizes convenience and functionality.

3.2 Functions and Indicators

The Thereye Ice Maker features a control panel with intuitive buttons, including Start/Stop, Self-Cleaning, and a mute function. The display includes indicators for ice-making status, water level, and cleaning mode. The Start/Stop button controls ice production, while the Self-Cleaning button activates the cleaning cycle when held for 3 seconds. The mute button silences operation beeps. Indicator lights signal when the ice bin is full or when water is needed. These functions and indicators ensure smooth operation and maintenance, providing clear feedback to users. The design prioritizes ease of use, allowing users to monitor and control the ice maker effortlessly.

Operating the Ice Maker

To operate, press the ON/OFF button to start the ice-making cycle. Ensure the water reservoir is filled. The machine stops when the ice bin is full and resumes when space is available.

4.1 Starting the Ice Maker

To start the Thereye Ice Maker, press the ON/OFF button located on the control panel. Ensure the water reservoir is filled to the recommended level. The machine will begin the ice-making cycle automatically. The ON/OFF button will stay solid during operation. If the ice bin is full, the ice maker will pause until space is available. Always plug the appliance directly into a wall outlet to avoid power issues. The indicator light will turn on, confirming the machine is active. For optimal performance, ensure the drain plug is securely inserted before starting. Regular checks ensure smooth operation.

4.2 Ice Making Cycle

The Thereye Ice Maker automatically initiates the ice-making cycle once started. It draws water from the reservoir, freezes it into nugget-shaped ice, and deposits it into the bin. The cycle typically lasts 10-15 minutes, producing a batch of ice. The machine stops when the ice bin is full or if water runs low. A full bin holds approximately 3.3 lbs of ice. The process is quiet and efficient, designed for home use. Ensure the drain plug is securely inserted before starting. The ice maker resumes operation once space is available or water is refilled, making it convenient for continuous use.

Maintenance and Cleaning

Regular cleaning is essential for optimal performance. Use a vinegar solution for deep cleaning and descaling. Rinse thoroughly and dry to prevent mold or mineral buildup.

5.1 Routine Cleaning

Regular cleaning ensures optimal performance and prevents mold or mineral buildup. Wipe the exterior with a damp cloth and dry thoroughly. For the water reservoir, drain and rinse with fresh water after each use. The ice bin should be cleaned with mild soap and warm water, then dried completely. Descale the machine every 3-6 months if you live in an area with hard water. Use a vinegar solution for deep cleaning by filling the reservoir to the max line, running a cycle, and rinsing thoroughly. Always unplug the device before cleaning to ensure safety.

5.2 Deep Cleaning and Descaling

Perform deep cleaning and descaling every 3-6 months to remove mineral buildup. Turn off and unplug the ice maker. Fill the reservoir with a descaling solution or white vinegar, following the manual’s instructions. Run an ice-making cycle to circulate the solution through the system. After completing the cycle, rinse by running 2-3 cycles with fresh water to remove any solution taste. Clean the ice bin with mild soap and warm water, then dry thoroughly. Regular descaling ensures efficient operation and prevents damage from mineral deposits. Always refer to the user manual for specific descaling recommendations to maintain your ice maker’s performance.

Troubleshooting Common Issues

Common issues include low water levels, improper ice bin alignment, or mineral buildup. Check the reservoir, ensure the bin is correctly placed, and descale regularly. If the ice maker stops, restart it after 30 minutes. For persistent problems, refer to the manual or contact customer support for assistance. Always ensure the appliance is properly plugged in and the power button is functioning correctly. Regular maintenance helps prevent many issues and ensures optimal performance. If unsure, consult the troubleshooting guide in the user manual for detailed solutions.

6.1 Common Problems

Common issues with the Thereye Ice Maker include the cleaning light staying on, ice not being produced, or excessive noise. The cleaning light indicates the need for descaling or maintenance. If no ice is made, check water levels, ensure the reservoir is filled, and verify the ice bin is properly aligned. Noise issues may arise from improper installation or scale buildup. Additionally, if the machine stops suddenly, restart it after 30 minutes. Mineral buildup can clog water flow, requiring deep cleaning. Ensure the drain plug is securely inserted and the machine is on a level surface. Regular maintenance helps prevent these issues. Always refer to the manual for specific troubleshooting steps.

6.2 Solutions and Resets

To resolve common issues with the Thereye Ice Maker, restart the machine by turning it off, waiting 30 seconds, and turning it back on. For the cleaning light, run a self-cleaning cycle using a vinegar-water mixture. If ice production stops, ensure the water reservoir is filled and the ice bin is not full. For noise issues, check for scale buildup and clean the machine. If the machine malfunctions, unplug it and restart after 30 minutes. Always ensure the drain plug is securely inserted and the unit is on a level surface. Refer to the manual for detailed reset and cleaning instructions to maintain optimal performance. Regular maintenance helps prevent recurring issues.

Additional Features

The Thereye Ice Maker includes an Automatic Water Adding feature and a Self-Cleaning Mode for convenience. These features enhance usability and maintain hygiene, ensuring optimal performance.

7.1 Automatic Water Adding

The Automatic Water Adding feature in the Thereye Ice Maker ensures continuous ice production by detecting water levels and automatically refilling when needed. This convenient function eliminates manual intervention, allowing the machine to operate smoothly. Once the water level is low, the device alerts the user to add water, preventing interruptions in ice making. This feature enhances efficiency and user experience, making it ideal for households or small gatherings. The system is designed to maintain optimal performance while minimizing downtime, ensuring a steady supply of nugget ice whenever desired.

7.2 Self-Cleaning Mode

The Self-Cleaning Mode on the Thereye Ice Maker simplifies maintenance by automatically cleaning the interior. To activate, press and hold the Start/Stop button for 3 seconds. The machine will flush water through the system to remove mineral buildup and residue. For deep cleaning, fill the reservoir with a vinegar and water mixture up to the max line, then run the cleaning cycle. After completion, rinse thoroughly with fresh water to ensure no vinegar taste remains. Regular use of this feature prevents scaling and maintains hygiene, ensuring optimal performance and fresh-tasting ice. Cleaning is essential for longevity and efficiency.

Warranty and Support

The Thereye Ice Maker is backed by a one-year limited warranty covering manufacturing defects. For inquiries or assistance, contact Customer Service via the provided support channels.

8.1 Coverage Details

The Thereye Ice Maker is covered by a one-year limited warranty from the date of purchase. This warranty applies to manufacturing defects in materials and workmanship. During the warranty period, defective parts or appliances will be repaired or replaced free of charge. The warranty does not cover damage caused by improper installation, misuse, or failure to follow the user manual instructions. Additionally, the warranty does not apply to cosmetic damage or normal wear and tear. For warranty claims, customers must provide proof of purchase and contact Customer Service through the official support channels.

8.2 Customer Service Information

For assistance with your Thereye Ice Maker, contact Customer Service via email or phone, as specified in the user manual. Support is available to address technical inquiries, troubleshooting, and warranty-related issues. Customers can also visit the official website for FAQs and downloadable resources. When contacting support, please have your product model number, serial number, and proof of purchase ready. Representatives are available Monday through Friday during business hours to provide prompt and effective solutions. For any concerns or questions, refer to the contact information provided in the manual or on the manufacturer’s official website.

the complete guide to home wiring pdf free download

Discover the fundamentals of residential electrical systems with our Complete Guide to Home Wiring PDF, offering step-by-step instructions and essential safety tips for DIY projects and professional installations․

Understanding the Basics of Residential Electrical Systems

Residential electrical systems are designed to safely distribute power throughout a home․ The system begins with the main power source, typically from a utility company, and flows through a meter and circuit breaker or fuse box․ From there, it branches into individual circuits, each supplying electricity to specific areas or appliances․ Key components include live wires (hot), neutral wires, and grounding wires, which work together to ensure safe and efficient power delivery․ Understanding these fundamentals is crucial for any wiring project․ The Complete Guide to Home Wiring PDF provides detailed explanations, diagrams, and step-by-step instructions to help homeowners and professionals grasp these essential concepts․

Safety Guidelines for Home Wiring

Always turn off the power supply before starting any wiring project․ Use proper tools and follow local electrical codes to ensure safe and reliable installations․

Essential Safety Precautions When Working with Electricity

Always disconnect power sources before starting any electrical work․ Use circuit breakers or fuses rated for your system to prevent overloads․ Ensure all tools are insulated and in good condition to avoid shocks․ Wear protective gear like gloves and goggles․ Never work in wet conditions or near water․ Keep a fire extinguisher nearby․ Test wires with a voltage tester to confirm they’re de-energized․ Avoid worn or damaged cords and plugs․ Follow local electrical codes strictly․ Consider hiring a licensed electrician for complex tasks․ Regularly inspect your wiring system for signs of wear or damage․ Remember, safety should always be your top priority when handling electricity․

Tools and Materials Required for Home Wiring

  • Wire cutters and strippers
  • Pliers and screwdrivers
  • Voltage tester
  • Circuit breakers and fuses
  • Wiring materials (cables, connectors)

A Comprehensive List of Tools and Materials Needed

To tackle home wiring projects effectively, you’ll need the right tools and materials․ Start with essentials like wire cutters, strippers, and pliers for handling wires․ Screwdrivers, both flathead and Phillips, are indispensable for connections․ A voltage tester ensures safety by detecting live wires․ For materials, stock up on high-quality cables, connectors, and junction boxes․ Circuit breakers, fuses, and switches are critical for controlling power․ Don’t forget insulation tape, cable ties, and a drill for making holes․ Additional items like a multimeter for advanced diagnostics and fish tape for running wires through walls can save time․ Always refer to your wiring diagram to ensure you have everything needed for the job․

Planning Your Home Wiring Layout

Plan your home wiring layout with a detailed diagram, including outlets, switches, and circuits․ Ensure safety by following guidelines and local electrical codes․ Download the complete guide for a step-by-step approach․

Creating a Wiring Diagram for Your Home

A wiring diagram is essential for planning and executing home electrical projects․ It provides a visual representation of your home’s electrical system, including circuits, outlets, switches, and appliances․ Start by identifying the main power source and map out the flow of electricity through your home․ Label each component clearly and use color-coding for different types of wires․ Ensure the diagram is to scale and includes all necessary connections․ Use specialized software or tools to create an accurate and detailed layout․ Refer to the Complete Guide to Home Wiring PDF for templates and step-by-step instructions․ A well-designed wiring diagram will help prevent errors and ensure safety during installations or repairs․

Understanding Local Electrical Codes and Regulations

Compliance with local electrical codes and regulations is crucial for safe and legal home wiring․ These codes, such as the Canadian Electrical Code, outline specific requirements for materials, installations, and safety standards․ Familiarize yourself with permits, inspections, and approved practices in your area․ Codes ensure proper wire sizing, grounding, and circuit protection to prevent hazards․ The Complete Guide to Home Wiring PDF provides insights into navigating these regulations and meeting compliance․ Always consult local authorities or licensed professionals to verify adherence to current standards․ Understanding and following these guidelines ensures your wiring project is both safe and legally approved, avoiding potential fines or safety risks․

Common Home Wiring Projects

Common home wiring projects include installing outlets, switches, and lighting fixtures․ These tasks are essential for enhancing functionality and safety in residential spaces, as detailed in the Complete Guide to Home Wiring PDF․

Installing Outlets and Switches

Installing outlets and switches is a fundamental task in home wiring․ Start by ensuring the power is off at the circuit breaker․ Use a voltage tester to confirm safety․ Gather essential tools like wire strippers, pliers, and screwdrivers․ For outlets, connect the black (hot) wire to the brass terminal and the white (neutral) wire to the silver terminal․ Ground wires attach to the green terminal․ When installing switches, the black wire connects to the switch, while the white wire runs directly to the fixture․ Always follow the wiring diagram in the Complete Guide to Home Wiring PDF for precise instructions․ Adhere to local electrical codes to ensure safety and compliance․

Wiring Lighting Fixtures and Appliances

Wiring lighting fixtures and appliances requires careful attention to detail and adherence to safety guidelines․ Begin by turning off the power at the circuit breaker and verifying with a voltage tester․ For lighting fixtures, connect the black (hot) wire to the fixture’s brass terminal, the white (neutral) wire to the silver terminal, and the copper or green grounding wire to the grounding terminal․ Ensure all connections are secure to prevent short circuits․ When wiring appliances, such as refrigerators or washing machines, use the appropriate gauge wire and install dedicated circuits as needed․ Refer to the Complete Guide to Home Wiring PDF for specific instructions and diagrams tailored to your project․ Always follow local electrical codes to ensure safety and compliance․ This guide provides clear, step-by-step instructions to help you successfully wire lighting fixtures and appliances, whether you’re a DIY enthusiast or a professional․ By following these guidelines, you can achieve safe and reliable electrical connections in your home․

Troubleshooting Common Wiring Issues

Identify and resolve issues like flickering lights or tripping breakers using the Complete Guide to Home Wiring PDF, which offers step-by-step solutions and expert advice for safe repairs․

Identifying and Fixing Electrical Problems

Learn to diagnose and repair common electrical issues with the Complete Guide to Home Wiring PDF․ Discover how to identify faulty circuits, tripped breakers, and flickering lights․ Understand the importance of using the right tools, such as multimeters and circuit testers, to safely troubleshoot problems․ The guide provides step-by-step instructions for resolving issues like overloaded outlets and short circuits․ It also highlights essential safety practices, such as turning off power before starting repairs․ For complex problems, the guide advises consulting licensed electricians to ensure compliance with local codes․ This resource is a must-have for homeowners seeking to maintain and improve their electrical systems efficiently and safely․

Downloading the Complete Guide to Home Wiring PDF

Access the Complete Guide to Home Wiring PDF for free online, offering detailed instructions, diagrams, and safety tips for safe and efficient electrical installations at home․

Where to Find Reliable and Free Resources

Find reliable and free resources for the Complete Guide to Home Wiring PDF by visiting reputable websites offering e-books and DIY guides․ Many official government and electrical association websites provide free downloads of wiring manuals and safety guidelines․ Platforms like PDF Drive or Google Books often host comprehensive guides․ Additionally, educational institutions and home improvement forums share detailed wiring diagrams and step-by-step instructions․ Always ensure the resources are updated to comply with your local electrical codes․ These free guides are perfect for homeowners and DIY enthusiasts seeking to improve their electrical skills safely and efficiently․

Additional Resources and Further Reading

Explore recommended books and online courses for advanced learning, offering in-depth knowledge on home wiring and electrical systems․ These resources provide expert tips and detailed guides․

Recommended Books and Online Courses for Advanced Learning

For deeper understanding, explore advanced resources like “The Complete Guide to Home Wiring” and “Residential Wiring: A Comprehensive Handbook”․ Online courses on platforms like Udemy and Coursera offer in-depth training․ These resources cover topics such as circuit design, automation, and code compliance, providing practical knowledge for professionals and DIY enthusiasts․ Books like “Electrical Wiring: Residential and Commercial” by John Smith and “Wiring Your Home” by Jane Doe are highly recommended․ Additionally, websites like FreeCodeCamp and ElectricalHub provide free tutorials and guides․ These materials are designed to enhance your skills and ensure safe, efficient electrical installations․ They are perfect for those seeking advanced knowledge beyond the basics․

saskatchewan dental fee guide 2023

The Saskatchewan Dental Fee Guide 2023 provides transparent pricing for dental services, ensuring patients and dentists understand treatment costs and reimbursement rates across the province effectively.

Overview of the Dental Fee Guide

The Saskatchewan Dental Fee Guide 2023 is a comprehensive resource outlining suggested fees for dental procedures in the province. It provides transparency for patients and dentists, ensuring clarity on treatment costs and reimbursement rates. The guide includes detailed codes for various services, such as exams, cleanings, fillings, and extractions, along with suggested fee ranges. This helps patients understand expected expenses and aids dentists in billing accurately. By standardizing fees, the guide promotes consistency and fairness in dental care across Saskatchewan, making it an essential tool for both providers and consumers.

Importance of the Fee Guide for Patients and Dentists

The Saskatchewan Dental Fee Guide 2023 is essential for both patients and dentists, ensuring transparency and consistency in dental care pricing. Patients benefit from clear understanding of treatment costs, helping them budget and make informed decisions. Dentists gain a standardized reference for billing, ensuring fair and uniform charges across the province. This guide also aids in insurance claims and reimbursement processes, reducing administrative challenges. By providing predictable pricing, it fosters trust and accessibility in Saskatchewan’s dental care system, benefiting all stakeholders equally.

Dental Fee Guide Structure and Content

The Saskatchewan Dental Fee Guide 2023 organizes dental services into categories, detailing procedure codes, descriptions, and suggested fees, ensuring clarity and ease of reference for all users.

Breakdown of Services and Procedures

The Saskatchewan Dental Fee Guide 2023 categorizes services into preventive, diagnostic, restorative, surgical, and orthodontic procedures. Each service includes detailed codes, descriptions, and suggested fees. Routine check-ups and cleanings, for example, range from $150 to $250. Fillings, crowns, and extractions are listed with specific codes, making it easy for patients and dentists to reference. The guide also includes costs for complex procedures, ensuring transparency and consistency in billing practices across the province. This structured approach helps in understanding treatment costs and planning accordingly.

Coding System and Fee Ranges

The 2023 guide uses a standardized coding system, assigning unique codes to each procedure for clarity. Fee ranges are provided to reflect variations in practice costs, materials, and expertise. For instance, routine exams are coded separately from complex surgeries, with fees adjusted to ensure fairness. This system helps patients understand charges and aids dentists in billing accurately. The transparent fee structure promotes consistency and trust in dental care delivery across Saskatchewan. It ensures that both providers and patients are aligned on pricing expectations.

Cost of Common Dental Procedures

The Saskatchewan Dental Fee Guide 2023 outlines costs for common procedures, including exams, cleanings, fillings, and extractions, ensuring transparency for patients and providers.

Routine Check-ups and Cleanings

Routine dental check-ups and cleanings are essential for maintaining oral health. According to the Saskatchewan Dental Fee Guide 2023, the average cost for a routine check-up and cleaning ranges from $150 to $250. This typically includes a comprehensive examination, professional cleaning, and sometimes X-rays. These costs are designed to be transparent, helping patients plan their dental care expenses effectively. The Fee Guide ensures that both patients and dentists have a clear understanding of the expected fees for these preventive services.

Cost of Fillings, Crowns, and Extractions

The Saskatchewan Dental Fee Guide 2023 outlines specific costs for common procedures like fillings, crowns, and extractions. Fillings typically range from $60 to $150, while crowns can cost between $800 and $1,200. Extractions vary depending on complexity, with simple extractions starting at $60 and surgical extractions reaching up to $300. These fees are set at 60% of the provincial guide, ensuring affordability and transparency for patients. This structure helps both patients and dentists understand and plan for necessary treatments effectively.

Dental Insurance and Coverage in Saskatchewan

Dental insurance in Saskatchewan varies, with plans covering 60-80% of procedures. Government programs like CDCP assist low-income individuals and children, ensuring affordable access to essential dental care services.

Overview of Insurance Plans

Dental insurance plans in Saskatchewan offer varied coverage options, catering to individuals, families, and employers. Many plans cover a percentage of procedure fees, typically between 60-80%, depending on the policy. Government programs, such as the Canada Dental Care Plan (CDCP), provide coverage for low-income individuals and children under 12. Private insurers also offer customizable plans, allowing patients to choose coverage levels that suit their needs. These plans help reduce out-of-pocket expenses, making dental care more accessible and affordable for residents across the province.

Child Dental Benefits and Low-Income Coverage

The Saskatchewan Dental Fee Guide 2023 supports affordable dental care for children and low-income families through government programs like the Canada Dental Care Plan (CDCP). Children under 12 are eligible for coverage, including routine check-ups, fillings, and extractions. Low-income individuals also benefit from reduced fees, with services charged at 60% of the guide rates. These initiatives aim to ensure access to essential dental care, reducing financial barriers and promoting oral health for vulnerable populations across the province.

How to Access the Saskatchewan Dental Fee Guide

Access the Saskatchewan Dental Fee Guide 2023 through the official Saskatchewan Dental Association or government website. It’s typically available for free or purchase, ensuring transparency and ease of access for both professionals and the public.

Official Sources for the Fee Guide

The Saskatchewan Dental Fee Guide 2023 is officially published by the Saskatchewan Dental Association and government health authorities. It is available on their websites for free or purchase, ensuring accessibility. Additionally, resources like the Canadian Dental Association and provincial health departments provide links or copies of the guide. Patients and professionals can also find abbreviated versions listing common services through local dental associations. These official sources guarantee accurate and up-to-date information, essential for understanding dental costs and insurance coverage effectively.

Electronic Format and Availability

The Saskatchewan Dental Fee Guide 2023 is available in electronic formats, such as .xlsx, for easy access and reference. It can be downloaded from the Saskatchewan Dental Association’s official website or purchased through authorized distributors. Digital versions ensure portability and quick updates, making it convenient for both patients and dentists to stay informed. Additionally, some dental insurance providers, like Sun Life, offer access to the guide for policyholders. This digital accessibility enhances transparency and simplifies cost comparisons for dental services across the province.

Annual Updates and Revisions

How Fees are Reassessed Annually

Fees in the Saskatchewan Dental Fee Guide 2023 are reassessed yearly, considering inflation, material costs, and feedback from dentists and patients to ensure fair pricing;

The Saskatchewan Dental Fee Guide 2023 undergoes annual updates to reflect current dental practices, inflation, and material costs. A committee of dental associations, economists, and patient representatives reviews and adjusts fees to ensure they remain fair and aligned with industry standards. This process involves analyzing feedback from dentists, patients, and insurers to determine necessary adjustments. The goal is to balance affordability for patients while ensuring dentists receive reasonable compensation for their services. Updates are typically released at the start of each year to maintain transparency and consistency in pricing across the province.

Key Changes in the 2023 Edition

The 2023 Saskatchewan Dental Fee Guide introduced several updates to align with current dental practices and economic conditions. Fees for routine procedures were adjusted to reflect inflation and material cost increases. New codes were added for emerging treatments, such as dental implants and cosmetic procedures, to provide clarity for patients and dentists. Additionally, there was an expansion of preventive care coverage, emphasizing early intervention and cost-effective treatments. These changes aim to enhance transparency, accessibility, and affordability of dental services across the province while ensuring fair compensation for dental professionals.

Tips for Patients to Minimize Costs

Attend regular check-ups, use insurance coverage wisely, and explore low-income assistance programs. Comparing fees and prioritizing preventive care can help reduce dental expenses effectively.

Understanding Your Dental Coverage

Understanding your dental coverage is crucial to minimizing costs. Review your insurance plan to know covered procedures, limits, and out-of-pocket expenses. The Saskatchewan Dental Fee Guide 2023 outlines standard fees, helping you anticipate costs. Many plans cover routine check-ups and cleanings fully, while others may require co-payments for restorative work. Low-income families can benefit from government programs like the Child Dental Benefits and low-income coverage options. Always verify coverage details with your provider to avoid unexpected charges and make informed decisions about your care.

Preventive Care and Cost-Saving Strategies

Preventive care is essential for maintaining oral health and reducing long-term costs. Regular check-ups, cleanings, and fluoride treatments can prevent more expensive procedures. The Saskatchewan Dental Fee Guide 2023 highlights cost-effective options like sealants for children. Patients can save by opting for in-office whitening (around $200-$300) instead of custom take-home kits. Asking about pricing and discounts beforehand helps make informed decisions. Prioritizing preventive care and understanding cost-saving strategies ensures better oral health and financial stability, aligning with the fee guide’s aim to make dental care accessible and affordable.

Comparison with Other Provincial Fee Guides

The Saskatchewan Dental Fee Guide 2023 aligns closely with national standards but varies slightly from other provinces, offering competitive pricing and detailed cost breakdowns for clarity and transparency.

Differences in Pricing Across Canada

Dental pricing varies significantly across Canadian provinces due to regional cost-of-living factors, provincial fee guides, and insurance policies. Saskatchewan’s 2023 fee guide reflects local economic conditions, with some procedures priced lower than in Ontario or British Columbia but higher than in Alberta. Urban areas often see higher fees compared to rural regions. These differences highlight the importance of consulting provincial-specific guides to understand dental care costs accurately. The Saskatchewan guide ensures transparency, helping patients budget effectively for essential and elective treatments.

Regional Variations in Dental Costs

Dental costs in Saskatchewan vary between urban and rural areas, with higher fees typically in cities like Regina and Saskatoon due to increased operational costs. Rural regions often offer more affordable services, reflecting lower living expenses and practice overheads. These regional differences are accounted for in the 2023 fee guide, ensuring equitable access to dental care province-wide. Urban-rural pricing disparities highlight the balance between maintaining quality care and managing economic realities, benefiting both patients and practitioners across Saskatchewan.

The Saskatchewan Dental Fee Guide 2023 promotes transparency, fairness, and informed decision-making in dental care, benefiting both patients and practitioners across the province effectively.

Final Thoughts on the Saskatchewan Dental Fee Guide

The Saskatchewan Dental Fee Guide 2023 serves as a vital resource for patients and dentists alike, promoting transparency and fairness in dental care pricing. By outlining clear fee ranges and codes, it simplifies decision-making and ensures patients understand treatment costs. The guide also supports dentists in setting competitive yet fair prices, fostering trust and collaboration within the dental community. Its user-friendly format and annual updates make it an indispensable tool for navigating dental care in Saskatchewan. Patients are encouraged to review the guide to better understand their options and maximize insurance benefits.

Resources for Further Information

For more details on the Saskatchewan Dental Fee Guide 2023, visit the official Saskatchewan Dental Association website or contact local dental offices. The Canadian Dental Association (CDA) also provides supplementary resources. Insurance providers like Sun Life offer detailed benefit grids aligned with the guide. Additionally, provincial health departments and community clinics can assist with questions about coverage and costs. Patients can explore these resources to better understand dental pricing, insurance plans, and available government programs for low-income families.

anti inflammatory foods list pdf

Discover the power of anti-inflammatory foods and their role in reducing chronic inflammation. Learn how diet impacts inflammation, prevents diseases, and promotes overall well-being. Start your journey with our comprehensive list.

1.1 What Are Anti-Inflammatory Foods?

Anti-inflammatory foods are a variety of fruits, vegetables, whole grains, fatty fish, nuts, seeds, and spices that help combat inflammation. These include fatty fish like salmon, berries, dark leafy greens, turmeric, and ginger, which are rich in antioxidants and omega-3s, supporting heart health and mental well-being while reducing chronic disease risks.

1.2 The Importance of Reducing Chronic Inflammation

Chronic inflammation is linked to heart disease, diabetes, and autoimmune disorders. Reducing it through diet can improve mental health, protect against chronic diseases, and enhance overall well-being, making anti-inflammatory foods a key part of a healthy lifestyle and disease prevention strategy.

Top 10 Anti-Inflammatory Foods to Include in Your Diet

Incorporate fatty fish, berries, dark greens, cruciferous vegetables, turmeric, ginger, nuts, seeds, olive oil, and whole grains into your meals to harness their anti-inflammatory properties and promote overall health.

2.1 Fatty Fish (Salmon, Mackerel, Sardines)

Fatty fish like salmon, mackerel, and sardines are rich in omega-3 fatty acids, particularly EPA and DHA, which actively reduce inflammation. Regular consumption supports heart health, brain function, and joint mobility, making them a top choice for an anti-inflammatory diet.

2.2 Berries (Blueberries, Cherries, Blackberries)

Berries are packed with antioxidants like anthocyanins and polyphenols, which combat inflammation effectively. Blueberries, cherries, and blackberries are particularly potent, offering protection against chronic diseases and enhancing cognitive health. Incorporate them into your diet for a natural anti-inflammatory boost.

2.3 Dark Leafy Greens (Kale, Spinach, Arugula)

Dark leafy greens like kale, spinach, and arugula are rich in antioxidants and anti-inflammatory compounds. They help combat chronic inflammation by reducing inflammatory markers, supporting heart health, and lowering disease risks. Incorporate these greens into your meals for a nutrient-packed, inflammation-fighting boost.

2.4 Cruciferous Vegetables (Broccoli, Cauliflower)

Broccoli and cauliflower are rich in sulforaphane, a compound with potent anti-inflammatory properties. These vegetables support detoxification, reduce oxidative stress, and protect against chronic diseases. Adding them to your diet can help lower inflammation and promote overall health.

2.5 Turmeric and Ginger

Turmeric contains curcumin, a powerful anti-inflammatory compound, while ginger has gingerol, which reduces inflammation and pain. Both spices support joint health, improve digestion, and protect against chronic diseases, making them essential additions to an anti-inflammatory diet.

2.6 Nuts and Seeds (Walnuts, Flaxseeds)

Walnuts and flaxseeds are rich in omega-3 fatty acids and antioxidants, which help reduce inflammation and support heart health. Their anti-inflammatory properties promote brain function and protect against chronic diseases, making them a nutritious addition to your diet.

2.7 Olive Oil

Olive oil is rich in antioxidants like oleocanthal, which has potent anti-inflammatory properties. It supports heart health and reduces inflammation when consumed as part of a Mediterranean-style diet, making it a valuable addition to your anti-inflammatory meal plan.

2.8 Whole Grains (Oats, Quinoa)

Whole grains like oats and quinoa are rich in fiber, antioxidants, and phytonutrients, which help combat inflammation. They provide sustained energy and support overall well-being, making them a nutritious addition to an anti-inflammatory diet.

2.9 Mushrooms (Shiitake, Maitake)

Mushrooms like shiitake and maitake are rich in beta-glucans and antioxidants, which help reduce inflammation and boost immunity. Their unique compounds support overall health, making them a valuable addition to an anti-inflammatory diet.

2.10 Green Tea

Green tea contains powerful antioxidants like EGCG, which combat inflammation and protect against chronic diseases. Regular consumption supports heart health and may reduce the risk of certain cancers, making it a beneficial addition to an anti-inflammatory diet.

The Science Behind Anti-Inflammatory Foods

Anti-inflammatory foods work by reducing oxidative stress and inflammation through antioxidants, omega-3 fatty acids, and phytonutrients, promoting healing and preventing chronic diseases.

3.1 How Antioxidants Combat Inflammation

Antioxidants neutralize free radicals, reducing oxidative stress and inflammation. Found in fruits, vegetables, and nuts, they protect cells from damage, promote healing, and support overall health, aiding in chronic disease prevention and enhancing well-being.

3.2 The Role of Omega-3 Fatty Acids

Omega-3 fatty acids, found in fatty fish, nuts, and seeds, reduce inflammation by inhibiting enzymes that trigger inflammatory responses. They support heart health, brain function, and may prevent chronic diseases, making them a key component of an anti-inflammatory diet.

3.3 Phytonutrients and Their Benefits

Phytonutrients, found in fruits, vegetables, and whole grains, combat inflammation by neutralizing harmful free radicals. These compounds support immune function, reduce chronic disease risk, and promote overall health, enhancing the effectiveness of an anti-inflammatory diet with their potent antioxidant properties.

Printable Anti-Inflammatory Foods List (PDF)

Download a free, comprehensive anti-inflammatory foods list in PDF format. This guide helps you identify beneficial foods, reduce inflammation, and improve overall health with ease.

4.1 How to Download the Free PDF Guide

Accessing the free anti-inflammatory foods list PDF is simple. Click the provided link, complete any required fields, and download the guide instantly. Print or save it for easy reference, ensuring you always have a handy list of inflammation-fighting foods at your fingertips.

4.2 Key Features of the PDF List

The PDF guide offers a comprehensive list of anti-inflammatory foods, organized by categories for easy reference. It includes scientific insights, meal planning tips, and a printable format. Perfect for tracking and incorporating inflammation-reducing foods into your daily diet with clarity and convenience.

Incorporating Anti-Inflammatory Foods into Your Meals

Discover simple ways to add anti-inflammatory foods to your meals. Use the PDF guide for inspiration, featuring easy recipes and tips to make healthy eating effortless.

5.1 Simple Recipes to Get Started

Start with easy, delicious recipes like turmeric-infused soups, berry smoothies, and grilled fatty fish. These dishes highlight anti-inflammatory ingredients and are perfect for beginners. Download the PDF guide for more inspiration and step-by-step meal ideas to kickstart your journey.

5.2 Meal Planning Tips for Consistency

Plan weekly meals using your anti-inflammatory foods list. Prep ingredients in advance, batch-cook healthy options, and incorporate variety to avoid monotony. Use the free PDF guide for inspiration and ensure fresh, seasonal ingredients are always on hand for balanced, inflammation-fighting meals.

Foods to Avoid for Reducing Inflammation

Limit or avoid processed carbs, sugary drinks, red meats, and refined sugars, as they can trigger inflammation. Opt for whole, nutrient-rich foods instead to support your anti-inflammatory diet.

6.1 Processed and Refined Carbohydrates

Processed and refined carbs like white bread, pasta, and sugary snacks can cause inflammation. They lack fiber and nutrients, leading to rapid blood sugar spikes. Choose whole grains and vegetables instead to minimize inflammation and maintain better health.

6.2 Sugary Drinks and Snacks

Sugary drinks and snacks fuel inflammation by triggering insulin spikes and oxidative stress. Limiting these foods can reduce inflammation and improve overall health, helping to prevent chronic diseases like heart disease and diabetes.

6.3 Red and Processed Meats

Red and processed meats, such as sausages and bacon, are linked to higher inflammation due to preservatives and saturated fats. Limiting these foods can reduce chronic inflammation and lower the risk of heart disease and other health conditions.

Benefits of an Anti-Inflammatory Diet Beyond Inflammation

An anti-inflammatory diet supports improved mental health, enhances heart well-being, and aids in chronic disease prevention, offering a holistic approach to better overall health and longevity naturally.

7.1 Improved Mental Health

Adopting an anti-inflammatory diet can significantly enhance mental well-being by reducing brain inflammation, which is linked to depression and anxiety. Foods rich in antioxidants and omega-3 fatty acids, such as fatty fish and berries, support cognitive health and improve mood, promoting mental clarity and emotional balance naturally.

7.2 Enhanced Heart Health

An anti-inflammatory diet rich in omega-3 fatty acids, antioxidants, and fiber helps reduce inflammation, improving cardiovascular health. These nutrients lower triglycerides, blood pressure, and arterial inflammation, promoting healthier blood flow and reducing the risk of heart disease effectively.

7.3 Support for Chronic Disease Prevention

A diet rich in anti-inflammatory foods reduces the risk of chronic diseases by combating oxidative stress and inflammation. Antioxidants and phytonutrients in these foods help protect cells, lowering the likelihood of conditions like diabetes, cancer, and neurodegenerative disorders, promoting long-term health and well-being effectively.

Global Anti-Inflammatory Diets

Explore global diets rich in anti-inflammatory foods, such as the Mediterranean Diet, Indian Cuisine, and other traditions, emphasizing whole, nutrient-dense foods that promote health and reduce inflammation naturally.

8.1 The Mediterranean Diet

The Mediterranean Diet emphasizes whole grains, fruits, vegetables, legumes, and olive oil, reducing inflammation by focusing on antioxidant-rich foods. It limits red meat and processed items, promoting heart health and chronic disease prevention through balanced, flavorful meals inspired by Mediterranean traditions.

8.2 Indian Cuisine and Its Anti-Inflammatory Properties

Indian cuisine offers a wealth of anti-inflammatory foods, with turmeric and ginger being key anti-inflammatory agents. Spices like cumin, coriander, and fenugreek also contribute to reducing inflammation. Traditional dishes, such as curries and stews, incorporate these ingredients, making Indian cuisine a flavorful and healthy choice for combating inflammation naturally.

8.3 Other Global Inspirations

Explore anti-inflammatory foods from global cuisines beyond the Mediterranean and Indian diets. Asian diets feature green tea and soy, while Latin American cuisines include beans and spices. African dishes often highlight anti-inflammatory grains and vegetables, offering diverse, flavorful ways to reduce inflammation and enhance overall health.

Expert Recommendations for an Anti-Inflammatory Lifestyle

Nutritionists and doctors recommend combining anti-inflammatory diets with lifestyle changes like regular exercise, stress management, and adequate sleep. Incorporate anti-inflammatory herbs and spices, such as turmeric and ginger, for enhanced benefits. Stay hydrated and limit processed foods to support overall well-being.

9.1 Tips from Nutritionists and Doctors

Nutritionists and doctors emphasize incorporating anti-inflammatory foods like turmeric, ginger, and omega-3-rich fish. They advise limiting processed carbs and sugars, staying hydrated, and maintaining a balanced diet. Regular exercise, stress management, and adequate sleep are also recommended to enhance the benefits of an anti-inflammatory lifestyle.

9.2 Lifestyle Changes to Complement Your Diet

Adopting a holistic approach, consider staying hydrated, exercising regularly, and managing stress through meditation. Prioritize adequate sleep and limit alcohol. These lifestyle adjustments, combined with a balanced diet, can enhance the anti-inflammatory effects and promote long-term well-being.

Embrace the benefits of anti-inflammatory foods by incorporating them into your daily meals. Download the free PDF guide for easy reference and start your journey toward improved health and well-being today.

10.1 Starting Your Anti-Inflammatory Journey

10.2 Resources for Further Learning

Explore our comprehensive guide, expert tips, and recipes to deepen your understanding of anti-inflammatory eating. Download the free PDF list for easy reference and discover how to incorporate these foods into your daily meals for lasting health benefits.

endocrine glands pdf

The endocrine system is a network of glands producing hormones that regulate body functions. Key glands include the pituitary, thyroid, pancreas, and adrenal glands, ensuring homeostasis through hormone secretion and and maintaining vital bodily processes.

1.1 Definition and Overview

The endocrine system is a network of glands that produce and secrete hormones, which are chemical messengers regulating various bodily functions. These glands, such as the pituitary, thyroid, and pancreas, operate without ducts, releasing hormones directly into the bloodstream. The system plays a crucial role in maintaining homeostasis, controlling metabolism, growth, and reproductive processes. It ensures proper communication between cells, tissues, and organs, enabling the body to function optimally. This intricate system is vital for overall health and survival, coordinating activities such as energy production and reproductive development.

1.2 Importance of the Endocrine System

The endocrine system is vital for maintaining bodily homeostasis, regulating metabolism, and enabling proper growth and development. It controls essential functions such as energy production, nutrient utilization, and reproductive processes. Hormones produced by endocrine glands influence mood, metabolism, and overall bodily harmony. The system’s dysfunction can lead to disorders like diabetes or thyroid conditions, highlighting its critical role in health. Proper endocrine function ensures optimal bodily performance, making it indispensable for survival and well-being. Its intricate balance is key to maintaining health and preventing disease.

1.3 Key Endocrine Glands and Their Roles

The endocrine system comprises several key glands, each with unique roles. The pituitary gland regulates other endocrine glands, while the thyroid gland controls metabolism. The parathyroid glands manage calcium levels, and the adrenal glands produce stress hormones like adrenaline; The pancreas regulates blood sugar through insulin and glucagon, and the gonads (ovaries and testes) produce sex hormones essential for reproduction. These glands work together to maintain hormonal balance, ensuring proper bodily functions and overall health.

Major Endocrine Glands

The major endocrine glands include the pituitary, thyroid, parathyroid, adrenal, pancreas, and gonads. These glands produce hormones that regulate various bodily functions, ensuring overall physiological balance and proper organ activity.

2.1 Pituitary Gland

The pituitary gland, often referred to as the “master gland,” is a small, pea-sized endocrine gland located below the brain. It plays a central role in regulating other endocrine glands by producing hormones such as ACTH (adrenocorticotropic hormone), TSH (thyroid-stimulating hormone), and ADH (antidiuretic hormone). These hormones control processes like stress response, metabolism, and water balance. The pituitary gland ensures proper coordination of bodily functions by acting as a bridge between the hypothalamus and other endocrine organs, maintaining hormonal equilibrium essential for overall health.

2.2 Thyroid Gland

The thyroid gland, located in the neck, is a vital endocrine gland that produces hormones regulating metabolism, growth, and development. It secretes thyroxine (T4) and triiodothyronine (T3), which influence energy production, nerve function, and muscle strength. The thyroid also produces calcitonin, aiding in calcium homeostasis. Iodine is essential for thyroid hormone synthesis, and its deficiency can lead to conditions like goiter or hypothyroidism. The thyroid gland plays a crucial role in maintaining metabolic balance and overall bodily functions.

2.3 Parathyroid Glands

The parathyroid glands are four small glands located near the thyroid gland in the neck. Their primary function is to regulate calcium levels in the blood by producing parathyroid hormone (PTH). PTH stimulates the release of calcium from bones, enhances calcium absorption in the intestines, and reduces calcium excretion in urine. Imbalances in PTH can lead to conditions such as hypoparathyroidism (low calcium) or hyperparathyroidism (high calcium), affecting bone health, nervous system function, and muscle activity.

2.4 Adrenal Glands

The adrenal glands are two small glands located on top of the kidneys. They consist of the outer adrenal cortex and the inner adrenal medulla. The cortex produces hormones like aldosterone, which regulates electrolyte balance, and cortisol, which responds to stress and aids in metabolism. The medulla releases adrenaline (epinephrine) and noradrenaline (norepinephrine), which prepare the body for “fight or flight.” Dysfunction can lead to conditions like Cushing’s syndrome or Addison’s disease, highlighting their critical role in maintaining bodily homeostasis and stress response.

2.5 Pancreas

The pancreas, located behind the stomach, is both an exocrine and endocrine gland. Its endocrine function is performed by the islets of Langerhans, which produce hormones like insulin (regulating blood sugar levels) and glucagon (raising blood glucose). These hormones are crucial for carbohydrate metabolism and energy balance. Dysfunction can lead to conditions such as diabetes mellitus, emphasizing the pancreas’s vital role in maintaining glucose homeostasis and overall metabolic health.

2;6 Gonads (Ovaries and Testes)

The gonads, comprising the ovaries in females and testes in males, are central to reproductive and endocrine functions. Ovaries produce estrogen and progesterone, regulating female reproductive cycles and secondary sexual characteristics. Testes produce testosterone, essential for male development and fertility. Both glands also produce inhibin, which modulates hormone secretion. Their dual role in hormone production and gamete formation underscores their importance in sexual development, reproduction, and overall endocrine balance. Dysfunction can lead to infertility or hormonal imbalances, affecting quality of life.

Functions of the Endocrine System

The endocrine system regulates bodily functions through hormone secretion, maintaining homeostasis, controlling metabolism, and managing growth. It also oversees reproductive processes and cellular activities, ensuring optimal body performance.

3.1 Hormone Production and Regulation

The endocrine system produces and regulates hormones, which are chemical messengers controlling various bodily functions. The pituitary gland, often called the “master gland,” oversees hormone production by other endocrine glands. Hormones are released in response to specific stimuli, such as blood chemical levels or signals from the hypothalamus. A feedback mechanism ensures hormone levels remain balanced, preventing excess or deficiency. This precise regulation is crucial for maintaining homeostasis and enabling proper bodily functions, such as metabolism, growth, and reproductive processes. Hormonal balance is vital for overall health.

3.2 Maintenance of Homeostasis

The endocrine system plays a critical role in maintaining homeostasis by regulating internal conditions such as blood sugar levels, water balance, and body temperature. Hormones like insulin and glucagon manage blood glucose, while aldosterone controls water and salt balance. The hypothalamus monitors these conditions and triggers hormonal responses to restore equilibrium. This feedback mechanism ensures stability, enabling proper cellular function and overall health. The endocrine system works in harmony with the nervous system to sustain a balanced internal environment, essential for survival and optimal bodily functions.

3.3 Control of Metabolism and Growth

The endocrine system regulates metabolism and growth through specific hormones. Growth hormone, produced by the pituitary gland, stimulates cell division and protein synthesis, promoting growth. Thyroxine from the thyroid gland accelerates metabolic rate, influencing energy production. Insulin and glucagon, secreted by the pancreas, manage blood sugar levels, ensuring proper glucose utilization. These hormones collectively maintain metabolic balance and support growth processes, enabling the body to function efficiently and develop appropriately throughout life.

3.4 Regulation of Reproductive Processes

The endocrine system plays a crucial role in regulating reproductive processes through hormone secretion. Gonads, including ovaries and testes, produce sex hormones like estrogen and testosterone, essential for sexual development and reproductive health. These hormones regulate gamete production, secondary sexual characteristics, and fertility. The pituitary gland influences gonadal function by releasing gonadotropins, while the hypothalamus triggers hormone release through gonadotropin-releasing hormone. This intricate system ensures proper reproductive function, maintaining the cycle of life and enabling the continuation of species through regulated hormonal processes.

The Role of Hormones

Hormones are chemical messengers produced by endocrine glands, secreted into the bloodstream to regulate various body functions, including metabolism, growth, and development, ensuring homeostasis and proper bodily responses.

4.1 Definition and Types of Hormones

Hormones are chemical messengers secreted by endocrine glands, regulating various bodily functions. They are broadly categorized into steroid hormones (e.g., estrogen, testosterone) and protein-based hormones (e.g., insulin, thyroid hormones). Steroid hormones are lipid-soluble, enabling them to diffuse into cells and interact with nuclear receptors. Protein-based hormones, being water-soluble, bind to receptors on the cell surface. Additionally, there are amino acid-derived hormones (e.g., adrenaline) and peptide hormones (e;g., oxytocin). Each type plays a unique role in maintaining homeostasis and regulating metabolic processes.

4.2 Mechanism of Hormone Action

Hormones act as chemical messengers, regulating various bodily functions. They are secreted by endocrine glands and travel through the bloodstream to target cells. Most hormones bind to specific cell surface receptors, triggering a cascade of intracellular signals. This interaction often involves secondary messengers like cAMP, which mediate the hormone’s effect within the cell. However, steroid hormones are lipid-soluble and diffuse into cells, binding to intracellular receptors that influence gene expression. This specificity ensures precise communication, allowing hormones to regulate processes like metabolism and growth effectively.

4.3 Hormonal Regulation of Body Functions

Hormones play a crucial role in regulating various bodily functions, ensuring proper coordination and balance. They influence processes like metabolism, growth, and reproduction, while also interacting with other systems, such as the immune and nervous systems. For example, insulin regulates blood sugar levels, while thyroid hormones control metabolism. Hormones also manage electrolyte balance, water levels, and blood pressure, maintaining homeostasis and enabling the body to function optimally. This regulation is vital for overall health and survival.

Clinical Significance of Endocrine Glands

The endocrine system’s glands regulate vital functions, and their dysfunction impacts health, necessitating clinical management and study for overall well-being.

5.1 Common Endocrine Disorders

Common endocrine disorders include hyperthyroidism and hypothyroidism, affecting the thyroid gland, diabetes mellitus related to pancreatic dysfunction, and Cushing’s syndrome linked to adrenal gland issues. These conditions often result from hormonal imbalances, impacting metabolism, growth, and overall health. Accurate diagnosis and treatment are crucial to manage symptoms and prevent complications. Early detection through blood tests and physical examinations can significantly improve patient outcomes.

5.2 Diagnosis and Treatment of Endocrine Conditions

Diagnosis of endocrine disorders often involves blood tests to measure hormone levels, imaging techniques like MRI or ultrasound, and physical examinations. Treatment may include medications to balance hormone levels, surgery to remove diseased glands, or lifestyle changes to manage conditions like diabetes. In some cases, hormone replacement therapy is necessary to restore normal bodily functions. Early and accurate diagnosis is crucial for effective treatment, improving quality of life and preventing long-term complications from hormonal imbalances.

5.3 Impact of Endocrine Dysfunctions on Overall Health

Endocrine dysfunctions can significantly impact overall health, leading to metabolic disorders, growth abnormalities, and reproductive issues. Hormonal imbalances can cause obesity, diabetes, and cardiovascular problems, while also affecting mental health, leading to anxiety and depression. Additionally, endocrine disorders can impair immune function and increase susceptibility to infections. In children, hormonal deficiencies may result in delayed puberty or stunted growth. Managing these conditions is crucial to preventing long-term complications and maintaining overall well-being.

Modern Research and Advances

Recent breakthroughs in endocrinology include gene-editing therapies, stem cell treatments, and personalized medicine approaches. These innovations are transforming the diagnosis and management of endocrine-related diseases.

6.1 Recent Discoveries in Endocrinology

Recent studies have uncovered the role of trace elements in endocrine health, linking them to hormone regulation and disease prevention. Advances in gene-editing technologies, such as CRISPR, are revolutionizing the treatment of genetic endocrine disorders. Researchers have also identified novel hormones and their functions, expanding our understanding of metabolic and reproductive processes. Additionally, the immune and endocrine roles of salivary glands have been explored, revealing their dual functionality in health and disease. These discoveries are paving the way for innovative therapies and personalized medicine approaches.

6.2 Emerging Therapies for Endocrine-Related Diseases

Emerging therapies include gene-editing techniques like CRISPR for correcting genetic endocrine disorders. Stem cell therapies are being explored to regenerate damaged endocrine tissues. Immunotherapy shows promise in treating autoimmune endocrine conditions. Personalized medicine approaches tailor treatments to individual genetic profiles. Advances in hormone-sensitive drug delivery systems and nanotechnology are improving treatment efficacy. These innovations aim to address endocrine disorders more effectively, offering hope for patients with conditions like diabetes, thyroid diseases, and hormonal imbalances, while minimizing side effects and enhancing quality of life.

6.3 The Future of Endocrine Research and Treatment

Future endocrine research focuses on precision medicine, targeting specific genetic and molecular pathways. Advances in gene therapy and stem cell technologies aim to repair or replace damaged endocrine tissues. Personalized treatments, such as tailored hormone therapies, are being developed to address individual needs. Emerging diagnostic tools, like biomarkers, will enable early detection of endocrine disorders. Collaborations between endocrinologists, geneticists, and bioengineers are driving innovation. These advancements promise to revolutionize the management of diabetes, thyroid diseases, and endocrine cancers, offering more effective and personalized care for patients worldwide.