Overview of Zone 10a Vegetable Planting
Zone 10a offers year-round gardening opportunities due to its warm climate. Gardeners benefit from detailed planting calendars and guides to optimize their harvests. Utilizing tools like farmers’ almanacs ensures timely and successful plantings.
1.1. Understanding USDA Hardiness Zone 10a
USDA Hardiness Zone 10a has warm temperatures year-round, with average annual extremes above 30°F. This zone allows for year-round vegetable planting, with minimal frost risks. Gardeners in Zone 10a can grow a wide variety of crops, including cool- and warm-season vegetables, by following specific planting schedules tailored to the region’s climate conditions.
1.2. Climate and Growing Seasons in Zone 10a
Zone 10a experiences mild winters and hot, dry summers, making it ideal for year-round gardening. The growing seasons are divided into cool and warm, allowing for continuous vegetable production. Cool-season crops thrive from fall to early spring, while warm-season crops grow best in late spring to early fall, maximizing the region’s climate advantages for diverse harvests.
Cool-Season Vegetables for Zone 10a
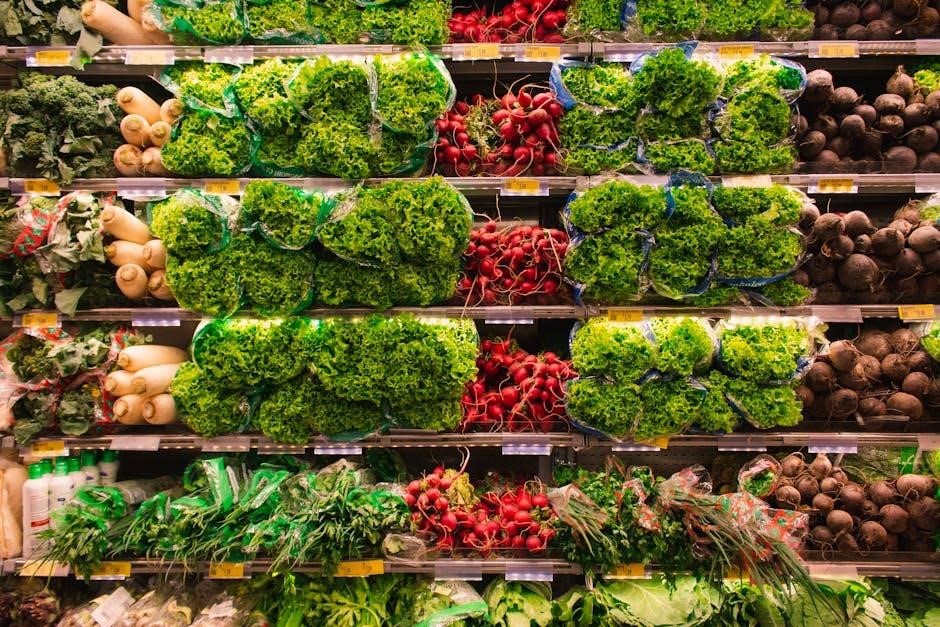
Cool-season vegetables thrive in Zone 10a’s mild winters and early springs. Popular choices include broccoli, spinach, kale, carrots, radishes, beets, and lettuce, which excel in cooler conditions.
- Broccoli
- Spinach
- Kale
- Carrots
- Radishes
- Beets
- Lettuce
2.1. Best Vegetables to Plant During Cool Seasons
Cool-season vegetables excel in Zone 10a’s mild winters and early springs, offering fresh harvests. These include leafy greens like Swiss chard, arugula, and mustard greens, and root vegetables such as turnips and parsnips. Peas, radicchio, and herbs like parsley and cilantro also thrive. These crops are ideal for the cooler months, providing a bounty before summer heat sets in.
- Swiss chard
- Arugula
- Mustard greens
- Turnips
- Parsnips
- Peas
- Radicchio
- Parsley
- Cilantro
2.2. Planting Schedule for Cool-Season Crops
In Zone 10a, cool-season crops are typically planted from October to November and again in late winter to early spring, around February. This avoids the intense summer heat, which can stress these plants. Starting seeds indoors 4-6 weeks before the last frost date ensures healthy transplants. Using planting calendars specific to Zone 10a helps gardeners time their plantings precisely for optimal growth and yield.
Warm-Season Vegetables for Zone 10a
Zone 10a’s warm climate is ideal for growing tomatoes, peppers, eggplants, and cucumbers year-round. These crops thrive in the region’s long growing season and mild winters.
3.1. Popular Warm-Season Vegetables
Popular warm-season vegetables in Zone 10a include tomatoes, peppers, eggplants, and cucumbers. These crops thrive in the region’s long growing season and mild winters, making year-round cultivation possible. Gardeners often use planting calendars to optimize yields. Companion planting and proper soil preparation further enhance growth and productivity in this favorable climate.
3.2. Optimal Planting Times for Warm-Season Crops
In Zone 10a, warm-season crops like tomatoes, peppers, and eggplants thrive when planted in early spring or late summer. Starting seeds indoors 4-6 weeks before the last frost date ensures a head start. Planting in March-April or August-September aligns with the region’s mild winters and long growing season, maximizing yields. Using a planting calendar tailored to Zone 10a helps gardeners synchronize with weather patterns for optimal results.
Using a Zone 10a Planting Calendar
A Zone 10a planting calendar provides a tailored guide for sowing seeds and harvesting crops. It helps gardeners time plantings to avoid frost and optimize yields. Tools like farmers’ almanacs and specific zone charts ensure accurate scheduling. Gardeners can use platforms like Homestead and Chill for detailed calendars, making it easier to plan and maintain a thriving garden year-round.
4.1. How to Create a Personalized Planting Schedule
To create a personalized planting schedule, start by identifying your specific USDA Hardiness Zone, which is Zone 10a. Next, determine the average frost dates for your area, as this will help you plan around potential frost events. Consider the specific vegetables you want to grow and their maturity times. Use online tools or planting calendars designed for Zone 10a to map out planting and harvesting timelines. Additionally, take into account microclimates in your garden, as these can affect growing conditions. Finally, track weather patterns and adjust your schedule as needed to ensure optimal growing conditions for your plants. This tailored approach will maximize your garden’s productivity throughout the year. Regularly reviewing and updating your schedule will help you stay on track and adapt to any changes in your local environment. By following these steps, you can enjoy a successful and bountiful harvest from your Zone 10a garden. Soil preparation and companion planting should also be considered to enhance growth and prevent pests; Utilizing resources like the Kellogg Garden Zone Planting Charts can further guide your planning process. Stay informed and flexible to make the most of your gardening efforts.
4.2. Resources for Zone 10a Planting Guides
Utilize resources like the Homestead and Chill garden planting calendars, which cover all USDA zones, including 10a. The Kellogg Garden Zone Planting Charts provide detailed guidance for sowing, planting, and harvesting vegetables. Farmers’ Almanacs are also reliable, offering accurate planting timelines. Printable calendars and apps like Garden Plan Pro can help track schedules. These tools ensure gardeners in Zone 10a can plan effectively and maximize their harvests year-round.
Common Mistakes in Zone 10a Vegetable Gardening
Overlooking soil preparation and ignoring weather patterns are common errors. Many gardeners also fail to adjust planting schedules for microclimates, leading to poor germination or early plant stress.
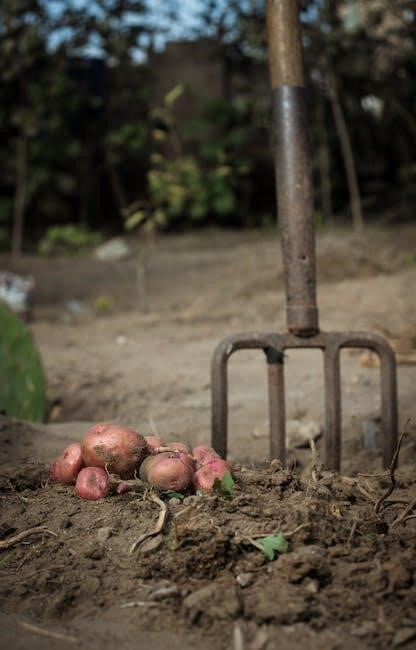
5.1. Overlooking Soil Preparation
Many gardeners in Zone 10a neglect soil preparation, leading to poor plant performance. Soil testing is crucial to address nutrient deficiencies and pH imbalances. Sandy, dry, or acidic soils require amendments like compost or organic matter to support healthy root growth. Without proper soil preparation, plants may struggle with drainage, nutrient uptake, and overall productivity, especially in Zone 10a’s challenging conditions.
5.2. Ignoring Weather Patterns
Gardeners often overlook weather patterns, which can significantly impact plant growth. In Zone 10a, extreme heatwaves or unexpected frosts can damage crops. Staying informed about weather forecasts and using resources like planting calendars or apps ensures timely plantings and harvests. Ignoring weather trends can lead to poor germination, reduced yields, or pest infestations, making it essential to adapt planting schedules accordingly for optimal results.
Regional Variations in Planting Schedules
Zone 10a planting schedules vary by region due to microclimates and local conditions. Elevation and coastal proximity influence temperature and rainfall, requiring tailored planting approaches for optimal growth.
6.1. Microclimates and Their Impact
Microclimates in Zone 10a significantly affect planting schedules. Variations in temperature, humidity, and wind patterns create distinct growing conditions within the same zone. Coastal areas may have cooler, foggy summers, while inland regions experience hotter, drier weather. These differences require adjusting planting times to match local microclimates, ensuring optimal growth and harvest success for vegetables; Understanding these variations is crucial for gardeners to adapt strategies effectively.
6.2. Adjusting for Local Conditions
Local conditions within Zone 10a require tailored planting strategies. Soil type, sunlight exposure, and temperature fluctuations vary, influencing crop performance. Gardeners should consult local planting calendars and resources like the Kellogg Garden Zone Charts to align planting times with specific microclimates. Adjusting for these factors ensures optimal growth, whether starting seeds indoors or transplanting nursery plants, maximizing harvest success in diverse environments.
Tools and Resources for Zone 10a Gardeners
Zone 10a gardeners benefit from tools like planting calendars, apps, and guides. Resources such as Homestead and Chill planting calendars and Kellogg Garden Zone Charts provide detailed insights for optimal planting and harvesting schedules, ensuring successful gardening experiences.
7.1. Printable Planting Calendars
Printable planting calendars are essential tools for Zone 10a gardeners, offering detailed schedules for sowing and harvesting. Resources like Homestead and Chill garden planting calendars and Kellogg Garden Zone Charts provide tailored guidance. These calendars outline optimal planting times for specific vegetables, ensuring gardeners can maximize their yields. Printable formats allow for easy reference, while sunlight guides help in selecting the best locations for plants.
7.2. Apps for Tracking Planting Schedules
Apps like Garden Plan Pro and Seed to Harvest simplify tracking planting schedules for Zone 10a gardeners. These tools provide personalized planting timelines, weather alerts, and harvest reminders. By inputting your USDA zone, apps generate tailored advice, ensuring optimal planting and harvesting times. They also offer space for notes, helping gardeners refine their strategies and achieve consistent success in their vegetable gardens.
Succession Planting in Zone 10a
Succession planting in Zone 10a involves growing multiple crops in sequence to maximize yields. This method optimizes the region’s year-round growing potential and ensures continuous harvests.
8.1. Benefits of Succession Planting
Succession planting in Zone 10a maximizes the growing season, allowing gardeners to harvest crops continuously. It optimizes space, reduces gaps between harvests, and ensures a steady supply of fresh produce. By staggering plantings, gardeners can avoid glut and maintain soil health. This method is ideal for leafy greens, herbs, and fast-growing vegetables, making it a key strategy for year-round productivity in Zone 10a’s favorable climate.
8.2. Strategies for Continuous Harvests
For continuous harvests in Zone 10a, use a detailed planting calendar to stagger sowings every 1-2 weeks for crops like lettuce and herbs. Intercrop fast-growing varieties with slower-maturing plants to maximize space. Plant repeat-bearing vegetables such as tomatoes and peppers, which produce multiple harvests. Monitor weather patterns and adjust planting schedules to avoid heat stress. Regular soil amendments ensure fertility for successive plantings, maintaining productivity throughout the year.

Companion Planting in Zone 10a
Companion planting enhances growth by pairing vegetables that naturally deter pests or improve soil health. For example, basil repels pests near tomatoes, while marigolds deter nematodes.
9.1. Vegetables That Grow Well Together
In Zone 10a, vegetables like tomatoes, basil, and chives grow harmoniously, with basil repelling pests. Leafy greens such as spinach and kale pair well with strawberries, enhancing flavor and growth. Corn, beans, and squash form the “Three Sisters,” promoting soil fertility and mutual support. These combinations maximize space and foster healthy plant communities year-round.
9.2. Avoiding Incompatible Plant Combinations
Certain vegetables should not be planted together to avoid competition or pest issues. For example, members of the Brassica family, like broccoli and cauliflower, can deplete soil nutrients for other plants. Tomatoes and fennel should be separated, as fennel inhibits tomato growth. Similarly, onions can stunt the growth of beans. Planting incompatible vegetables separately ensures healthier growth and better yields in Zone 10a gardens.
Frequently Asked Questions
Common questions include optimal planting times, soil preparation, and extending the growing season. Gardeners often ask about starting seeds indoors and managing pests effectively in Zone 10a.
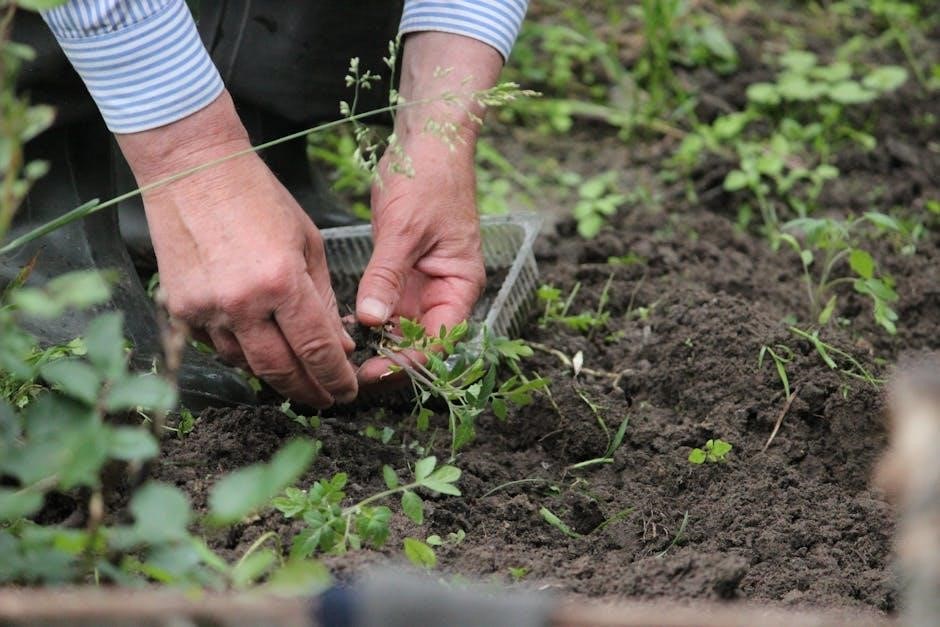
10.1. When to Start Seeds Indoors in Zone 10a
In Zone 10a, start seeds indoors 4-6 weeks before the last frost date, typically late December to early January. Use a planting calendar for specific timing. Ensure adequate light and maintain optimal soil temperatures for germination. Begin with cool-season crops like broccoli and kale. Transition to warm-season plants like tomatoes in late winter for a continuous harvest cycle.
10.2. How to Extend the Growing Season
Extend the growing season in Zone 10a by using succession planting and companion planting. Plant cool-season crops in fall and winter, and warm-season crops in spring and summer. Utilize row covers to protect plants from extreme heat or pests. Start seeds indoors and transition them outdoors at optimal times, following a detailed planting calendar for best results.