canon eos1300d manual

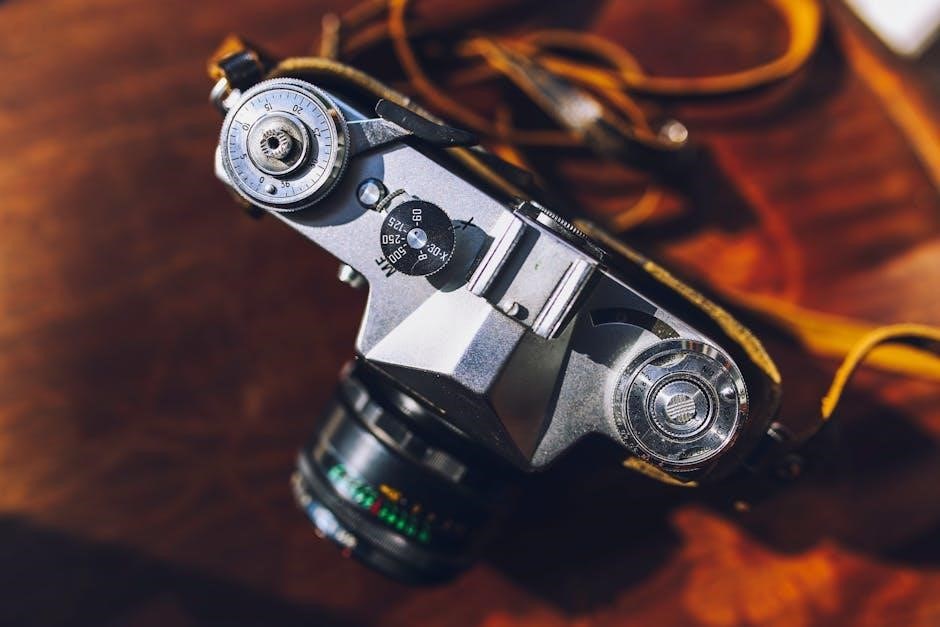
The Canon EOS 1300D is an entry-level DSLR camera designed for beginners and photography enthusiasts, offering high-quality images with an 18MP CMOS sensor and built-in Wi-Fi for easy connectivity and sharing.

Key Features and Technical Specifications

The Canon EOS 1300D features an 18MP APS-C CMOS sensor, built-in Wi-Fi, and NFC connectivity, offering high-quality imaging with precise details and vibrant colors, ideal for photography enthusiasts.

2.1 Sensor and Image Quality

The Canon EOS 1300D is equipped with an 18.0-megapixel APS-C CMOS sensor, delivering high-resolution images with vibrant colors and precise details. It supports up to 5184×3456 pixels, ensuring crisp and lifelike visuals. The sensor’s improved light-capturing capabilities enhance low-light performance, while the DIGIC 4+ image processor optimizes noise reduction and color accuracy. With an ISO range of 100-6400 (expandable to 12800), the camera captures sharp images in various lighting conditions. Its ability to shoot in RAW format allows for greater flexibility in post-processing, making it ideal for enthusiasts seeking high-quality photography.

Setup and Initial Configuration

Unboxing and setting up the Canon EOS 1300D involves charging the battery, mounting lenses, and configuring basic settings like date/time and language. Formatting memory cards is essential for optimal performance.

3.1 Unboxing and First Impressions

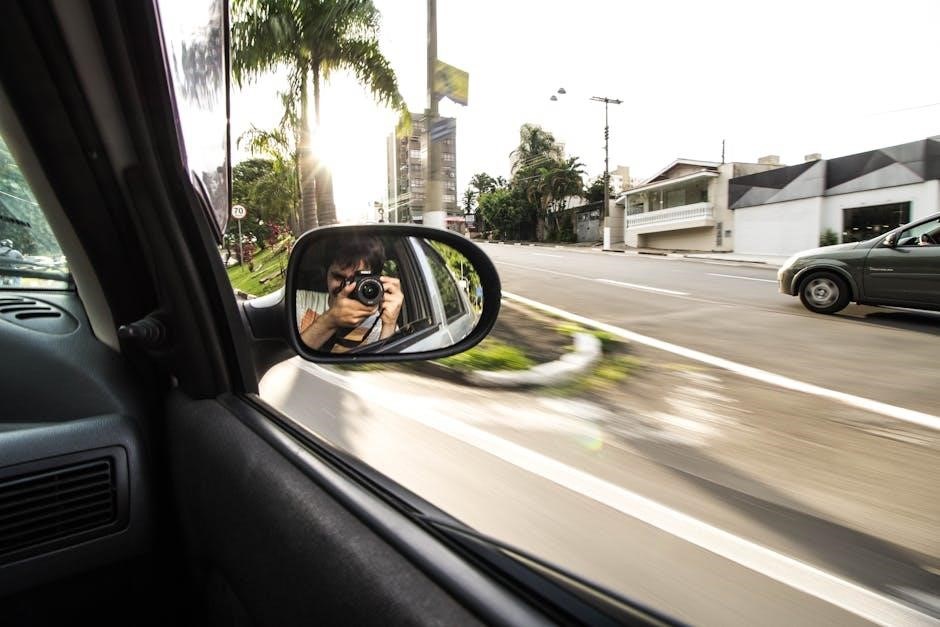
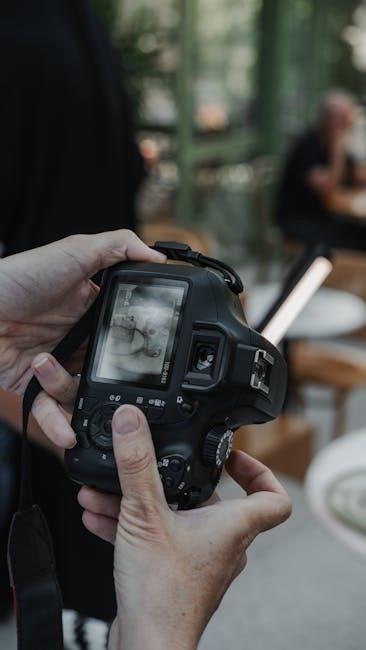
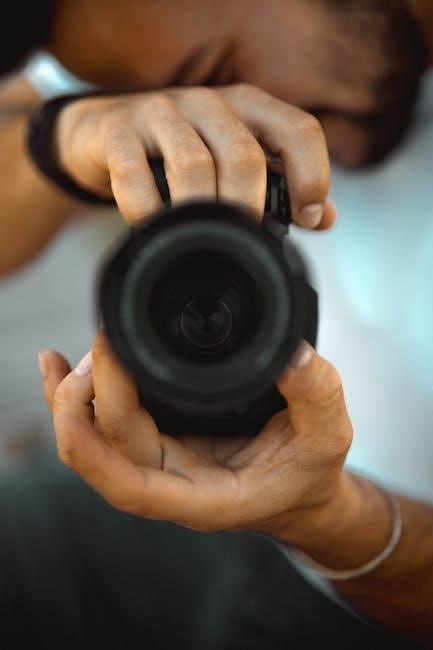
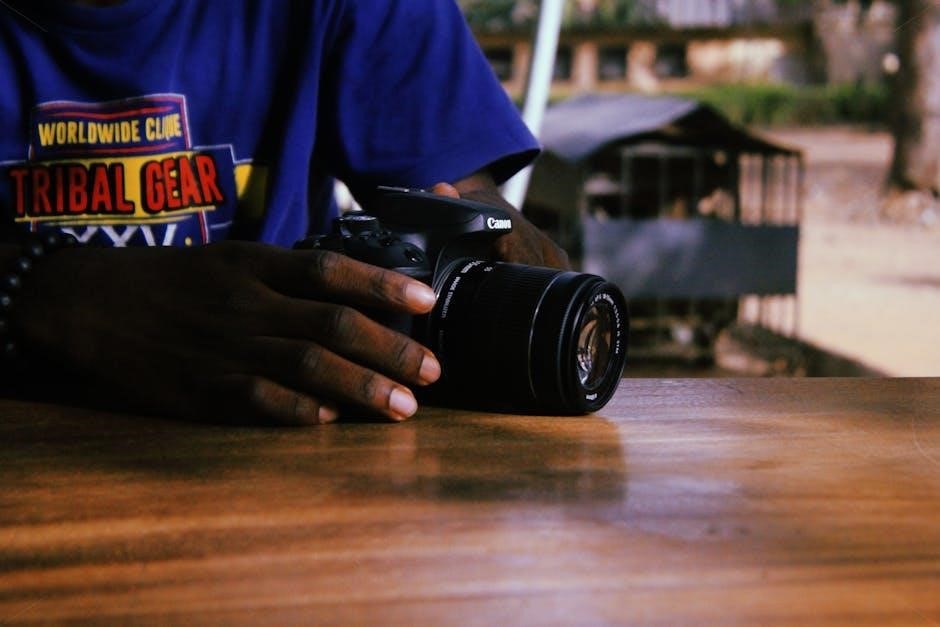
Unboxing the Canon EOS 1300D reveals the camera body, EF-S 18-55mm lens, battery, charger, neck strap, and a basic instruction manual. The camera feels solid and lightweight, with a comfortable grip. Initial impressions highlight its user-friendly design, making it accessible for beginners. The 3-inch LCD screen and intuitive controls provide a seamless first-time experience. The included manual offers a quick start guide, while detailed instructions are available online. This setup ensures photographers can begin capturing moments immediately after unboxing;

3.2 Charging the Battery and Initial Setup

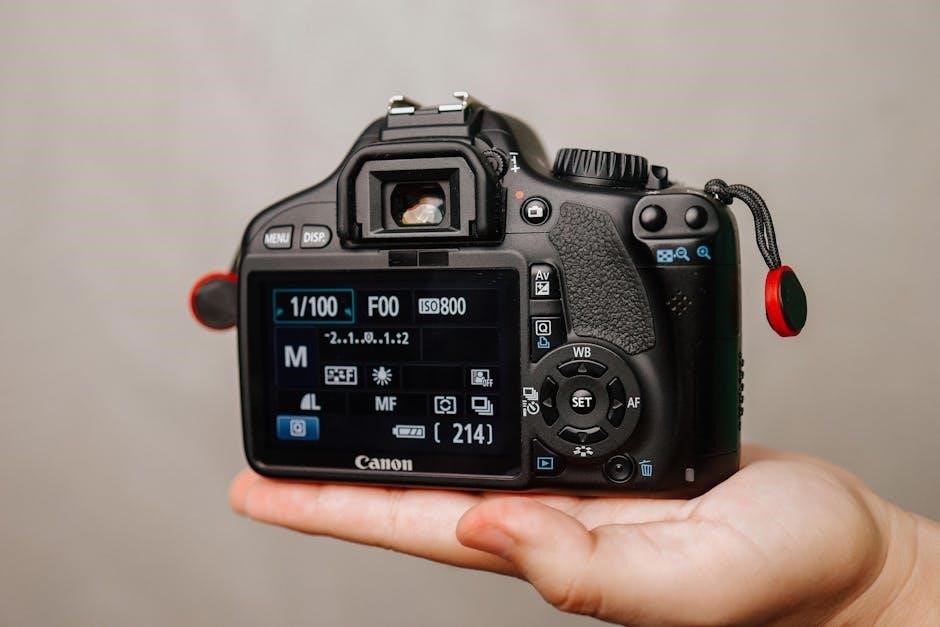
The Canon EOS 1300D comes with a rechargeable LP-E10 battery and a charger. Before first use, charge the battery fully, which takes approximately 2 hours. Once charged, insert the battery into the camera. Turn on the camera and follow the on-screen prompts to set your language, date, and time. These settings are essential for organizing your photos. The 3-inch LCD screen guides you through the process. Ensure the camera is updated with the latest firmware for optimal performance. Refer to the manual or Canon’s support website for detailed setup instructions.

3.3 Mounting Lenses and Accessories

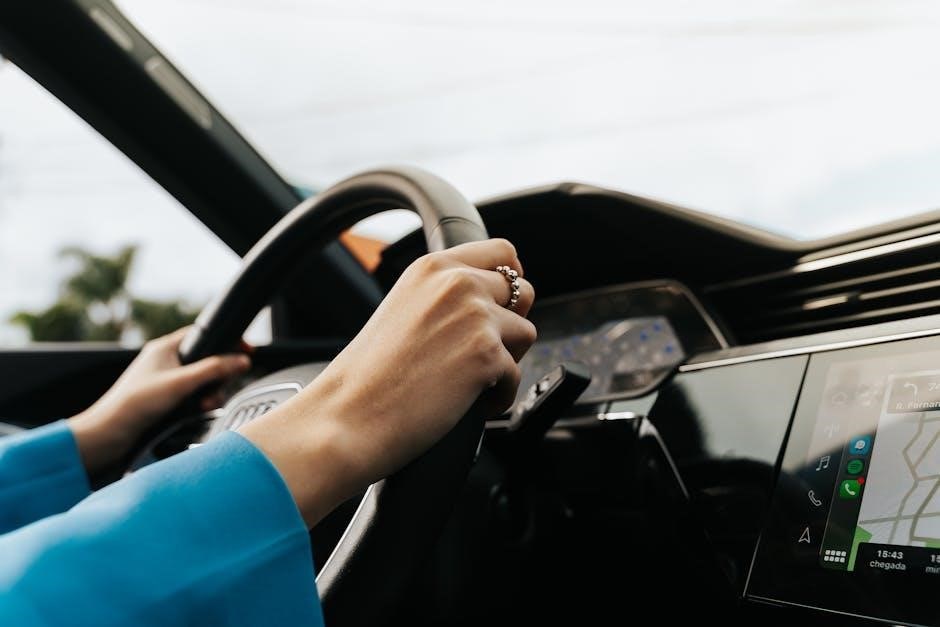
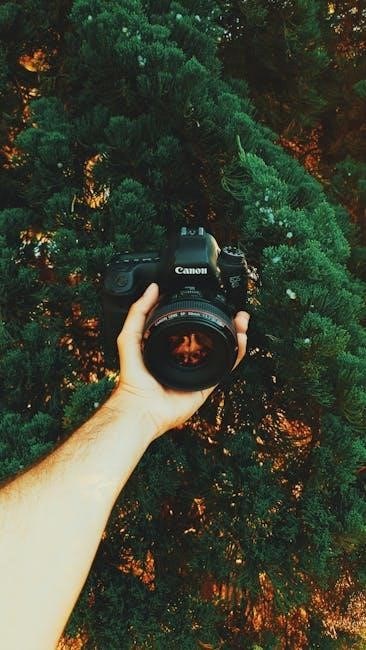
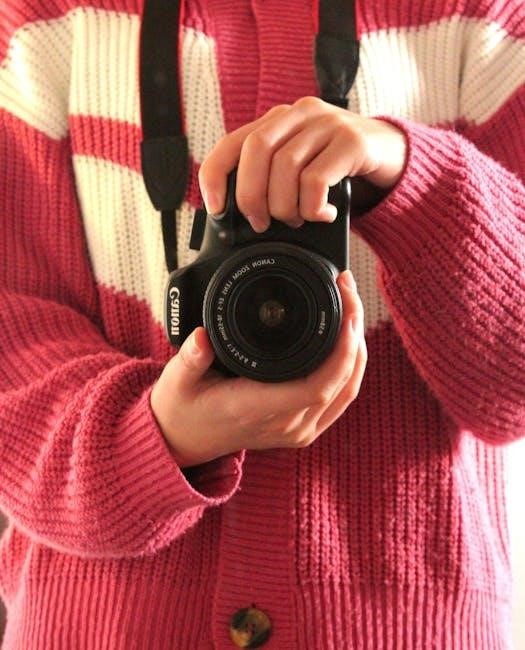
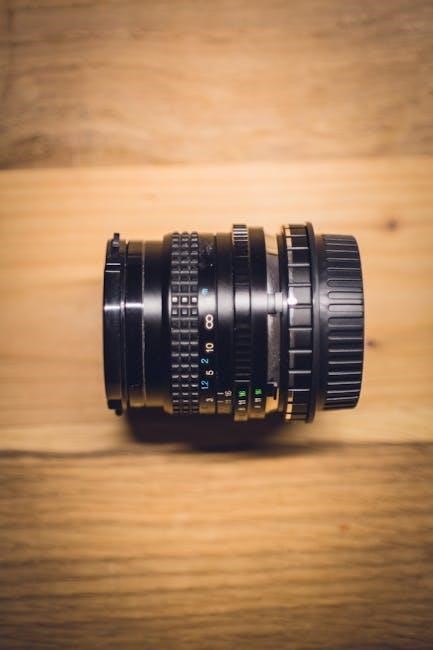
Mounting lenses and accessories on the Canon EOS 1300D is straightforward. Align the EF-S or EF lens with the camera’s mount, ensuring the white or red dot matches for correct alignment. Gently twist the lens clockwise until it clicks. For the kit lens (18-55mm), attach it securely. Additional accessories like the flash or grip can be connected via the hot shoe or tripod mount. Always handle lenses with care to avoid damage. The camera automatically recognizes compatible lenses, enabling features like image stabilization. Refer to the manual for specific accessory compatibility and mounting instructions.

Shooting Modes Explained

The Canon EOS 1300D offers various shooting modes, from automatic to manual, providing flexibility for beginners and experienced photographers to capture stunning images effortlessly.

4.1 Automatic Modes (Scene Intelligent Auto, etc.)

The Canon EOS 1300D features Scene Intelligent Auto mode, which automatically adjusts settings for optimal results. It also includes Portrait, Landscape, Close-up, and Night Portrait modes, simplifying photography for beginners by detecting and adapting to various shooting conditions. These modes ensure vibrant colors and sharp focus, making it easier to capture stunning images without manual adjustments. The camera analyzes the scene and selects the best settings, allowing users to focus on composition and creativity while achieving professional-looking results effortlessly.

4.2 Manual Modes (P, Av, Tv, M)

The Canon EOS 1300D offers manual modes for advanced control: Program AE (P), Aperture Priority (Av), Shutter Priority (Tv), and Manual (M). In P mode, the camera adjusts aperture and shutter speed, while Av mode lets users set the aperture for depth-of-field control. Tv mode allows manual shutter speed adjustment for motion effects. M mode provides full manual control over both aperture and shutter speed. These modes enable precise customization, catering to photographers seeking creative control and professional results, making the EOS 1300D versatile for both beginners and experienced shooters.

Customizing Your Camera

Customize your Canon EOS 1300D to suit your preferences, including button assignments and settings. Use the EOS Utility software for advanced customization and personalized camera control.

5.1 Customizing Buttons and Functions

The Canon EOS 1300D allows users to customize buttons and functions to enhance their shooting experience. Assign frequently used settings like ISO, AF Lock, or white balance to specific buttons for quick access. Use the camera’s menu to reassign functions, ensuring intuitive control. This feature is particularly useful for streamlining workflows and adapting the camera to individual preferences. Customization options are detailed in the manual, providing step-by-step guidance for personalizing button assignments and optimizing camera operation.

5.2 Using the EOS Utility Software

The EOS Utility Software enhances the functionality of your Canon EOS 1300D by enabling remote camera control and image transfer to a computer. It allows users to adjust settings, capture images, and review photos directly on a PC or Mac. The software also supports firmware updates, ensuring your camera stays up-to-date. Detailed instructions for downloading and installing the software are available in the manual, making it easy to integrate this tool into your workflow for improved efficiency and creativity in photography.

Troubleshooting Common Issues

Common issues with the Canon EOS 1300D include battery drainage, memory card errors, and autofocus malfunctions. The manual provides solutions like resetting the camera, formatting memory cards, and cleaning the sensor. For connectivity problems, resetting Wi-Fi settings often resolves the issue. Firmware updates can address software-related glitches. Referencing the troubleshooting section in the manual or Canon’s support website offers step-by-step guidance to restore functionality and ensure optimal performance, helping users overcome challenges efficiently and continue capturing high-quality images without interruption.

Tips for Getting the Best Results

To achieve the best results with the Canon EOS 1300D, experiment with manual modes for creative control. Use the built-in flash sparingly to avoid harsh lighting and opt for natural light when possible. Shoot in RAW format for better post-processing flexibility. Regularly clean the sensor and lenses to prevent dust spots. Familiarize yourself with the autofocus system for sharper images. Utilize the EOS Utility software for remote shooting and advanced settings. Practice composition and experiment with angles to enhance your photos. Stay updated with firmware for optimal performance and image quality.

Resources and Support

Canon EOS 1300D users can access comprehensive support through the official Canon website, including downloadable manuals, EOS Utility software, and active online communities for troubleshooting and tips.

8.1 Downloading the Manual and Additional Guides

The Canon EOS 1300D manual and additional guides are available for download on the official Canon website. Users can access the Basic Instruction Manual, which provides essential information for getting started, as well as more detailed PDF manuals for advanced features. These resources cover topics like camera settings, shooting modes, and troubleshooting. To download, visit www.canon.com, navigate to the support section, and search for the EOS 1300D. This ensures access to the most up-to-date guides and software for optimal camera performance.

8.2 Online Communities and Forums

Online communities and forums are invaluable resources for Canon EOS 1300D users. Platforms like Canon’s official forum, DPReview, and Reddit host active discussions where photographers share tips, ask questions, and exchange experiences. These communities are great for troubleshooting, learning advanced techniques, and staying updated on the latest firmware and software. Users can also find inspiration and feedback on their work. Engaging with these forums fosters a sense of camaraderie and provides access to a wealth of knowledge from both professionals and enthusiasts. Always follow community guidelines to ensure respectful and constructive interactions.

Comparison with Other Canon EOS Models

The Canon EOS 1300D stands out among entry-level DSLRs, offering a balance of affordability and performance. Compared to the EOS 1200D, it features built-in Wi-Fi and NFC for enhanced connectivity. While it lacks the weather-sealing of higher-end models like the EOS 80D, it remains a solid choice for beginners. Its 18MP sensor and DIGIC 4+ processor deliver consistent image quality, though it trails behind the EOS 200D in terms of Dual Pixel AF and touchscreen functionality. Overall, the EOS 1300D is a reliable option for those seeking a budget-friendly DSLR without compromising on essential features.

The Canon EOS 1300D is a versatile and user-friendly DSLR camera, ideal for beginners and hobbyists. With its 18MP sensor, built-in Wi-Fi, and intuitive controls, it offers excellent value for its price. While it may not match the advanced features of higher-end models, its simplicity and performance make it a great starting point for photography enthusiasts. The comprehensive manual and online resources ensure easy learning and troubleshooting. Overall, the EOS 1300D is a reliable choice for capturing high-quality images with minimal complexity.

delta controls thermostat user manual

The Delta Controls Thermostat is a user-friendly‚ efficient device designed to regulate temperature with precision․ It features a touchscreen interface‚ programmable scheduling‚ and smart home integration capabilities‚ ensuring optimal comfort and energy savings․

Overview of the Delta Controls Thermostat

The Delta Controls Thermostat is a fully programmable and customizable device designed to optimize temperature control and energy efficiency․ It features a user-friendly touchscreen interface‚ compatibility with smart home systems‚ and advanced scheduling options․ The thermostat is built to integrate seamlessly with various HVAC systems‚ offering precise temperature management and remote access capabilities․ Its design focuses on simplicity‚ accessibility‚ and modern functionality‚ making it a versatile solution for both residential and commercial settings․

Importance of the User Manual

The user manual is essential for understanding and maximizing the Delta Controls Thermostat’s features․ It provides detailed guidance on installation‚ setup‚ and operation‚ ensuring users can navigate the touchscreen interface‚ customize programmable schedules‚ and troubleshoot common issues․ The manual serves as a comprehensive resource for optimizing energy efficiency‚ exploring advanced customization options‚ and integrating with smart home systems․ Referencing it is crucial for both initial setup and ongoing use to fully utilize the thermostat’s capabilities․

Installation and Setup

Installation and setup of the Delta Controls Thermostat require careful attention to wiring and configuration․ Follow the manual’s step-by-step guide to ensure proper mounting and system activation․

Physical Installation Steps

Begin by turning off the power to your HVAC system at the circuit breaker․ Remove the old thermostat and disconnect the wires‚ noting their colors and connections․ Mount the Delta Controls Thermostat base to the wall‚ ensuring it is level․ Connect the wires to the appropriate terminals as per the manual․ Secure the thermostat faceplate and restore power․ Test the system to ensure proper operation and connectivity․

Initial Configuration and Settings

After installation‚ power on the thermostat and follow the on-screen prompts to set your preferred language and unit of measurement․ Select your system type (heating‚ cooling‚ or both) and configure the date and time․ Set your desired temperature range and schedule preferences․ Navigate through the touchscreen menu to enable features like energy-saving modes or smart home integration․ Save your settings to complete the initial setup and ensure optimal performance․

Key Features of the Delta Controls Thermostat

The Delta Controls Thermostat offers a touchscreen interface‚ programmable scheduling‚ smart home integration‚ and energy optimization․ It provides remote access‚ geofencing‚ and adaptive learning for enhanced comfort and efficiency․

Touchscreen Interface and Navigation

The Delta Controls Thermostat features a modern‚ high-resolution touchscreen interface designed for intuitive navigation․ Users can easily adjust settings‚ view schedules‚ and access advanced features with a few taps․ The interface is responsive and user-friendly‚ providing clear visual feedback for temperature adjustments and mode changes․ Customizable menus allow for personalized control‚ while built-in sensors optimize performance․ This sleek design ensures seamless interaction‚ making it simple to manage your comfort settings efficiently․

Programmable Scheduling Options

The Delta Controls Thermostat offers flexible programmable scheduling‚ allowing users to set custom temperature profiles for different times of the day and week․ This feature enables energy-efficient operation by automatically adjusting settings based on occupancy and preferences․ With daily and weekly scheduling options‚ users can optimize comfort while reducing energy consumption․ The intuitive interface makes it easy to create and modify schedules‚ ensuring seamless integration into your daily routine for enhanced convenience and cost savings․

Programming and Customization

The Delta Controls Thermostat offers advanced programming and customization options‚ allowing users to tailor temperature settings‚ schedules‚ and energy-saving preferences to their unique needs and lifestyles effortlessly․

Creating Custom Schedules

The Delta Controls Thermostat allows users to create custom schedules tailored to their daily routines․ With a user-friendly interface‚ you can set specific temperature adjustments for different times of the day or week․ This feature ensures optimal comfort while minimizing energy waste․ By programming your preferences‚ you can automate temperature changes to match your lifestyle‚ whether you’re at home‚ asleep‚ or away․ This flexibility enhances energy efficiency and personal convenience‚ making it easy to adapt to changing needs․

Advanced Customization Features

The Delta Controls Thermostat offers advanced customization options‚ including geofencing‚ smart sensor integration‚ and custom scenes․ Users can set temperature thresholds‚ humidity levels‚ and energy-saving modes․ The system adapts to your lifestyle by learning preferences over time‚ optimizing comfort and efficiency․ With remote access‚ you can adjust settings from anywhere‚ ensuring your home is always comfortable when you arrive․ These features provide unparalleled control and flexibility‚ enhancing your smart home experience․

Maintenance and Troubleshooting

Regularly clean the thermostat’s touchscreen and sensors to ensure accurate temperature readings․ Check for firmware updates and reset the device if issues arise․ Refer to the user manual for troubleshooting common problems like connectivity issues or display malfunctions․ Proper maintenance extends the thermostat’s lifespan and maintains optimal performance․

Regular Maintenance Tips

Regular maintenance ensures your Delta Controls Thermostat operates efficiently․ Clean the touchscreen gently with a soft cloth to remove smudges and debris․ Check and replace the batteries if applicable․ Update the firmware periodically to access new features and improvements․ Inspect the sensors for dust or obstructions‚ as this can affect temperature accuracy․ Schedule annual professional calibration to maintain precise temperature control and optimize energy savings․

Common Issues and Solutions

Common issues with the Delta Controls Thermostat include unresponsive screens and inaccurate temperature readings․ Restart the device to resolve display issues․ Ensure sensors are clean and free from obstructions for accurate readings․ Check wiring connections and consult the user manual for troubleshooting steps․ If problems persist‚ contact customer support for assistance․ Regular updates and maintenance can prevent many of these issues‚ ensuring smooth operation and reliable performance․

Energy Efficiency and Cost Savings

The Delta Controls Thermostat enhances energy efficiency by optimizing temperature settings based on schedules and preferences‚ thereby reducing energy consumption and lowering utility bills significantly․

How the Thermostat Optimizes Energy Use

The Delta Controls Thermostat optimizes energy use through advanced features like learning algorithms‚ smart scheduling‚ and geofencing․ These technologies adapt to your routine‚ ensuring heating and cooling systems operate efficiently․ By minimizing unnecessary energy consumption during absences or when conditions are met‚ the thermostat significantly reduces waste and lowers utility bills while maintaining comfort․

Monitoring and Reducing Energy Consumption

The Delta Controls Thermostat offers real-time energy monitoring‚ providing detailed insights into your consumption patterns․ Through its intuitive interface‚ you can track usage trends and receive alerts for unusual activity․ Customizable energy reports help identify areas for improvement‚ while features like automatic shutoff and geofencing ensure your system operates efficiently‚ reducing waste and lowering your energy bills․

Integration with Smart Home Systems

The Delta Controls Thermostat seamlessly integrates with popular smart home systems like Amazon Alexa and Google Home‚ enabling voice control and remote adjustments for enhanced convenience․

Compatibility with Smart Home Devices

The Delta Controls Thermostat is designed to work seamlessly with leading smart home systems‚ including Amazon Alexa and Google Home․ It supports wireless communication protocols like Wi-Fi and Zigbee‚ ensuring effortless integration with other smart devices․ This compatibility allows users to control their thermostat alongside lights‚ security systems‚ and more from a single interface‚ creating a unified and convenient smart home experience․

Remote Access and Control Features

The Delta Controls Thermostat offers remote access through its dedicated smartphone app‚ allowing users to adjust settings‚ monitor temperatures‚ and receive notifications from anywhere; Geofencing technology automatically adjusts the thermostat based on your location‚ while voice control integration with smart assistants like Alexa and Google Assistant enhances convenience․ These features provide unparalleled control‚ ensuring optimal comfort and energy efficiency‚ even when you’re not at home․

User-Friendly Design and Accessibility

The Delta Controls Thermostat features an intuitive interface with clear navigation‚ ensuring ease of use for all users․ Accessibility features include large text options and voice control compatibility‚ making it accessible to everyone․

Intuitive Interface Design

The Delta Controls Thermostat boasts an intuitive interface designed for seamless navigation․ Its touchscreen display features a clean‚ user-friendly layout with clear menus and visual cues․ The interface is responsive‚ allowing users to adjust settings effortlessly․ Large icons and straightforward controls ensure that even those less familiar with smart devices can operate it with ease․ This design reduces the learning curve‚ making it accessible and efficient for all users․

Accessibility Features for All Users

The Delta Controls Thermostat is designed with accessibility in mind‚ offering features like voice control for hands-free operation and large‚ high-contrast display options for better visibility․ It also supports compatibility with assistive technologies‚ ensuring users with disabilities can manage settings easily․ Remote access via smartphones or tablets further enhances convenience‚ allowing users to adjust temperatures from any location without physical interaction with the device․

Final Thoughts on the Delta Controls Thermostat

The Delta Controls Thermostat stands out as an excellent choice for modern homes‚ offering efficiency‚ user-friendly design‚ and advanced features that enhance comfort and energy savings․

The Delta Controls Thermostat is a standout solution for modern heating and cooling needs‚ offering a blend of efficiency‚ ease of use‚ and smart features․ Its intuitive design ensures seamless navigation‚ while programmable scheduling and energy-saving capabilities make it a practical choice for homeowners․ Whether you prefer manual control or smart home integration‚ this thermostat delivers consistent performance and comfort‚ making it a worthwhile investment for any household․

Encouragement to Explore Further

Exploring the Delta Controls Thermostat further will unlock its full potential‚ offering advanced features and energy-saving opportunities․ Dive into the user manual to discover customizable settings and smart integrations․ By experimenting with programmable schedules and monitoring energy use‚ you can maximize efficiency and comfort․ Embrace the thermostat’s capabilities to create a tailored environment that suits your lifestyle and preferences‚ ensuring long-term satisfaction and cost savings․

cessna 172n maintenance manual

1.1 Purpose and Scope of the Cessna 172N Maintenance Manual

The manual provides detailed procedures for maintaining the Cessna 172N‚ ensuring safety‚ reliability‚ and compliance with aviation standards. It covers inspections‚ repairs‚ and servicing for optimal performance.

1.2 Structure and Format of the Manual

Organized into sections‚ the manual includes inspection schedules‚ troubleshooting guides‚ and maintenance protocols. It is designed for clarity‚ with visual aids and clear instructions for ease of use.

1.3 Importance of Adhering to Maintenance Procedures

Proper adherence to the manual ensures aircraft airworthiness and safety. It helps prevent system failures and extends the lifespan of critical components‚ maintaining operational efficiency and reliability.

This manual provides detailed procedures for maintaining the Cessna 172N‚ ensuring compliance with safety and regulatory standards. It covers inspections‚ repairs‚ and servicing for optimal aircraft performance and longevity. The guide applies to all 172N models‚ including Skyhawk and Reims F172 variants‚ offering factory-recommended practices for domestic and international versions.

The manual is organized into clear sections‚ including inspection schedules‚ maintenance protocols‚ and troubleshooting guides. It features detailed visual aids‚ revision history‚ and service bulletins. Designed for easy reference‚ the format ensures accessibility for both domestic and international Cessna 172N models‚ providing comprehensive guidance for effective aircraft upkeep.

Adhering to maintenance procedures ensures the Cessna 172N operates safely and efficiently. Proper compliance prevents system failures‚ extends aircraft lifespan‚ and meets regulatory requirements. Neglecting procedures can lead to safety risks‚ operational downtime‚ and costly repairs‚ emphasizing the critical role of rigorous maintenance in sustaining airworthiness and reliability.

Regulatory Compliance and Safety Information

This section outlines essential FAA guidelines‚ safety protocols‚ and regulatory requirements for maintaining the Cessna 172N. Adherence ensures compliance‚ safety‚ and airworthiness‚ supported by service bulletins and airworthiness directives.

2.1 FAA Guidelines for Aircraft Maintenance

The FAA provides detailed guidelines for maintaining the Cessna 172N‚ covering inspections‚ repairs‚ and documentation. These standards ensure compliance with aviation regulations‚ maintaining aircraft airworthiness and operational safety. Adherence to these guidelines is crucial for ensuring the aircraft remains compliant and safe for flight. Always refer to the latest FAA updates for critical safety information.

2.2 Safety Precautions and Warnings

Adherence to safety precautions is critical when performing maintenance on the Cessna 172N. Always follow proper procedures‚ wear protective equipment‚ and ensure the aircraft is in a safe state before starting work. Specific warnings are provided for electrical‚ fuel‚ and hydraulic systems to prevent accidents and ensure technician safety.

2.4 Role of Service Bulletins and Airworthiness Directives

Service bulletins and airworthiness directives play a vital role in ensuring the Cessna 172N’s safety and compliance. Bulletins provide optional improvements‚ while directives enforce mandatory safety measures. Compliance with these documents is essential to prevent hazards‚ maintain airworthiness‚ and adhere to regulatory requirements. Regular checks ensure all updates are implemented.

Aircraft Systems and Components

The Cessna 172N comprises multiple systems‚ including airframe‚ powerplant‚ avionics‚ fuel‚ and hydraulic components. Understanding each system ensures proper maintenance‚ enhancing safety and reliability during operations.

3.1 Airframe Inspection and Maintenance

Regular airframe inspections are critical to ensure structural integrity. Visual checks for cracks‚ corrosion‚ and wear on stabilizers‚ elevators‚ and attach fittings are essential. Proper securing of hinge bolts and bearings ensures safe flight operations. Adhering to these procedures maintains aircraft reliability and compliance with safety standards.

3.2 Powerplant and Engine Maintenance

Regular engine inspections and maintenance are vital for optimal performance. Procedures include checking the alternator charging system‚ monitoring engine performance metrics‚ and ensuring compliance with service bulletins. Proper care extends engine lifespan and ensures reliable operation‚ adhering to factory-recommended standards for the Cessna 172N powerplant.

3.3 Avionics and Electrical Systems

The manual provides detailed procedures for inspecting and maintaining avionics and electrical systems. Routine checks include verifying system functionality‚ inspecting wiring‚ and ensuring proper alternator operation. Troubleshooting techniques and maintenance tasks are outlined to maintain system reliability and performance‚ adhering to factory-recommended guidelines for the Cessna 172N.

3.4 Fuel and Hydraulic Systems

The manual outlines procedures for inspecting fuel tanks‚ lines‚ and hydraulic components. It includes steps for detecting leaks‚ ensuring system integrity‚ and maintaining proper fluid levels. Troubleshooting and maintenance tasks are detailed to prevent system failures and ensure safe‚ efficient aircraft operation.

Inspection and Troubleshooting

This section covers detailed inspection processes‚ troubleshooting techniques‚ and repair guidance for identifying and resolving issues in the Cessna 172N aircraft;

4.1 Pre-Flight and Post-Flight Inspection Procedures

Pre-flight inspections involve visual checks of the airframe‚ wings‚ and flight surfaces for damage or wear. Post-flight inspections focus on system functionality‚ fluid levels‚ and control mechanisms. Both ensure the aircraft’s airworthiness and safety‚ adhering to maintenance guidelines for reliable operation.

4.2 Identifying and Addressing Common Issues

Common issues include wear on engine components‚ avionics malfunctions‚ and hydraulic system leaks. Routine inspections help identify these problems early. Refer to the manual for troubleshooting guides and repair procedures. Addressing issues promptly ensures safety and prevents further damage‚ maintaining the aircraft’s performance and reliability.

4.3 Troubleshooting Techniques for System Malfunctions

Troubleshooting involves consulting the maintenance manual for specific fault codes and symptoms. Visual inspections‚ system checks‚ and diagnostic tools help identify malfunctions. Following factory procedures ensures repairs are done safely and effectively‚ minimizing downtime and ensuring compliance with aviation standards. Regular system monitoring aids in early detection of potential issues.

Maintenance Schedules and Intervals

Regular maintenance ensures the Cessna 172N operates safely and efficiently; Scheduled tasks include routine inspections‚ component replacements‚ and system checks. Adhering to these intervals prevents failures and extends aircraft lifespan. The manual outlines specific procedures and timelines for all maintenance activities.

5.1 Routine Maintenance Tasks and Frequencies

Routine maintenance for the Cessna 172N includes regular inspections‚ fluid checks‚ and system evaluations. Tasks are scheduled at specific intervals‚ such as pre-flight‚ every 50 hours‚ and annually‚ to ensure safety and optimal performance. These frequencies help prevent unexpected issues and maintain compliance with aviation standards.

5.2 Annual Inspection Requirements

The annual inspection requires a thorough examination of the airframe‚ engine‚ and systems. It includes detailed checks of wear‚ corrosion‚ and system functionality. Compliance with FAA guidelines ensures safety and airworthiness. Proper documentation of findings and repairs is mandatory to maintain regulatory compliance and operational integrity.

5.3 Life-Limited Component Replacement

Life-limited components must be replaced at specified intervals to ensure safety and compliance. These include engine parts‚ propeller components‚ and critical system elements. Adhering to these schedules prevents premature failure and maintains airworthiness. Proper documentation of replacements is essential for compliance and long-term reliability.

Specialized Maintenance Topics

This section covers advanced maintenance areas‚ including corrosion control‚ landing gear‚ and propeller care. Detailed procedures ensure longevity and safety‚ addressing specific challenges in aircraft upkeep.

6.1 Corrosion Control and Prevention

Corrosion control is vital for maintaining aircraft integrity. Regular inspections and treatments prevent metal degradation. Apply protective coatings and ensure proper drainage. Environmental factors like humidity and salt exposure require special attention. Neglecting corrosion can lead to structural weaknesses and safety risks. Compliance with manufacturer guidelines is essential for effective prevention.

6.2 Maintenance of Landing Gear and Brakes

Regular inspection of landing gear and brakes ensures safe operations. Lubricate moving parts‚ check for wear‚ and replace worn components. Brake systems must be tested for proper function. Follow manufacturer guidelines to maintain structural integrity and reliable performance during takeoffs and landings.

6.3 Propeller Maintenance and Inspection

Inspect propeller blades for cracks‚ nicks‚ and erosion. Check hub bolts for tightness and lubricate as needed. Ensure proper pitch setting and balance. Address any damage promptly to maintain efficiency and prevent vibration‚ following the manufacturer’s guidelines for optimal performance and safety.

Tools and Equipment

Essential tools include wrenches‚ screwdrivers‚ and specialized equipment for specific tasks. Proper calibration and maintenance of tools ensure accuracy and safety during aircraft servicing and repairs.

7.1 Essential Tools for Cessna 172N Maintenance

Essential tools include wrenches‚ screwdrivers‚ pliers‚ and torque wrenches. These tools are vital for inspections‚ repairs‚ and part replacements. Proper tool calibration ensures accuracy and safety during maintenance tasks. Specialized tools may be required for specific systems‚ such as avionics or engine components. Always use manufacturer-recommended equipment for reliability.

7.2 Specialized Equipment for Specific Tasks

Specialized equipment includes hydraulic testers‚ avionics diagnostic tools‚ and precision gauges. These tools are essential for tasks like engine overhaul‚ fuel system servicing‚ and electrical system diagnostics. Proper use ensures accurate repairs and compliance with manufacturer specifications. Source these tools from authorized Cessna dealers or reputable aviation suppliers.

7.3 Calibration and Care of Maintenance Tools

Regular calibration of tools ensures accuracy and reliability in maintenance tasks. Follow manufacturer guidelines for calibration intervals and storage. Inspect tools for wear or damage and replace as needed. Proper care extends tool lifespan and maintains precision‚ crucial for safe and effective aircraft maintenance.

Documentation and Record-Keeping

Accurate and detailed records are essential for tracking maintenance activities‚ ensuring compliance‚ and providing a clear history of the aircraft’s upkeep and repairs over time.

8.1 Maintaining Accurate Maintenance Records

Accurate maintenance records are crucial for ensuring compliance‚ tracking airworthiness‚ and providing a clear history of all inspections‚ repairs‚ and servicing. Detailed logs‚ including dates‚ procedures performed‚ and parts replaced‚ must be securely stored and regularly updated. Incomplete or inaccurate records can lead to non-compliance and safety risks.

8.2 Reporting and Tracking Maintenance Activities

Effective reporting and tracking of maintenance activities ensure accountability and transparency. Detailed maintenance logs‚ work orders‚ and electronic tracking systems help monitor progress‚ verify completion‚ and ensure compliance with regulatory requirements. Regular updates and reviews of these records are essential for maintaining aircraft airworthiness and operational safety.

8;3 Compliance with Record-Keeping Requirements

Accurate and complete records ensure compliance with aviation regulations‚ traceability of maintenance activities‚ and accountability. Detailed logs‚ service histories‚ and compliance documentation are essential for audits‚ safety inspections‚ and maintaining airworthiness certification; Proper record-keeping also supports legal and operational standards‚ ensuring transparency and consistency in maintenance practices.

Common Maintenance Challenges

Aging aircraft often face wear‚ corrosion‚ and obsolete parts. Environmental factors‚ system malfunctions‚ and strict compliance requirements further complicate maintenance. Regular inspections and adherence to protocols are crucial to ensure safety and reliability.

9.1 Addressing Wear and Tear on Critical Components

Regular inspections of stabilizers‚ elevators‚ and control surfaces are essential to identify wear and tear. Visual checks for cracks‚ corrosion‚ and loose fasteners ensure early detection of issues. Addressing these promptly prevents system failures and maintains aircraft integrity‚ ensuring continued safe operation and compliance with maintenance standards.

9.2 Managing Obsolete or Hard-to-Find Parts

Sourcing obsolete parts for the Cessna 172N requires consulting manufacturer support and authorized dealers. Utilizing FAA-PMA-approved alternatives and referencing parts catalogs can help locate compatible replacements. Online forums and communities also serve as valuable resources for identifying suppliers and sharing solutions for rare or discontinued components.

9.3 Dealing with Environmental Factors

Environmental factors like humidity‚ temperature extremes‚ and exposure to saltwater can damage aircraft components. Regular cleaning‚ corrosion inspections‚ and protective coatings are essential. Climate-controlled storage and proper sealing of openings help mitigate these issues‚ ensuring the integrity and longevity of the Cessna 172N’s systems and structure.

Training and Certification

Proper training and certification are essential for maintaining the Cessna 172N. They ensure personnel meet required standards‚ understand procedures‚ and stay updated on best practices for safe and effective aircraft maintenance.

10.1 Requirements for Maintenance Personnel

Maintenance personnel must meet specific requirements‚ including factory-recommended training and certification. They should stay updated on manufacturer guidelines and best practices to ensure compliance and safety. Proper qualifications are essential for performing inspections‚ repairs‚ and servicing effectively.

10.2 Training Resources and Programs

Cessna offers specialized training programs and resources to enhance maintenance skills. These include factory-approved courses‚ online tutorials‚ and workshops. Additional materials like service manuals and technical bulletins provide hands-on guidance‚ ensuring personnel are well-equipped to handle specific aircraft systems and components effectively.

10.3 Staying Updated on Maintenance Practices

Regularly reviewing service bulletins‚ airworthiness directives‚ and manufacturer updates ensures compliance with the latest maintenance standards. Utilizing the Cessna Maintenance Library and online forums provides access to updated procedures and best practices‚ while subscribing to technical newsletters keeps maintenance teams informed about emerging trends and safety improvements.

Resources and References

This section provides a comprehensive list of resources‚ including service manuals‚ parts catalogs‚ and online forums‚ ensuring easy access to detailed maintenance information and support for the Cessna 172N.

11;1 Cessna 172N Service Manuals and Parts Catalogs

The official Cessna 172N service manuals and parts catalogs provide detailed instructions‚ diagrams‚ and part numbers for maintenance and repairs. These resources include model-specific guides‚ such as the 1977 172N service manual‚ ensuring accurate and efficient servicing of the aircraft. Supplementary materials‚ like parts catalogs for models 150-185‚ are also available.

11.2 Online Forums and Communities

Online forums and communities‚ such as aviation groups and pilot networks‚ offer valuable insights and resources for Cessna 172N maintenance. These platforms provide access to shared experiences‚ troubleshooting tips‚ and downloadable manuals‚ fostering collaboration among aircraft owners and maintenance professionals. They serve as vital support networks for resolving technical issues.

11.3 Manufacturer Support and Dealer Networks

Cessna dealers provide comprehensive support‚ including service manuals‚ parts catalogs‚ and bulletins. They ensure access to updated technical resources‚ fostering compliance and efficiency in maintenance. These networks are essential for maintaining aircraft airworthiness and addressing specific maintenance needs effectively.

Proper maintenance practices are crucial for ensuring the safety and reliability of the Cessna 172N. Continuous improvement in processes and adherence to guidelines are essential for optimal performance and longevity.

12.1 The Importance of Proper Maintenance Practices

Proper maintenance ensures optimal performance‚ safety‚ and longevity of the Cessna 172N. It prevents system failures‚ enhances reliability‚ and guarantees compliance with aviation standards. Regular inspections and adherence to guidelines are vital for maintaining airworthiness and operational efficiency. Proper practices also reduce risks‚ ensuring the aircraft remains safe and reliable for all flights.

12.2 Continuous Improvement in Maintenance Processes

Continuous improvement in maintenance processes ensures the Cessna 172N remains safe and efficient. Stay updated with manufacturer guidelines‚ incorporate feedback from maintenance personnel‚ and adopt advanced tools and techniques. Regular reviews and updates to procedures enhance reliability and compliance‚ ensuring the aircraft meets evolving aviation standards and operational demands effectively.

12.3 Final Thoughts on Safe and Effective Maintenance

Safe and effective maintenance is crucial for ensuring the Cessna 172N’s airworthiness and reliability. Adherence to established procedures‚ regular updates‚ and a commitment to continuous improvement are essential. By following the manual’s guidelines‚ maintenance teams can uphold safety standards‚ prevent potential issues‚ and ensure the aircraft remains operational for years to come.

wesecuu security camera manual

Welcome to the Wesecuu Security Camera Manual! This guide helps you understand and utilize your camera’s features, including HD video, motion detection, and seamless setup instructions․

1․1 Overview of the Wesecuu Security Camera System

The Wesecuu Security Camera System is a cutting-edge surveillance solution designed to provide reliable home or business monitoring․ It combines advanced features like 2K HD video quality, motion detection, and dual-band Wi-Fi connectivity for a stable and secure experience․ The system supports both 5G and 2․4G networks, ensuring stronger signal reception and longer coverage distances․ With its sleek, discreet design, the camera blends seamlessly into any environment while offering real-time alerts and remote access via the app․ Whether for indoor or outdoor use, the Wesecuu system is tailored to meet diverse security needs, offering peace of mind through intelligent alerts and continuous monitoring capabilities․

1․2 Key Features of the Wesecuu Light Bulb Camera

The Wesecuu Light Bulb Camera stands out with its innovative design and robust features․ It offers 2K HD resolution for crystal-clear video quality, ensuring every detail is captured․ The camera is equipped with a built-in motion sensor, enabling timely detection of moving objects and sending instant alerts to your smartphone․ Its dual-band Wi-Fi support (5G and 2․4G) ensures a stable connection and extended range․ Additionally, the camera features color night vision, allowing you to monitor your surroundings even in low-light conditions․ The lightweight and compact design makes installation effortless, while its weather-resistant construction ensures durability for outdoor use․ These features make the Wesecuu Light Bulb Camera an ideal choice for enhancing home security and monitoring․

1․3 What’s Included in the Box

Inside the box, you’ll find the Wesecuu Light Bulb Camera, a user manual, and all necessary accessories for installation․ The camera itself is compact and lightweight, designed for easy setup․ Additionally, the package includes screws and a mounting bracket to secure the camera in your desired location․ A power adapter is also provided to ensure reliable operation․ For connectivity, an Ethernet cable is included to help you establish a stable network connection during the initial setup․ These components are thoughtfully packaged to provide everything you need to get started with your new security system․ The manual offers step-by-step guidance, making the installation process straightforward and hassle-free․

Installation and Setup

The Wesecuu Security Camera is designed for easy installation․ Start by mounting the camera in your desired location, then connect it to your Wi-Fi network via the app․ Ensure the power supply is stable and follow the in-app instructions to complete the setup process․

2․1 Physical Installation of the Camera

Begin by selecting a suitable location for your Wesecuu Security Camera, ensuring optimal coverage of the area you wish to monitor․ Use the provided mounting hardware to secure the camera firmly to a wall or ceiling․ Ensure the surface is sturdy and level to prevent any wobbling or unstable positioning․ If using a screwdriver, carefully drill pilot holes to avoid damaging the wall․ Once mounted, adjust the camera’s angle to achieve the best viewing perspective․ Ensure the power supply is nearby and accessible to maintain a stable connection․ Finally, double-check all connections and ensure the camera is securely fastened before proceeding to the next steps․

2․2 Connecting the Camera to Your Wi-Fi Network

Power on your Wesecuu Security Camera and ensure it is in pairing mode․ Open the EseeCloud app and navigate to the “Add Device” section․ Select your camera model from the list and follow the in-app instructions․ Reset the camera by pressing and holding the reset button until the indicator light flashes․ Choose your Wi-Fi network from the available options and enter your password․ Wait for the camera to connect; once successful, you will receive a confirmation message in the app․ Ensure your router supports 5G and 2․4G dual-band connectivity for optimal performance․ If issues arise, restart the camera and router, then retry the connection process․ Always use a secure Wi-Fi password to safeguard your camera feed․

Motion Detection and Alerts

Motion detection offers real-time alerts and notifications, enabling you to monitor activities remotely․ Adjust sensitivity settings to reduce false alarms and ensure accurate alerts for security․

3․1 How to Enable Motion Detection

Enabling Motion Detection on your Wesecuu camera is straightforward․ Open the app, navigate to the Settings menu, and select Motion Detection․ Toggle the feature on to activate it․ Ensure your Wi-Fi connection is stable for real-time alerts․ Customize sensitivity levels to avoid false notifications․ Once enabled, the camera will detect movement and send push notifications to your device․ This feature enhances security by keeping you informed of any activity captured by the camera․ Regularly check and adjust settings to optimize performance based on your specific needs․ Motion detection is a key feature for proactive monitoring and peace of mind․

3․2 Customizing Motion Detection Settings

Customizing Motion Detection Settings on your Wesecuu camera allows you to tailor alerts to your needs․ Access the Settings menu via the app and select Motion Detection․ Adjust the sensitivity slider to reduce false alerts from pets or minor movements․ Schedule detection during specific hours or disable it for certain periods․ Define activity zones to focus on critical areas, like entry points․ Enable notifications for alerts and set up recording options for detected events․ These adjustments ensure you receive relevant updates without unnecessary interruptions․ Regularly review and refine settings to maintain optimal performance and enhance your home or property’s security․ Customization ensures a balanced and efficient monitoring experience․

Camera Operation and Settings

Master your Wesecuu camera’s functionality through the app, enabling live viewing, recording, and adjusting settings for optimal performance․ Customize preferences to enhance security and usability seamlessly․

4․1 Using the App to Control the Camera

The Wesecuu Security Camera can be easily controlled through its dedicated app, offering a user-friendly interface to manage your security system․ With the app, you can access live video streaming, enabling real-time monitoring of your surroundings․ Key features include motion detection alerts, two-way audio communication, and the ability to record or capture images directly from the feed․ Users can also customize settings, such as adjusting motion sensitivity or scheduling recording times․ The app allows you to rename cameras, check connectivity status, and receive push notifications for any detected activity․ Additionally, you can enable night vision, toggle between HD and standard video quality, and access cloud storage for recorded footage․ This seamless app integration ensures your camera is always ready to provide reliable security monitoring, day or night․

4․2 Adjusting Camera Settings for Optimal Performance

To optimize your Wesecuu Security Camera, navigate to the app’s settings menu․ Here, you can adjust video quality, choosing between HD or standard resolution based on your needs․ Customize motion detection sensitivity to reduce false alerts and ensure accurate notifications․ Enable or disable night vision, depending on your lighting conditions, to enhance visibility in low-light environments․ Additionally, you can configure alert notifications, selecting which events trigger push alerts․ Check the camera’s Wi-Fi signal strength to ensure a stable connection and consider updating the firmware for the latest features and security improvements․ Regularly reviewing and tweaking these settings ensures your camera performs at its best, providing reliable security monitoring around the clock․

Troubleshooting Common Issues

Resolve connectivity problems by restarting your router and camera․ Check Wi-Fi signal strength and ensure 5G compatibility․ For motion detection issues, adjust sensitivity and clear alerts regularly․

5․1 Resolving Connectivity Problems

If your Wesecuu camera loses connection, ensure it is powered on and physically connected to your network․ Restart both the camera and router․ Check Wi-Fi signal strength and switch to a 2․4GHz network if using 5G․ Verify that your router supports the camera’s dual-band capability․ Launch the EseeCloud app, go to settings, and reconfigure the Wi-Fi connection․ If issues persist, reset the camera to factory settings and reconnect․ Ensure firmware is updated․ If problems remain, contact Wesecuu support for further assistance․

5․2 Addressing Motion Detection Alerts

For motion detection issues, check if the feature is enabled in the app․ Open the EseeCloud app, navigate to settings, and ensure motion detection is activated․ Adjust sensitivity levels to reduce false alerts․ Clear any obstructions blocking the camera’s view․ Ensure the camera is positioned correctly to monitor the desired area․ Review alert notifications to verify they are accurate․ If alerts are delayed, check your internet connection․ Update the camera’s firmware to the latest version․ If problems persist, reset the camera and reconfigure motion settings․ For further assistance, refer to the troubleshooting section or contact Wesecuu support․

apc back ups 600 manual

The APC Back-UPS 600 provides reliable battery backup and surge protection for home and office computers‚ ensuring uninterrupted operation during power fluctuations‚ surges‚ and outages.

Overview of the APC Back-UPS 600

The APC Back-UPS 600 is a versatile uninterruptible power supply (UPS) designed to provide reliable battery backup and surge protection for home and small office equipment. It ensures continuous power during outages and protects against voltage fluctuations‚ spikes‚ and surges. Compact and efficient‚ the Back-UPS 600 supports essential devices like computers‚ routers‚ and gaming consoles‚ offering peace of mind with its advanced safety features and user-friendly design.

Key Features and Benefits

The APC Back-UPS 600 offers essential features for power protection‚ including automatic voltage regulation‚ overload protection‚ and a built-in battery backup system. It provides clean power during outages and safeguards devices from damaging surges. The UPS supports multiple outlets‚ ensuring connectivity for critical equipment. Its compact design and user-friendly interface make installation and monitoring straightforward. Enhanced safety features and reliable performance ensure optimal protection for sensitive electronics‚ making it an ideal choice for home and office use.

Installation and Setup

The APC Back-UPS 600 installation involves connecting the device to a power source‚ attaching equipment‚ and configuring settings. Follow the manual for step-by-step guidance to ensure proper setup and functionality.

Step-by-Step Installation Guide

First‚ unbox the APC Back-UPS 600 and place it on a flat surface. Connect the UPS to a nearby power outlet using the provided cord. Next‚ plug your computer and peripherals into the UPS outlets. Ensure the UPS is turned on by pressing the power button. Allow it to charge the battery for at least 4 hours before use. Refer to the manual for specific setup instructions and safety guidelines to ensure optimal performance and protection.

Connecting Equipment to the UPS

To connect equipment to the APC Back-UPS 600‚ identify the correct outlets for your devices. Plug critical devices‚ such as computers‚ into the battery backup outlets for uninterrupted power. Less sensitive devices can be connected to the surge-only outlets. Ensure the UPS is turned on before connecting equipment. Avoid overloading the UPS by staying within its power capacity. Refer to the manual for specific outlet configurations and ensure all connections are secure for optimal protection and performance.

Safety Precautions and Guidelines

Always handle the battery safely‚ avoiding improper disposal or short circuits. Ensure proper installation and avoid overloading the UPS. Follow manual guidelines for safe operation.

General Safety Information

Always read the manual thoroughly before installing or operating the APC Back-UPS 600. Ensure proper grounding to prevent electrical hazards. Avoid exposing the unit to moisture‚ extreme temperatures‚ or physical stress. Never overload the UPS or use damaged cables. Keep children away from the device. Use only original APC replacement parts. Dispose of batteries and packaging responsibly. Follow all local safety regulations and guidelines provided by the manufacturer to ensure safe operation and longevity of the UPS.

Handling the Battery Safely

Handle the APC Back-UPS 600 battery with care to avoid damage. Always wear protective gloves and eyewear when replacing the battery. Ensure the UPS is turned off and disconnected from power before accessing the battery. Avoid short circuits by keeping metal objects away from terminals. Do not dispose of batteries in fire or water. Recycle batteries according to local regulations. Use only APC-recommended replacement batteries to maintain safety and performance. Properly secure the battery to prevent movement during operation.

Understanding the Control Panel

The APC Back-UPS 600 control panel features indicator lights and a power button for monitoring and controlling the UPS. The power button also configures On Battery modes.

Indicator Lights and Their Meanings

The APC Back-UPS 600 features indicator lights that provide real-time status updates. The On Battery light illuminates when the UPS is using battery power‚ ensuring your devices remain powered. The Charge light indicates the battery’s charging status‚ offering peace of mind. These indicators are essential for monitoring the UPS’s operation and troubleshooting issues promptly‚ ensuring your equipment stays protected during power interruptions or surges.

Using the Power Button and Alarm Settings

The Power Button on the APC Back-UPS 600 toggles the unit on and off. Pressing and holding it for three seconds switches between On Battery indicator modes. The alarm alerts you to power issues or low battery. To silence it‚ press the Power Button briefly. For customized notifications‚ configure alarm settings via the PowerChute software. Adjusting these settings ensures personalized alerts‚ minimizing distractions while maintaining equipment protection. Always refer to the manual for detailed configuration guidance.

Troubleshooting Common Issues

Identify power supply problems by checking connections and battery status. Consult the manual for resolving issues like low battery alerts or unexpected shutdowns.

Resolving Power Supply Problems

Power supply issues can often be resolved by checking the UPS connections and ensuring the unit is turned on. Verify that the battery is fully charged and the power cord is securely plugged in. If the UPS does not switch to battery power during an outage‚ check the battery status and connections. For persistent issues‚ consult the manual or contact technical support for advanced troubleshooting. Regular maintenance and updates can help prevent recurring power supply problems.

Addressing Battery and Charging Issues

If the battery fails to charge or the UPS indicates a battery issue‚ ensure the unit is properly plugged in and the power button is on. Check for loose connections and verify the battery health through the indicator lights. If issues persist‚ replace the battery with an APC-approved part‚ such as the BE600M1 replacement battery. Allow the new battery to charge fully before testing. Always dispose of old batteries safely and consult the manual for detailed replacement procedures.

Maintenance and Upkeep

Regularly inspect the UPS connections and ensure the unit is dust-free. Replace the battery with APC-approved parts when necessary and dispose of old batteries properly.

Regular Maintenance Tips

To ensure optimal performance‚ regularly inspect the UPS for dust buildup and clean it with a soft cloth. Check all connections for tightness and integrity. Replace the battery every 3-5 years or when the UPS indicates a weak battery. Avoid extreme temperatures and humidity. Update the UPS firmware if available. Perform self-tests monthly to verify battery health. Refer to the manual for detailed maintenance schedules and procedures to extend the UPS lifespan and reliability.

Replacing the Battery

To replace the battery‚ first disconnect all connected equipment and unplug the UPS from the power source. Open the battery compartment‚ typically located at the rear or bottom. Remove the old battery‚ ensuring no cables are damaged. Insert the new APC-approved battery‚ securing it properly. Reconnect the battery terminals and close the compartment. Plug in the UPS and allow it to charge. Test the UPS with a self-test to ensure proper function. Always use genuine APC replacement batteries for optimal performance and safety.

Battery Management and Performance

The APC Back-UPS 600 ensures efficient battery management through adaptive charging technology‚ optimizing backup performance and extending battery life. It provides real-time monitoring of battery health.

Understanding Battery Backup Capabilities

The APC Back-UPS 600 provides reliable battery backup during power outages or voltage fluctuations. It detects line voltage distortions and switches to battery power automatically. The UPS ensures continuous operation of connected devices‚ such as computers and networking equipment‚ during utility failures. With adaptive charging technology‚ it optimizes battery performance and extends lifespan. The system also prevents overcharging and deep discharges‚ ensuring safe and efficient energy storage. This capability guarantees uninterrupted productivity and data protection during unexpected power interruptions or unstable electrical conditions.

Optimizing Battery Life

To maximize the lifespan of the APC Back-UPS 600 battery‚ ensure proper maintenance and operating conditions. Avoid extreme temperatures‚ as they can degrade battery performance. Regularly charge the battery when not in use and prevent deep discharges. The UPS features adaptive charging technology to prevent overcharging. Replace the battery every 3-5 years or when capacity drops significantly. Store spare batteries in a cool‚ dry place. Always follow the manufacturer’s guidelines for replacement and care to maintain optimal performance and reliability.

Differences from Other UPS Models

The APC Back-UPS 600 is designed for basic power protection‚ unlike the Smart-UPS series‚ which offers advanced monitoring and management capabilities for critical applications.

Comparing Back-UPS with Smart-UPS

The APC Back-UPS 600 is tailored for essential power protection‚ offering battery backup and surge defense‚ while the Smart-UPS series provides advanced features like remote monitoring and higher capacity‚ making it suitable for critical applications requiring precise control and monitoring. The Back-UPS lacks the microprocessor-based management found in Smart-UPS‚ utilizing comparators and logic circuits instead. This distinction makes the Back-UPS ideal for simpler setups‚ whereas Smart-UPS excels in complex‚ high-stakes environments.

Unique Features of the Back-UPS 600

The APC Back-UPS 600 offers essential power protection with its compact design‚ providing battery backup and surge protection for home and office devices. It features automatic voltage regulation to stabilize power and prevent damage from fluctuations. The unit is user-friendly‚ with a simple interface and audible alarms for status updates. Its efficient design ensures reliable performance during outages‚ making it an ideal choice for basic power protection needs without requiring advanced monitoring or complex configurations.

Surge Protection and Voltage Regulation

The APC Back-UPS 600 safeguards devices from power surges and voltage fluctuations‚ ensuring stable power delivery. It automatically adjusts to maintain optimal voltage levels during fluctuations.

How the Back-UPS Protects Against Surges

The APC Back-UPS 600 features advanced surge protection circuitry that detects and diverts voltage spikes‚ preventing damage to connected devices. Its components absorb or block surges‚ ensuring safe power flow. This protection extends to both over-voltage and under-voltage conditions‚ maintaining stable power delivery. The UPS’s design includes filters to minimize electromagnetic interference‚ further safeguarding sensitive electronics. This comprehensive approach ensures reliable protection against various power anomalies‚ preserving equipment functionality and longevity during storms or electrical disturbances.

Adjusting Transfer Voltage Settings

Adjusting transfer voltage settings on the APC Back-UPS 600 ensures optimal performance for sensitive equipment. The UPS allows customization of voltage thresholds to accommodate specific power requirements. By accessing the settings via the control panel or software‚ users can modify under-voltage and over-voltage levels. This prevents unnecessary switching to battery power during minor fluctuations. Proper adjustment enhances system stability and prolongs battery life by reducing unnecessary discharge cycles.

Warranty and Support

The APC Back-UPS 600 comes with a comprehensive warranty and dedicated customer support. Registered users can access online resources‚ troubleshooting guides‚ and technical assistance for optimal performance.

Understanding the Warranty Terms

The APC Back-UPS 600 is backed by a comprehensive warranty program. The standard warranty covers defects in materials and workmanship for a specified period‚ typically two years for the UPS and five years for the battery. Extended warranty options are available for added protection. To ensure coverage‚ users must register their product and adhere to usage guidelines outlined in the manual. Warranty terms exclude damages caused by misuse or unauthorized modifications. For detailed information‚ refer to the official APC warranty documentation or contact their support team.

Accessing Technical Support

APC offers extensive technical support for the Back-UPS 600‚ ensuring users can resolve issues efficiently. Customers can visit the official APC website to access user manuals‚ troubleshooting guides‚ and software updates. Additionally‚ support is available through phone‚ email‚ and live chat. Registered users can also access premium support services‚ including 24/7 assistance. For more complex issues‚ APC recommends contacting certified service providers or utilizing the online knowledge base for detailed solutions and FAQs.

super mario 64 manual

Super Mario 64 revolutionized gaming with its 3D platforming, introducing immersive worlds and precise controls. This manual guides players through Mario’s adventures, ensuring a seamless experience in the Mushroom Kingdom.

1.1 Overview of the Game

Super Mario 64 is a groundbreaking 3D platformer where Mario explores vibrant worlds, collects stars, and rescues Princess Peach from Bowser. The game introduced innovative camera systems, precise analog stick controls, and immersive gameplay. This manual provides essential guidance for mastering Mario’s movements, utilizing power-ups, and navigating the Mushroom Kingdom’s secrets, ensuring players can fully embrace the adventure.

1.2 Importance of the Manual

The manual is essential for understanding Super Mario 64’s mechanics, controls, and secrets. It provides detailed instructions for mastering Mario’s movements, utilizing power-ups, and navigating the Mushroom Kingdom. This guide ensures players of all skill levels can fully explore the game’s innovative features and hidden content, enhancing their overall gaming experience.

Gameplay Mechanics

Super Mario 64 introduced groundbreaking 3D gameplay, innovative camera systems, and precise analog stick controls. It revolutionized platforming with dynamic movement and interactive environments, setting a new standard in gaming.

2.1 Innovative Camera System

Super Mario 64’s camera system was a groundbreaking feature, offering dynamic angles and perspectives. Controlled by the analog stick, it allowed players to view Mario from multiple directions, enhancing exploration and precision. This system adapted to Mario’s movements, providing an immersive experience and setting a new standard for 3D gaming. Its flexibility and responsiveness were crucial in navigating the game’s vast environments.

2.2 3D Platforming and Movement

Super Mario 64 pioneered 3D platforming, introducing precise jumping, diving, and maneuvering in open worlds. Mario’s movement was responsive, allowing players to explore vast environments with ease. The game’s physics and innovative controls created a dynamic experience, making it a breakthrough in 3D gaming. Players could climb, swim, and interact with the environment, enhancing immersion and gameplay depth significantly.

2.3 Role of Analog Stick in Controls

The analog stick in Super Mario 64 was revolutionary, offering precise 360-degree control. It enabled smooth movement, allowing Mario to walk, run, and perform intricate maneuvers. The stick’s sensitivity was key to navigating 3D spaces, making it essential for platforming and exploration. This innovation set a new standard for 3D gaming, enhancing player interaction and immersion significantly in the Mushroom Kingdom.

Controls and Basic Movements

Mario’s movements are controlled using the analog stick for walking, running, and precise platforming. The A button jumps, while B performs attacks. C buttons adjust the camera view, enhancing navigation and combat in 3D environments seamlessly.

3.1 Mastering Mario’s Basic Actions

Mario’s basic actions are essential for navigating the Mushroom Kingdom. Use the analog stick to move, the A button to jump, and the B button to attack. The C buttons control camera angles, aiding in exploration. Precise movement and timing are crucial for overcoming obstacles and defeating enemies effectively in this 3D platforming adventure.

3.2 Advanced Techniques for Precision

Master advanced moves like precision jumping, wall kicks, and slope sliding to navigate challenging terrain. Use the analog stick for subtle movements and camera controls to align jumps perfectly. Techniques like backflips and long jumps require precise timing. Exploit Mario’s momentum for optimal distance and accuracy, ensuring success in tricky sections of the Mushroom Kingdom.

3.3 Combat and Interaction Mechanics

Mario can punch, kick, or jump on enemies to defeat them. Use the analog stick to target enemies precisely. Grabbing and throwing objects or foes adds strategic depth. Interact with NPCs by pressing A near them. Mastering these mechanics is essential for solving puzzles and progressing through levels. The camera system aids in aligning attacks and interactions accurately.

Power-Ups and Items

Power-ups like Super Mushrooms, Fire Flowers, and Stars enhance Mario’s abilities. Collecting these items boosts health, grants fire-throwing powers, or provides invincibility. Special items like coins and keys unlock new areas, aiding progression and exploration in the Mushroom Kingdom.

4.1 Super Mushroom and Its Effects

The Super Mushroom transforms Mario into Super Mario, increasing his size and abilities. He can withstand one additional hit and break certain crates. The mushroom is often found in hidden areas or by breaking crates. Collecting it enhances Mario’s power, allowing him to access previously unreachable areas. Losing a life or falling into a pit causes Mario to lose the mushroom.

4.2 Fire Flower and Star Power-Ups

The Fire Flower grants Mario the ability to throw fireballs, enhancing his offensive capabilities. The Star Power-Up provides temporary invincibility and allows Mario to defeat enemies effortlessly. Both power-ups are strategically placed in levels, aiding Mario in overcoming challenges and defeating tougher foes. Collecting these power-ups is crucial for progressing through the game effectively.

4.4 Special Items and Their Uses

Special items in Super Mario 64 include Yoshi’s Eggs and the Silver Stars. Yoshi’s Eggs allow Mario to summon Yoshi, granting access to new abilities. Silver Stars are hidden collectibles that reveal secret paths or enhance Mario’s powers. These items are crucial for unlocking hidden areas and achieving 100% completion in the game.

Level Guides and Secrets

Navigate the Mushroom Kingdom with precision, uncover hidden stars, and discover secret areas. Strategies include exploiting camera angles and utilizing power-ups to access concealed paths and rewards.

5.1 Navigating the Mushroom Kingdom

Explore the vast Mushroom Kingdom by following paths, crossing bridges, and utilizing rotating platforms. Discover hidden areas by jumping over fences and interacting with objects. Use power-ups strategically to access hard-to-reach locations. Pay attention to camera angles for better navigation and uncover secrets hidden throughout the kingdom.

5.2 Hidden Stars and Secret Areas

Discover hidden stars near bridges, rotating platforms, and secret areas like the Chain Chomp zones. Explore off-path locations, break crates, and use power-ups to reveal concealed stars. Some areas require precise jumps or interactions with specific objects to unlock hidden treasures and progress through the game.

5.3 Strategies for Completing Levels

Mastering levels requires exploring thoroughly, using power-ups wisely, and exploiting game mechanics. Learn optimal paths for star collection, avoid pitfalls like bottomless pits, and utilize analog stick precision for tricky jumps. Practice advanced techniques to overcome challenges and efficiently navigate each world in the Mushroom Kingdom.

Tips and Tricks

Explore thoroughly, use power-ups strategically, and master precise jumps. Exploit camera angles for better navigation and avoid common pitfalls to optimize your gameplay experience effectively always.

6.1 Optimizing Star Collection

To efficiently collect stars, explore each level thoroughly, utilizing power-ups like the Super Mushroom and Fire Flower. Master precise jumps and camera manipulation to locate hidden stars quickly. Focus on completing specific objectives and exploring secret areas, as this often reveals additional stars, enhancing your progress and unlocking new levels effectively always.

6.2 Avoiding Common Pitfalls

Avoid falling into pits or lava by precise platforming. Use power-ups to protect against enemy attacks. Adjust the camera frequently to maintain visibility. Don’t overjump or misjudge distances. Explore carefully to prevent unintended falls. Learn enemy patterns to avoid unnecessary damage. Practice precise movements to reduce errors. Mastering these strategies will help you navigate challenges more effectively and minimize setbacks during gameplay always.

6.3 Exploiting Game Mechanics

Exploit Mario’s movement physics for advanced tricks. Use backtracking to collect stars out of order. Clipping through walls reveals hidden paths. Precise analog stick control enables glitchy jumps. Manipulate enemy AI to access restricted areas. Sequence breaking allows early progression. These techniques require practice but offer shortcuts and unique gameplay experiences, enhancing exploration and challenge completion creatively in Super Mario 64.

History and Legacy

Super Mario 64, released in 1996 by Nintendo EAD, revolutionized 3D gaming and set a new standard for platformers, influencing countless games and earning its place in gaming history.

7.1 Development and Impact

Developed by Nintendo EAD, Super Mario 64 was a groundbreaking title released in 1996, revolutionizing 3D gaming. Its innovative camera system and precise controls set new industry standards. The game’s success stemmed from its immersive 3D world, marking a pivotal moment in gaming history and influencing countless platformers. Its impact remains evident in modern games, solidifying its legacy as a pioneer in 3D gaming.

7.2 Influence on 3D Gaming

Super Mario 64 pioneered 3D gaming, introducing immersive worlds and dynamic camera systems. Its revolutionary mechanics, like analog stick controls, set a benchmark for 3D platformers. The game’s success inspired countless developers, shaping the future of 3D game design and solidifying its role as a cornerstone of modern gaming innovation and creativity.

7.3 Cultural Significance

Super Mario 64 became a cultural phenomenon, defining 3D gaming and inspiring countless players. Its iconic music, memorable levels, and innovative design embedded it in gaming history. The game fostered a vibrant community, with speedrunning and mods keeping it relevant. It remains a nostalgic symbol of gaming’s evolution, celebrated for its timeless charm and enduring influence on pop culture.

Super Mario 64 remains a timeless classic, shaping 3D gaming and inspiring generations. Its legacy continues to captivate players, ensuring Mario’s adventures stay forever iconic and endlessly enjoyable.

8.1 Final Thoughts on Mastering the Game

Super Mario 64 is a timeless classic that rewards precision and curiosity. Completing every star and secret offers immense satisfaction, showcasing the game’s enduring charm; Remember to utilize power-ups like mushrooms and fire flowers strategically. Explore thoroughly, as hidden paths often lead to unexpected rewards. Mario’s adventures in 3D set a new standard, inspiring future games and leaving a lasting legacy that continues to captivate players of all ages.

8.2 Encouragement for Further Exploration

Super Mario 64 invites players to embrace curiosity and creativity. Every nook of the Mushroom Kingdom holds surprises, from hidden stars to secret paths. Experiment with Mario’s movements and power-ups to uncover all the game has to offer. The joy of discovery is timeless, making this classic a treasure trove for both newcomers and veterans alike.

manual jeep grand cherokee 2012

The 2012 Jeep Grand Cherokee Manual provides comprehensive guidance on operation, maintenance, and troubleshooting. It covers essential features, driving tips, and care routines for optimal vehicle performance and longevity.

Importance of Manual Transmission in the 2012 Model

The 2012 Jeep Grand Cherokee with a manual transmission offers enhanced driver control and fuel efficiency. It appeals to enthusiasts who prefer a more engaging driving experience. As one of the last manufacturers to retain manual options, Jeep caters to purists. The diesel variant’s drivability and efficiency make it a sought-after choice, with fewer used models available due to high demand. Manual transmissions provide better off-road traction control, a key feature for adventurous drivers. This traditional setup ensures a direct connection to the vehicle, making it a standout option for those prioritizing performance and precision behind the wheel.

Diesel Variants and Performance

The 2012 Jeep Grand Cherokee diesel variant delivers exceptional efficiency and drivability, making it a favored choice. Its performance ensures lower emissions and higher torque for improved off-road capability.

Fuel Efficiency and Drivability of Diesel Models

The 2012 Jeep Grand Cherokee diesel models are renowned for their impressive fuel efficiency, offering lower consumption rates compared to petrol variants. This makes them a practical choice for long-distance driving and off-road adventures. The diesel engine’s higher torque output ensures smoother acceleration and better towing capacity, enhancing overall drivability. Owners often praise the diesel models for their refined performance and reduced emissions, making them eco-friendly while maintaining the rugged capability Jeep is known for. Their popularity is evident, as used diesel variants are less commonly found for sale due to their reliability and efficiency.

Coolant Maintenance and Issues

Regular coolant level checks are vital to avoid engine damage. Identifying leaks early ensures the 2012 Jeep Grand Cherokee runs smoothly and lasts longer with proper maintenance and care.

Monitoring Coolant Levels and Preventing Leaks

Regularly inspect the coolant reservoir to ensure levels are between the minimum and maximum marks. Look for signs of leaks, such as green or yellow fluid under the vehicle. Always use the recommended coolant type to maintain proper chemical balance. Check hoses and belts for cracks or damage. If the coolant level drops unexpectedly, inspect the system for leaks promptly. Avoid overheating by monitoring the temperature gauge during driving. Addressing these issues early prevents engine damage and ensures reliable performance. Schedule periodic coolant flushes as per the manual to maintain optimal cooling system health and longevity.

OBD-II Codes and Diagnostics

The 2012 Jeep Grand Cherokee features an advanced OBD-II system for diagnosing engine and emissions issues. This system generates specific codes when a problem is detected, such as P0300 for a random cylinder misfire or P0171 for a lean fuel mixture. Owners can retrieve codes using an OBD-II scanner or by following the manual procedure in the owner’s manual. Regular diagnostics help identify issues early, preventing costly repairs. If the “Check Engine” light illuminates, addressing the code promptly is crucial to avoid further damage. Use a compatible scanner to read and clear codes, and consult a professional if issues persist.

Maintenance Tips for Optimal Performance

Regular fluid checks, tire pressure monitoring, and filter replacements are essential for the 2012 Jeep Grand Cherokee. Follow the recommended service schedule to ensure reliability and performance.

Regular Service Schedule and Checks

Adhering to the 2012 Jeep Grand Cherokee Manual’s service schedule is crucial for maintaining performance and reliability. Regular oil changes every 5,000 to 7,500 miles, tire rotations, and fluid checks are essential. The manual recommends annual inspections of hoses, belts, and brakes to prevent unexpected issues. Ensuring proper coolant levels and monitoring for leaks can avoid overheating problems. Additionally, scheduling periodic inspections of the 4×4 system and traction control ensures optimal off-road capabilities. By following the outlined maintenance routine, owners can extend the vehicle’s lifespan, prevent costly repairs, and maintain its robust performance both on and off the road.

Buying Guide for the 2012 Jeep Grand Cherokee

When purchasing a 2012 Jeep Grand Cherokee, ensure to check the vehicle’s service history, engine condition, and coolant system. Inspect for any signs of leaks or damage; Use OBD-II diagnostics to identify potential issues. Test drive to assess drivability and performance, especially in 4×4 mode. Verify all safety features are functional and review maintenance records for consistency; A pre-purchase inspection by a mechanic is highly recommended to ensure a reliable buy.

Checklist for Purchasing a Used Vehicle

When buying a used 2012 Jeep Grand Cherokee, start by verifying the vehicle’s service history and maintenance records. Check for any signs of damage or wear on the exterior and interior. Inspect the engine for leaks or unusual noises, and ensure the coolant system is functioning properly. Use an OBD-II scanner to identify any trouble codes. Test drive the vehicle to assess its performance, especially in 4×4 mode. Review the vehicle’s title and history report for any accidents or major repairs. Finally, consider hiring a mechanic for a pre-purchase inspection to ensure the vehicle is in good condition.

Safety Features and Technologies

The 2012 Jeep Grand Cherokee is equipped with advanced safety features, including electronic stability control, multiple airbags, and anti-lock brakes. These technologies enhance protection and driver control.

Advanced Safety Technology in the 2012 Model

The 2012 Jeep Grand Cherokee features cutting-edge safety technologies, including electronic stability control, anti-lock brakes, and a robust airbag system. These systems work together to enhance driver confidence and passenger protection. The vehicle also includes advanced features like Trailer Sway Control and Hill Start Assist, which improve stability during towing and incline driving. Additionally, the Jeep offers optional technologies such as adaptive cruise control and blind-spot monitoring, further elevating its safety profile. These innovations ensure the Grand Cherokee stands out as a secure and reliable choice for both on-road and off-road adventures.

Off-Road Capabilities and Features

The 2012 Jeep Grand Cherokee excels off-road with its robust 4×4 system, high ground clearance, and excellent approach/departure angles. Traction control and advanced suspension ensure superior grip and stability.

4×4 System and Traction Control

The 2012 Jeep Grand Cherokee features a sophisticated 4×4 system designed for exceptional off-road performance. The Quadra-Trac II system includes a two-speed transfer case and automatic torque distribution. Traction control enhances stability by limiting wheel slippage, ensuring maximum grip on uneven terrain. Drivers can engage different modes, such as low-range for extreme conditions, while the system adapts seamlessly to varying surfaces. This advanced setup, combined with the Selec-Terrain feature, allows customization for snow, sand, or rock environments. The result is unparalleled off-road capability, making the Grand Cherokee a leader in its class for versatility and reliability in challenging landscapes.

Troubleshooting Common Issues

Identify issues using OBD-II diagnostics and manual checks. Address common problems like coolant leaks or error codes promptly to ensure reliability and prevent further damage.

Identifying and Addressing Frequently Encountered Problems

Common issues with the 2012 Jeep Grand Cherokee include coolant leaks, OBD-II error codes, and manual transmission quirks. Regular inspections can help identify these problems early. The manual provides steps to diagnose issues using OBD-II diagnostics, such as checking MIL (Malfunction Indicator Lamp) codes. Coolant leaks often occur near hoses or radiators, requiring immediate attention to prevent engine damage. For manual transmissions, irregular shifting or noises may indicate clutch or gear wear. Addressing these problems promptly ensures reliable performance and avoids costly repairs. Always refer to the manual for specific troubleshooting guides and maintenance schedules.

Environmental Impact and Eco-Friendly Aspects

The 2012 Jeep Grand Cherokee features diesel variants that offer improved fuel efficiency and reduced emissions, making it a more eco-friendly option compared to older models.

Fuel Efficiency and Emissions Reduction

The 2012 Jeep Grand Cherokee showcases advancements in fuel efficiency and emissions reduction, particularly with its diesel variants. These models deliver improved mileage compared to previous years, making them more eco-friendly. The diesel engine’s superior combustion efficiency results in lower emissions, aligning with environmental standards. Additionally, the vehicle’s optimized drivetrain contributes to reduced fuel consumption without compromising performance. These enhancements make the 2012 Grand Cherokee a more sustainable choice for drivers seeking a balance between power and environmental responsibility. Regular maintenance, as outlined in the manual, further ensures optimal fuel efficiency and minimized emissions.

octatrack manual

Welcome to the Elektron Octatrack MKII user manual, your comprehensive guide to unlocking the full potential of this powerful performance sampler and sequencer. This manual covers setup, navigation, advanced features, and troubleshooting, ensuring you master every aspect of the device.

1.1 Overview of the Octatrack MKII

The Elektron Octatrack MKII is a dynamic performance sampler and sequencer designed for real-time audio manipulation, sampling, and remixing. It builds on the legacy of the original Octatrack, offering enhanced features and improved workflows. With its hierarchical structure, the device allows users to organize and manage samples, patterns, and scenes efficiently. Its flexibility makes it an industry standard for live performers and electronic musicians, providing unparalleled control over audio.

Key features include the Parameter Lock automation system, advanced sampling capabilities, and seamless integration with other Elektron devices. The MKII version introduces refinements to the interface and functionality, solidifying its reputation as a powerful tool for creative music production and live performances.

1.2 Importance of the Manual for Optimal Usage

The Octatrack MKII manual is essential for understanding and maximizing the device’s capabilities. It provides in-depth guidance on navigating the interface, configuring settings, and utilizing advanced features like the Parameter Lock system. Without the manual, users may overlook critical functions or struggle with troubleshooting common issues.

The manual also serves as a reference for optimal workflow, helping users avoid mistakes and ensure smooth operation during live performances or studio sessions. By following the manual, musicians can fully harness the Octatrack MKII’s potential, achieving professional-level results in their creative endeavors.

Structure of the Octatrack MKII

The Octatrack MKII is organized hierarchically, featuring a clear structure with Sets, Banks, Patterns, Scenes, and Tracks. This design ensures flexibility and scalability for diverse applications.

2.1 Hierarchical Organization of the Device

The Octatrack MKII is structured hierarchically, starting with Sets at the top. A Set contains multiple Banks, each holding Patterns and Scenes. This organization allows efficient navigation and management of complex projects. Patterns serve as the core of your musical ideas, while Scenes enable dynamic transitions and live arrangement. Tracks handle individual audio and MIDI data, providing a clear workflow. This layered system ensures intuitive access to all functionalities, making it easy to create and perform with precision and creativity.

2.2 Key Components: Sets, Banks, Patterns, and Scenes

The Octatrack MKII is built around a logical structure of core elements. Sets are the highest level, containing Banks that organize Patterns and Scenes. Patterns are the building blocks for your musical ideas, while Scenes allow for flexible arrangement and live performance. Banks provide a way to group related Patterns, and Sets offer a high-level view of your entire project. This modular design ensures efficient workflow, making it easy to navigate and manage complex compositions. Understanding these components is essential for maximizing the device’s creative potential;

Suggested Applications of the Octatrack MKII

The Octatrack MKII excels as a performance sampler, ideal for live shows, real-time sampling, and audio manipulation. It’s perfect for producers, DJs, and sound designers, enabling versatile creativity in music production and live performances.

3.1 Using the Octatrack as a Looper Device

The Octatrack MKII is a powerful looper device, perfect for real-time audio manipulation. It allows seamless sampling, looping, and rearranging of sounds, making it ideal for live performances and remixing. With its intuitive interface and advanced features like parameter locking, you can create dynamic loops and layers. Whether you’re a DJ or electronic musician, the Octatrack MKII offers endless possibilities for transforming your sounds into engaging live sets with precision and creativity.

Key Features and Functionality

The Octatrack MKII offers advanced sampling, real-time audio manipulation, and powerful sequencing capabilities, with features like parameter locking and flexible scene management for dynamic performances and production.

4.1 Parameter Lock Automation System

The Parameter Lock Automation System on the Octatrack MKII enables precise control over parameter changes, allowing users to automate adjustments across patterns. This feature is ideal for creating dynamic, evolving sounds and performances. By locking parameters to specific steps, you can design intricate textures and transitions effortlessly. The system also supports visual feedback, making it easier to track automation changes. This powerful tool enhances creativity and streamlines workflow, making it a standout feature for live performers and producers aiming to push the boundaries of their music production.

Technical Specifications and Safety Information

The Octatrack MKII operates with a PSU-2b power supply, handling 100-240 VAC, 50/60Hz. It complies with FCC Part 15 and includes essential safety guidelines to prevent damage.

5.1 Electrical Specifications and Safety Instructions

The Octatrack MKII requires a PSU-2b power supply, supporting 100-240 VAC at 50/60Hz. Ensure the device is used in a well-ventilated area, avoiding direct sunlight or moisture. Never touch electrical components with wet hands or while standing on conductive surfaces. Use only the provided PSU-2b to prevent damage. Keep the device away from children and flammable materials. Follow all safety guidelines to avoid hazards and maintain optimal performance. Compliance with FCC Part 15 ensures reliable operation under specified conditions.

Best Practices for Using the Octatrack MKII

Organize your projects efficiently, back up data regularly, and use high-quality cables for optimal performance. Consult the manual for troubleshooting and to explore advanced features effectively.

6.1 Tips for Live Performance and Sampling

For seamless live performances, organize your sets into clear hierarchies and utilize scene and pattern navigation to maintain flow. When sampling, import high-quality audio and organize samples into banks for easy access. Use the Parameter Lock system to create dynamic variations during performances. Regularly back up your projects and samples to avoid data loss. Experiment with real-time manipulation features to enhance your creative process. These practices ensure reliability and maximize the Octatrack MKII’s potential as a performance sampler.

Troubleshooting Common Issues

Troubleshooting common issues with the Octatrack MKII often involves checking power connections and ensuring the PSU-2b is correctly rated for your region. Resetting audio settings or restarting the device can resolve software glitches. Always refer to the manual for detailed solutions to maintain optimal performance and address technical problems effectively.

7.1 Solving Technical Glitches and Performance Problems

Common issues with the Octatrack MKII include power supply problems, software glitches, and audio synchronization errors. To resolve these, ensure the PSU-2b is correctly connected and matches your region’s voltage. Restarting the device often fixes temporary software bugs. For persistent issues, update the firmware or reset to factory settings. Always check audio cable connections for stability. If problems persist, consult the troubleshooting section in the manual or contact Elektron support for professional assistance. Regular maintenance and updates are key to maintaining peak performance and reliability.

Accessing the Full Manual and Additional Resources

The full Octatrack MKII manual is available for download from Elektron’s official website. Additional guides, tutorials, and troubleshooting resources can also be found on their support page.

8.1 Downloading the Official User Manual

To download the official Elektron Octatrack MKII user manual, visit the Elektron website and navigate to the support section. The manual is available as a free PDF download, providing detailed information on device operation, features, and troubleshooting. Ensure you select the correct version (e.g., OS 1.40A) for your firmware. The manual covers everything from basic setup to advanced techniques, helping you maximize the Octatrack’s performance capabilities. Additional resources, such as quick start guides and Merlin’s in-depth tips, are also recommended for enhanced understanding.

8.2 Recommended Guides and Tutorials

Supplement your learning with Elektron’s official guides and community resources. Merlin’s in-depth guide offers expert tips for mastering the Octatrack MKII. Cuckoo’s tutorials provide step-by-step instruction for beginners. Explore the Elektron forums for user-generated tips and tricks. Additionally, YouTube channels like Cuckoo and Looping Manual offer hands-on demonstrations. These resources complement the official manual, helping you explore advanced techniques, optimize workflows, and unlock the device’s full creative potential. Visit the Elektron website or forums for direct links to these valuable materials.

seiki tv owners manual

Welcome to the Seiki TV Owner’s Manual․ This guide helps you understand your TV’s features, setup, and maintenance․ Explore troubleshooting, settings, and more to enhance your viewing experience․

1․1 Understanding the Importance of the Owner’s Manual

Understanding your Seiki TV’s owner’s manual is crucial for safe operation, proper setup, and troubleshooting common problems․ It guides you through initial configuration, picture and sound optimization, and effective maintenance tips, ensuring you get the most out of your TV while preventing potential issues and enhancing your viewing experience for optimal performance․

1․2 Overview of Seiki TV Models and Their Manuals

Seiki offers a range of TV models, each with unique features such as LED, UHD, and Smart TV capabilities․ Their manuals provide detailed instructions tailored to specific models, ensuring users can navigate setup, settings, and troubleshooting with ease․ Whether you own a 4K model or a standard LED TV, the manual is your guide․

Seiki TV Components and Accessories

Seiki TV components and accessories are essential for optimal performance․ This section introduces key parts, remote controls, and cables, ensuring proper setup and functionality․ Refer to your manual for details․

2․1 Identifying Key Parts of Your Seiki TV

Identify your Seiki TV’s essential components, such as the screen, tuner, and internal processors․ Familiarize yourself with ports like HDMI and USB for connectivity․ Understanding these parts aids in proper setup, troubleshooting, and optimal use․ Refer to your manual for a detailed list and descriptions․

2․2 Remote Control Functions and Layout

Understand your Seiki TV remote control’s functions and layout․ Key buttons include power, navigation, volume, channel, and smart features․ The remote’s ergonomic design ensures ease of use․ Refer to your manual for detailed button descriptions and customize settings for a personalized viewing experience․

2․3 Cables and Connections: HDMI, USB, and More

Seiki TVs support various connections, including HDMI for high-definition video and audio, USB for external devices, and more․ Use compatible cables to ensure optimal performance․ Connect gaming consoles, Blu-ray players, or soundbars via HDMI․ USB ports allow media playback and firmware updates․ Always use high-quality cables for the best viewing experience․

Setting Up Your Seiki TV

Start by unboxing and placing your TV on a stable surface․ Connect the power cord and turn it on․ Follow on-screen instructions for initial setup, including language, Wi-Fi, and channel tuning․ Ensure all cables are securely connected for optimal performance․

3․1 Unboxing and Physical Installation

Carefully unbox your Seiki TV, ensuring all components are included and undamaged․ Handle the screen by the edges to avoid damage․ Place the TV on a stable, flat surface, such as a table or wall mount․ Connect the power cord and other cables securely․ Ensure proper ventilation to prevent overheating․

3․2 Initial Setup and First-Time Configuration

Turn on your Seiki TV and follow the on-screen instructions to complete the initial setup․ Select your language, connect to Wi-Fi, and configure basic settings․ Use the remote control to navigate through the menu․ Ensure all software updates are installed for optimal performance․ Refer to the manual for detailed guidance․

3;3 Connecting External Devices: Blu-ray, Gaming Consoles, etc․

Connect external devices like Blu-ray players or gaming consoles using HDMI cables for high-quality output․ Ensure the TV is turned on and select the correct HDMI input․ Refer to the manual for specific port locations and compatibility․ Use the remote to configure settings for optimal performance and seamless connectivity․

Navigating the Seiki TV Menu

Use the remote to access the main menu, offering options for picture, sound, and system settings․ Navigate through categories using arrow keys and confirm selections with OK․

4․1 Accessing and Understanding the Menu Options

Press the Menu button on your remote to access the main menu․ Navigate using arrow keys and select options with OK․ Explore categories like Picture, Sound, and System to customize settings․ Sub-menus provide detailed adjustments for brightness, audio outputs, and more, ensuring optimal viewing experiences․

4․2 Customizing Picture and Sound Settings

Use the remote to access Picture Settings and adjust options like brightness, contrast, and color․ Select Sound Settings to tweak equalizer, volume, and audio outputs․ Experiment with presets or manual adjustments to optimize visuals and audio for movies, games, or music, enhancing your entertainment experience․

4․3 Exploring Smart TV Features and Apps

Welcome to your Seiki TV’s Smart TV interface․ Discover a world of entertainment by accessing the app store to download popular streaming services․ Navigate seamlessly through menus, customize your home screen, and enjoy features like voice search and multi-device control for a personalized viewing experience․

Picture and Sound Settings

Customize your Seiki TV’s visual and audio settings to enhance your viewing experience․ Adjust picture quality, optimize sound output, and tailor settings to suit your preferences․

5․1 Adjusting Picture Quality: Brightness, Contrast, and Color

Adjust brightness, contrast, and color settings to optimize your viewing experience․ Brightness controls light levels, contrast balances dark and light areas, and color enhances vibrancy․ Use these settings to customize the picture based on room lighting and content type for the best visual clarity and enjoyment․

5․2 Sound Settings: Equalizer, Volume Control, and Audio Outputs

Customize your audio experience with the equalizer, volume control, and audio outputs․ Adjust frequency levels for balanced sound, control volume for optimal listening, and connect external speakers or sound systems via HDMI or optical outputs for enhanced audio quality and immersive entertainment․

5․3 Optimizing Settings for Different Viewing Scenarios

Adjust settings for movies, sports, or gaming by tweaking brightness, contrast, and color accuracy․ Enable motion smoothing for sports and fast-paced content․ Use surround sound for movies and clear dialogue settings for shows․ Tailor settings to enhance your viewing experience based on content type and personal preference for optimal picture and sound quality․

Troubleshooting Common Issues

Resolve connectivity, picture, or sound problems by checking cables, restarting the TV, or updating software․ Refer to the manual for detailed solutions to common issues․

6․1 Resolving Connectivity Problems

Check all HDMI and cable connections for secure links․ Restart your TV and devices to reset connections․ Ensure correct HDMI ports are used and update firmware if necessary․ Consult the manual or visit Seiki’s support site for detailed troubleshooting guides to address specific connectivity issues effectively․

6․2 Fixing Picture or Sound Distortion

Experiencing picture or sound distortion? Check all connections for stability and restart your TV․ Ensure external devices are functioning properly․ Reset to factory settings if needed․ Update firmware and adjust picture/sound settings․ If issues persist, contact Seiki customer support for expert help․

6․3 Addressing Remote Control Malfunctions

If your Seiki TV remote isn’t working, replace the batteries and ensure there’s a clear line of sight to the TV․ Clean the remote’s sensors and check for interference from other devices․ If issues continue, visit ReplacementRemotes․com for genuine Seiki remote controls or contact customer support for further assistance․

Software and Firmware Updates

Regular software and firmware updates enhance your Seiki TV’s performance and security․ Check for updates in the settings menu and install them to access new features and improvements․ Always ensure a stable internet connection during the update process to avoid interruptions․

7․1 Checking for and Installing Updates

To keep your Seiki TV up-to-date, navigate to the Settings menu and select “System” or “Software Update․” Ensure your TV is connected to Wi-Fi, then check for available updates․ If an update is found, download and install it by following on-screen instructions․ Avoid interrupting the process to prevent issues․ After installation, restart your TV to complete the update․

7․2 Understanding the Importance of Firmware Updates

Firmware updates enhance your Seiki TV’s performance, security, and compatibility․ They fix bugs, improve image quality, and add new features․ Regular updates ensure your TV stays compatible with the latest technologies and streaming services․ Installing updates maintains optimal functionality and prevents potential issues, ensuring a seamless viewing experience for years to come․

7․3 Troubleshooting Update-Related Issues

If an update fails, restart your Seiki TV and retry․ Ensure a stable internet connection․ If issues persist, reset your TV to factory settings or contact Seiki support․ Always back up settings before resetting to avoid losing custom configurations․

Safety and Maintenance Tips

Welcome to the Safety and Maintenance Tips section․ Ensure your Seiki TV’s longevity by following cleaning, power management, and overheating prevention guidelines for optimal performance․

8․1 Cleaning the Screen and Exterior

Regular cleaning maintains your Seiki TV’s screen clarity and exterior appearance․ Use a microfiber cloth and distilled water to gently wipe away dust and fingerprints, avoiding circular motions that may cause scratches․ For tougher stains, lightly dampen the cloth but never apply liquids directly to the TV․ Avoid harsh chemicals or abrasive materials that could damage the screen coating․ Regularly cleaning the exterior casing with a soft cloth ensures a pristine look and prevents dust buildup․ Always turn off the TV before cleaning to avoid any accidental damage or smudging․

8․2 Power Management and Energy Efficiency

Proper power management and energy efficiency are crucial for your Seiki TV․ Use features like Energy Saving mode to reduce power consumption․ Disable unnecessary devices when not in use and adjust brightness settings to optimize energy use․ Regularly updating firmware ensures improved energy efficiency and performance․ These practices help lower energy costs and prolong your TV’s lifespan․

8․3 Preventing Overheating and Physical Damage

To prevent overheating, ensure proper airflow around your Seiki TV and avoid blocking ventilation ports․ Place the TV on a stable, flat surface away from direct sunlight․ Avoid extreme temperatures and physical stress․ Clean the screen gently with a soft cloth and avoid touching the display․ Regular maintenance helps prevent damage and ensures optimal performance․

Warranty and Support Information

Understand your warranty coverage and explore support options․ Contact Seiki customer support for assistance or visit authorized service centers․ ReplacementRemotes․com offers Seiki manuals and resources․

9․1 Understanding Your Warranty Coverage

Your Seiki TV warranty provides coverage for manufacturing defects, typically lasting one year․ Register your product to ensure eligibility․ Coverage includes parts and labor but varies by model․ Visit the Seiki support website or consult your manual for detailed terms and conditions․ ReplacementRemotes․com offers additional resources for warranty-related inquiries․

9․2 Contacting Seiki Customer Support

For assistance, visit Seiki’s official website or contact their support team directly․ Use phone, email, or live chat for inquiries․ ReplacementRemotes․com also offers resources for remote controls․ Ensure you have your TV model number ready for efficient support․ Visit ReplacementRemotes․com for additional help․

9․3 Finding Authorized Service Centers

Visit Seiki’s official website to locate authorized service centers near you․ Use the “Support” or “Service Center” section for accurate information․ Ensure your TV model number is ready for quick assistance․ You can also contact customer support for guidance․ Visit ReplacementRemotes․com for additional resources․

Frequently Asked Questions (FAQs)

  1. How do I resolve connectivity issues with my Seiki TV?
  2. Where can I download the latest Seiki TV manual?
  3. What steps should I take if my remote control stops working?

10․1 Common Questions About Seiki TV Setup

How do I connect my Seiki TV to Wi-Fi for the first time?

What are the steps to perform initial setup after unboxing?

Can I pair an external device with the TV during setup?

How do I update the TV’s software during initial configuration?

10․2 Frequently Encountered Issues and Solutions

Issues like screen flickering or no sound are common․ Check HDMI connections and restart the TV․ For Wi-Fi problems, reset your router or update network settings․ If the remote isn’t working, replace batteries or re-pair it․ Ensure firmware is updated to resolve software glitches․

10․3 Tips for Optimizing Your Viewing Experience

Adjust picture settings for different lighting conditions and content types; Calibrate sound settings for your room’s acoustics․ Use high-quality HDMI cables for optimal resolution․ Regularly update firmware for performance improvements․ Clean the screen with a microfiber cloth to avoid glare and maintain clarity․

Additional Resources

Explore online manuals, community forums, and authorized service centers for further assistance․ Visit ReplacementRemotes․com for Seiki TV manuals and remote control solutions․ Enhance your experience with official guides and support․

11․1 Online Manuals and Guides

Access Seiki TV manuals and guides online for easy troubleshooting and setup․ Visit ReplacementRemotes․com for digital manuals and remote codes․ Official Seiki sites and forums provide comprehensive resources, ensuring optimal TV performance and enhanced viewing experiences․

11․2 Seiki TV Community Forums and Support Groups

Join Seiki TV community forums for troubleshooting, tips, and discussions․ Engage with experts and users, share experiences, and find solutions․ These platforms offer valuable insights and real-time support, enhancing your TV ownership experience and connecting you with a knowledgeable community․

11․3 Recommended Accessories for Enhanced Functionality

Enhance your Seiki TV experience with recommended accessories like wall mounts, soundbars, and HDMI cables․ These additions improve functionality, ensuring optimal performance․ Explore compatible options from trusted sources like ReplacementRemotes․com for a seamless and upgraded viewing experience tailored to your needs․

12․1 Summary of Key Points

This manual provides a comprehensive guide to setting up, customizing, and troubleshooting your Seiki TV․ It covers essential features, maintenance tips, and solutions for common issues, ensuring optimal performance and an enhanced viewing experience for all users․

12․2 Final Tips for Getting the Most Out of Your Seiki TV

Regularly update your TV’s software for the latest features․ Adjust brightness and sound settings for optimal viewing․ Use high-quality HDMI cables for clear visuals․ Explore smart TV apps for enhanced entertainment․ Organize your app layout for easy access․ Refer to the manual for troubleshooting common issues and maintaining peak performance․

safety first grow and go car seat manual

The Safety 1st Grow and Go Car Seat Manual is your essential guide to ensuring safe and proper use of the 3-in-1 convertible car seat․ It provides detailed instructions for installation, adjustments, and maintenance, helping parents create a secure and comfortable environment for their child․ By following the manual, you can maximize safety and longevity of the product․

Overview of the Safety 1st Grow and Go Car Seat

The Safety 1st Grow and Go Car Seat is a 3-in-1 convertible car seat designed for children from 5 to 40 pounds in rear-facing mode, up to 65 pounds forward-facing, and up to 100 pounds in booster mode․ It offers a lightweight design, machine-washable covers, and a recline feature for comfort․ The seat is engineered to meet federal safety standards, ensuring protection and longevity․ Its versatility and ease of use make it a practical choice for growing families, with a comprehensive manual guiding proper installation and maintenance․

Importance of Following the Manual for Safe Usage

Following the Safety 1st Grow and Go Car Seat Manual is crucial for ensuring your child’s safety․ Proper installation, adjustment, and maintenance are detailed to prevent injuries or fatalities․ Deviating from instructions can compromise protection․ The manual outlines weight, height limits, and correct modes for different stages․ Regular inspections and adherence to guidelines are vital․ Neglecting these steps can lead to serious risks, making the manual indispensable for safe and effective use of the car seat throughout your child’s growth․

Key Features of the Safety 1st Grow and Go Car Seat

The Safety 1st Grow and Go Car Seat offers a 3-in-1 convertible design, accommodating rear-facing, forward-facing, and booster modes․ It features machine-washable covers for easy maintenance and is designed to be lightweight for convenience․ The seat supports children from 5 to 40 pounds in rear-facing mode, up to 65 pounds forward-facing, and up to 100 pounds in booster mode, ensuring long-lasting use and comfort․

3-in-1 Convertible Design: Rear-Facing, Forward-Facing, and Booster Modes

The Safety 1st Grow and Go Car Seat features a versatile 3-in-1 design, adapting to your child’s growth․ Rear-facing mode supports 5-40 lbs (2․3-18 kg) and 19-40 in (48-101․6 cm), forward-facing for 22-65 lbs (10-29․5 kg) and 29-52 in (74-132․1 cm), and booster mode for 40-100 lbs (18-45 kg) and 38-57 in (96․5-144․8 cm)․ This ensures safe and comfortable seating from infancy through childhood, with easy transitions between modes as your child grows․

Weight and Height Limits for Each Mode

The Safety 1st Grow and Go Car Seat supports children through three modes with specific weight and height limits․ Rear-facing mode accommodates 5-40 lbs (2․3-18 kg) and 19-40 in (48-101․6 cm)․ Forward-facing mode is for 22-65 lbs (10-29․5 kg) and 29-52 in (74-132․1 cm)․ Booster mode is for 40-100 lbs (18-45 kg) and 38-57 in (96․5-144․8 cm)․ These limits ensure proper fit and safety for your child as they grow․

Machine-Washable Covers and Easy Maintenance

The Safety 1st Grow and Go Car Seat features machine-washable covers, making maintenance simple and convenient․ Parents can remove and clean the pads to ensure hygiene and freshness․ The seat’s design allows for easy removal of covers without affecting its structural integrity․ Regular washing helps maintain comfort and longevity․ This feature is particularly useful for busy parents, ensuring the car seat remains clean and comfortable for their child while adhering to safety standards․

Installation and Adjustment Guidelines

The manual provides a step-by-step guide for installing the car seat in rear-facing and forward-facing modes, ensuring proper alignment with vehicle seats and secure adjustments for safety․

Step-by-Step Installation Process for Rear-Facing and Forward-Facing Modes

For rear-facing installation, place the car seat in Position 1, ensuring it is level and flush against the vehicle seat․ Use the base and secure it with LATCH connectors or a seatbelt, tightening until snug․ For forward-facing, switch to Position 2, routing the harness through the correct slot․ Always check vehicle compatibility and refer to the manual for specific guidance․ Ensure the car seat is tightly secured and level for optimal safety․

Adjusting the Recline Position for Proper Fit

To ensure proper fit, adjust the recline position using the recline handle located at the base․ For rear-facing, use Position 1 for newborns and smaller infants․ For forward-facing, switch to Position 2 if necessary․ Always check the level indicator to confirm the seat is properly reclined․ Ensure the car seat is snug against the vehicle seat and level for your child’s safety and comfort․ Refer to the manual for specific recline adjustment instructions based on your child’s size and age․

Securing the Child with the Harness System

Ensure the harness is snug and evenly tightened, with no twisting․ Place the chest clip at armpit level to properly distribute forces․ Buckle the harness and tighten by pulling the shoulder straps․ Check that the fit is secure, avoiding bulky clothing․ Regularly adjust the harness as your child grows, ensuring proper fit and safety․ Always verify that the harness is correctly fastened and tightened to provide optimal protection during travel․

Safety Precautions and Warnings

Failure to follow the manual’s warnings can result in serious injury or death․ Ensure proper usage, regular inspections, and adherence to all safety guidelines provided․

Essential Safety Warnings from the Manual

The manual emphasizes critical safety warnings to ensure your child’s protection․ Failure to follow instructions can lead to serious injury or death․ Always install the car seat correctly, using the vehicle’s LATCH system or seatbelt, and ensure it is securely fastened․ Regularly inspect the seat for damage or wear․ Never use the car seat beyond its expiration date or without proper maintenance․ Adhering to these guidelines is paramount for your child’s safety while traveling․

Consequences of Not Following the Manual Instructions

Failure to follow the manual instructions can lead to serious injury or death to your child․ Improper installation, incorrect harness use, or ignoring weight and height limits can result in inadequate protection during a crash․ Always adhere to the guidelines to ensure maximum safety and effectiveness of the car seat․ Neglecting these critical steps compromises your child’s security and increases the risk of harm in the event of an accident․

Importance of Regular Inspection and Maintenance

Regular inspection and maintenance are crucial to ensure the car seat’s optimal performance and safety․ Check for wear, tear, and damage regularly․ Clean and maintain machine-washable covers as instructed․ Verify that all harnesses and buckles function correctly․ Ensure the expiration date has not passed․ Addressing these steps ensures your child’s continued protection and prolongs the seat’s usability․ Neglecting maintenance can compromise safety and effectiveness, risking your child’s well-being during travel․

Understanding the Manual and Its Components

The Safety 1st Grow and Go manual includes a detailed table of contents, key sections for easy navigation, and model-specific instructions․ It also outlines effective dates and compatibility․

Table of Contents and Key Sections of the Manual

The manual begins with a table of contents, guiding users through sections like installation, maintenance, and safety precautions․ Key sections include detailed instructions for rear-facing, forward-facing, and booster modes, weight limits, and harness adjustments․ Troubleshooting guides address common issues, while model-specific instructions ensure compatibility․ The manual emphasizes regular inspections and adherence to effective dates, ensuring optimal safety and functionality for the Safety 1st Grow and Go car seat․

Effective Date and Manufacture Date Requirements

The manual specifies that the car seat’s manufacture date must be equal to or later than the effective date of the manual․ For example, the effective date for model CC138 is November 8, 2023․ This ensures compliance with the latest safety standards and instructions․ Users must verify this date on their car seat to ensure they are using the most up-to-date guidelines․ This requirement is critical for maintaining safety and adhering to the product’s specifications․

Model-Specific Instructions for CC138 and Other Variants

The manual provides detailed instructions tailored to specific models like CC138EHWH, CC253, and CC302․ For model CC138, the effective date is November 8, 2023, ensuring the manufacture date on the seat matches or exceeds this date․ Each variant may have unique features or adjustments, such as weight limits or harness settings, requiring adherence to model-specific guidelines․ Users should consult their particular model’s manual for accurate instructions, as differences exist between variants․

Troubleshooting Common Issues

The manual addresses common issues like installation difficulties, harness adjustments, and recline position problems․ It provides clear guides for resolving these issues, ensuring proper seat functionality and safety․

Resolving Installation Difficulties

For installation issues, consult the manual for guidance on LATCH system usage and seat belt installation․ Ensure the car seat is securely fastened and properly reclined․ If the seat doesn’t fit flush, adjust the recline position as instructed․ Refer to your vehicle’s manual for compatibility details․ Always verify a snug fit and correct angle to ensure safety․ If problems persist, contact Safety 1st customer support for assistance or additional resources․

Addressing Harness and Buckle Adjustments

Adjust the harness to fit snugly around your child, ensuring the buckle is at hip level․ Tighten straps until snug, avoiding slack․ If needed, move the buckle to the first slot for proper positioning (refer to page 6)․ Regularly inspect the harness and buckle for wear or damage․ Ensure all adjustments are made with the seat in the correct recline position․ Proper fit is crucial for safety, so double-check all connections before each use․

Reclining Position and Seat Compatibility

Ensure the car seat is installed in the correct recline position for your child’s age and weight․ Use Position 1 for rear-facing and semi-reclined Position 2 if necessary for proper installation․ Always check vehicle compatibility and consult your car’s manual for LATCH system locations․ Verify the manufacture date on the seat matches or exceeds the manual’s effective date․ Proper recline ensures a safe fit and prevents airbag interference․ Adjust as needed for optimal safety and comfort․

Additional Resources and Support

Access the Grow and Go Owner Center for comprehensive guides, download the PDF manual, or contact customer support for assistance, ensuring a smooth and safe experience․

Accessing the Grow and Go Car Seat Owner Center

Visit the Grow and Go Car Seat Owner Center for a wealth of resources, including detailed user guides, troubleshooting tips, and FAQs․ To access, go to www․safety1st․com, navigate to the support section, and explore the dedicated portal․ Register your product for updates and download the PDF manual for comprehensive instructions․ For further assistance, contact customer support via phone, email, or text for personalized help, ensuring your car seat is used safely and effectively․

Downloading the PDF Manual for Detailed Instructions

To access the comprehensive PDF manual for the Safety 1st Grow and Go Car Seat, visit the Safety 1st website and navigate to the support section․ Search for your specific model, such as CC138, and download the manual for detailed guidance on installation, maintenance, and troubleshooting․ This resource ensures you have all the information needed to use the car seat safely and effectively․ For further assistance, contact customer support via phone, email, or text․

Contact Information for Customer Support

For assistance with your Safety 1st Grow and Go Car Seat, contact customer support at 1-800-544-1108 (toll-free in the US and Canada)․ You can also reach them via email at supportdjgusa․com or visit their website at www․safety1st․com for additional resources․ For quick help, text 1-812-203-4747 (carrier fees may apply)․ Their team is available to address any questions or concerns about your car seat, ensuring your child’s safety and your peace of mind․