uuni pizza oven instructions

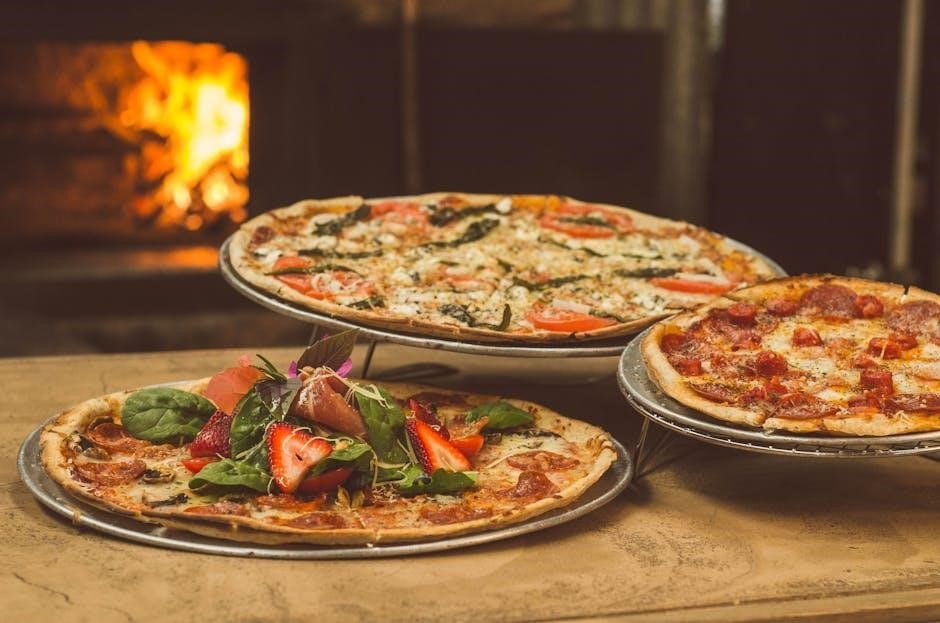
The Uuni pizza oven offers a versatile and efficient way to achieve authentic, high-temperature cooking at home, perfect for crafting delicious Neapolitan-style pizzas quickly and easily.

1.1 What Is a Uuni Pizza Oven?

A Uuni pizza oven is a compact, portable cooking appliance designed for high-temperature pizza making at home. It is engineered to achieve professional-grade results, with quick preheating and cooking times. The oven is typically fueled by propane or wood pellets, allowing users to create authentic, crispy Neapolitan-style pizzas in about 90 seconds. Its sleek design and portability make it ideal for outdoor cooking, offering a fun and efficient way to enjoy homemade pizza with minimal effort.

1.2 Benefits of Using a Uuni Pizza Oven

Using a Uuni pizza oven offers numerous advantages, including quick cooking times, portability, and the ability to achieve professional-grade results at home. Its compact design makes it easy to set up outdoors, while its high-temperature capabilities ensure crispy crusts and well-cooked toppings in just minutes. The oven is also versatile, accommodating various fuel sources like propane or wood pellets, and it requires minimal cleanup. This makes it an ideal choice for pizza enthusiasts seeking convenience, efficiency, and delicious outcomes without the need for a traditional brick oven.

Choosing the Right Uuni Pizza Oven Model

Choosing the right Uuni model depends on your cooking style, space, and preferences. Consider factors like fuel type, size, portability, and additional features to find the perfect fit.

2.1 Key Features of Different Uuni Models

Uuni models vary in size, fuel type, and portability. The Karu model offers gas and wood-fired options, while the Ooni Koda 12 and Koda 16 are gas-powered, offering quick preheating and consistent heat. The Ooni 3 is a compact, portable option, ideal for outdoor use. Each model includes features like ceramic insulation, stainless steel construction, and a pizza stone for crispy crusts. Accessories like pizza peels and brushes enhance the cooking experience, ensuring easy dough handling and cleanup.

2.2 Factors to Consider When Selecting a Model

When choosing a Uuni model, consider your cooking needs, available space, and preferred fuel type. If you prioritize portability and quick setup, the Ooni 3 is ideal. For larger gatherings, the Koda 16 offers ample cooking space. Gas models provide easier temperature control, while wood-fired options deliver a traditional flavor. Budget and desired features like insulation or additional accessories also play a role in selecting the perfect model for your pizza-making experience.

Preparing Ingredients for Uuni Pizza

Use fresh, high-quality ingredients like flavorful tomatoes, mozzarella, and herbs. Prepare dough, sauce, and cheese beforehand for quick assembly, ensuring ingredients are ready when the oven is hot.

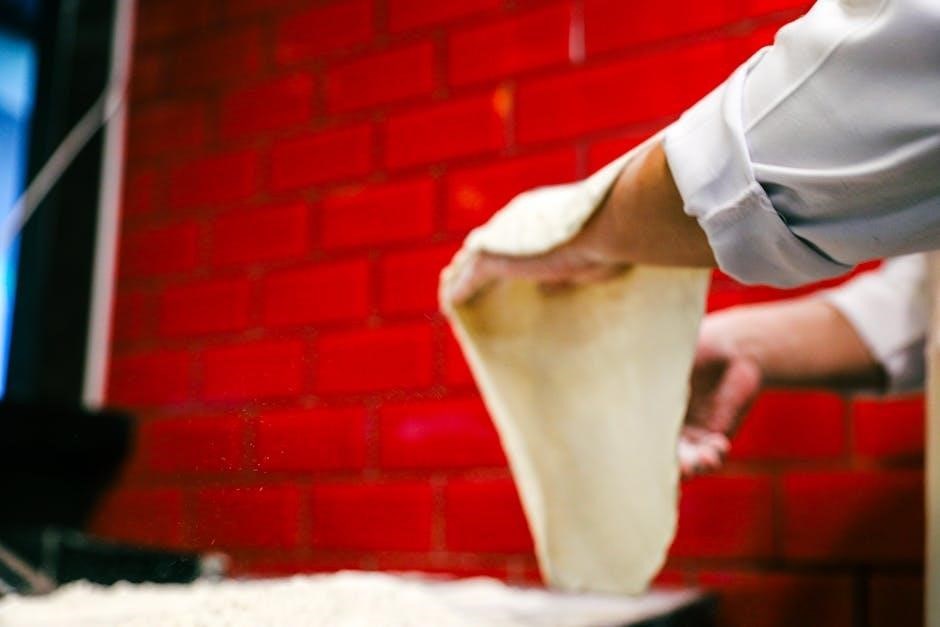
3.1 Making the Perfect Pizza Dough

Making perfect pizza dough requires fresh ingredients and precise techniques. Use high-quality flour, salt, yeast, and water. Mix dough gently, knead thoroughly, and let it proof in a warm, draft-free area. Ensure room temperature is ideal for fermentation, typically around 75°F (24°C), and allow 1-2 hours for the dough to rise. Divide and shape dough into balls for easy handling. Preheat your Uuni oven to 500°F (260°C) for at least 20 minutes before cooking. Proper dough preparation ensures a crispy crust and chewy interior.

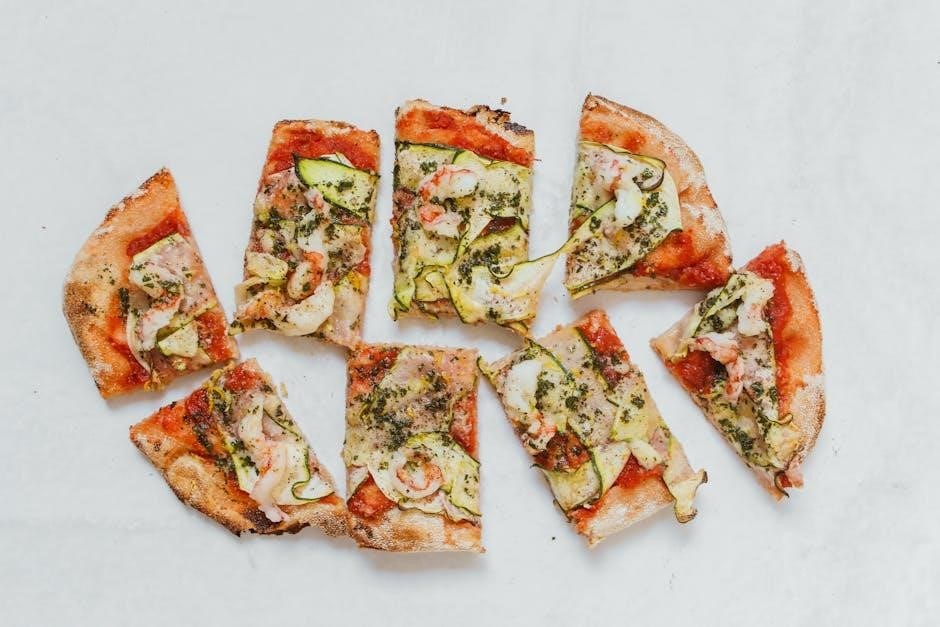
3.2 Selecting the Best Toppings for Your Pizza

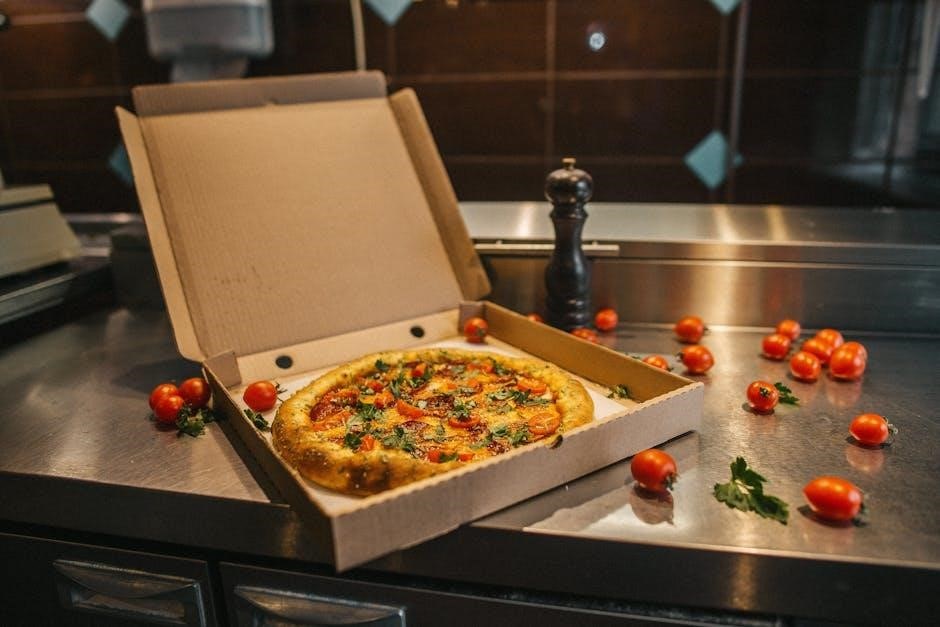
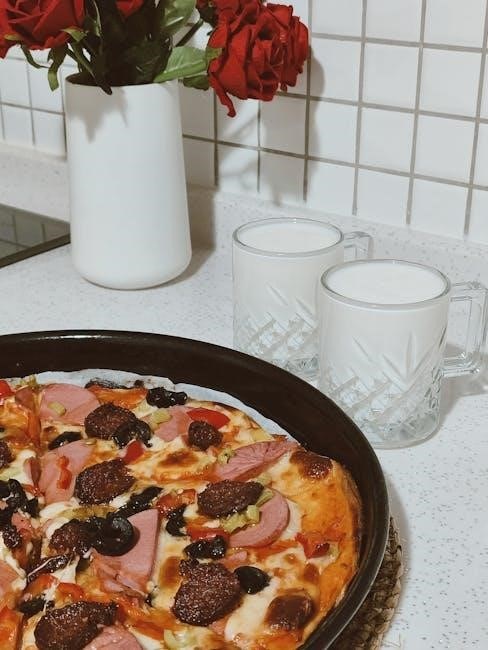
Selecting the best toppings for your pizza is crucial for achieving a flavorful and well-balanced result. Opt for fresh, high-quality ingredients like San Marzano tomatoes, fresh mozzarella, and seasonal vegetables. Classic combinations include prosciutto and arugula or caramelized onions and mushrooms. Avoid overloading the pizza, as this can make the crust soggy. Keep toppings simple and complementary to ensure a harmonious taste experience. Experiment with herbs and spices to enhance flavor without overwhelming the dish.

3.3 Preparing Sauce and Cheese

Preparing the sauce and cheese is essential for a delicious Uuni pizza. Use fresh, high-quality ingredients like San Marzano tomatoes for the sauce, blending with olive oil, garlic, and herbs for flavor. For cheese, mozzarella is ideal due to its melting properties. Fresh mozzarella is recommended, but buffalo mozzarella adds a richer taste. Avoid excessive sauce to prevent sogginess, and balance cheese with toppings for optimal flavor and texture. Preparing these elements ensures a perfect base for your pizza.

Setting Up Your Uuni Pizza Oven

Setting up your Uuni pizza oven involves assembling the components, placing wood pellets or fuel, and ensuring proper ignition using a propane torch for quick startups. Essential steps include lighting the burner, checking ventilation, and arranging the chimney for optimal airflow to achieve high temperatures efficiently.

4.1 Assembling and Preparing the Oven

Assembling your Uuni pizza oven begins with unboxing and attaching essential components like the chimney and burner. Place wood pellets in the burner and use a propane torch to ignite. Ensure proper ventilation by positioning the chimney correctly. Before first use, preheat the oven to burn off any factory coatings. Always follow the manufacturer’s assembly guide for safety and optimal performance. Testing the setup with a small fire ensures everything is functioning correctly. Proper assembly ensures even heat distribution for perfect cooking results.

4.2 Preheating the Oven for Optimal Results

Preheating your Uuni pizza oven is crucial for achieving the perfect cook. Start by lighting the burner and adjusting the flame to reach high temperatures, ideally around 500°F. Use a thermometer to monitor the heat. Allow the oven to preheat for 10-15 minutes until the stone is evenly heated. Proper preheating ensures a crispy crust and evenly cooked toppings. Always maintain good ventilation and keep a safe distance from flammable materials while preheating.

Cooking Pizza in Your Uuni Oven

Cooking pizza in your Uuni oven is quick and rewarding. Preheat to 500°F, load the dough using a peel, and cook for about 90 seconds. Turn for even results.

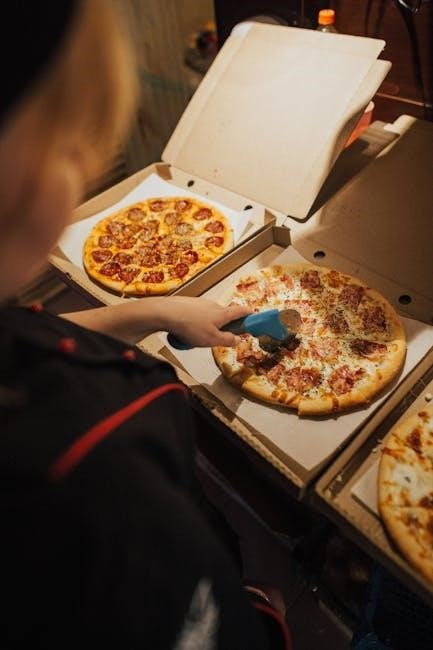
5.1 Loading the Pizza into the Oven

Loading the pizza into the Uuni oven requires precision and care. Preheat the oven to 500°F, ensuring it’s ready for high-temperature cooking. Use a pizza peel or sheet pan to transfer the dough, topped with your desired ingredients. Gently slide the pizza into the oven, positioning it evenly to avoid toppings falling into the flames. Use a long-handled tool to adjust its placement if needed. This ensures even cooking and prevents burning. Proper loading is key to achieving a perfectly cooked crust and evenly distributed toppings.

5.2 Monitoring and Turning the Pizza

Monitor the pizza closely while cooking, as high temperatures can quickly lead to burning. Use a pizza peel or long-handled tool to rotate the pizza every 20-30 seconds, ensuring even cooking. Keep an eye on the crust color and topping distribution. Proper turning prevents hot spots and promotes uniform browning. This step is crucial for achieving a perfectly cooked, Neapolitan-style pizza with a crispy crust and well-cooked toppings.

Safety Tips for Using a Uuni Pizza Oven

Ensure proper ventilation and maintain at least three feet of clearance around the oven. Keep children and flammable materials away to prevent accidents and fires.

6.1 Proper Ventilation and Clearance

Ensuring proper ventilation and clearance is crucial for safe operation. Maintain at least three feet of clearance around the oven on all sides and nine feet above to prevent heat exposure. This reduces fire risks and ensures airflow. Always place the oven on a heat-resistant surface and keep it away from overhead obstructions, such as tree branches or awnings. Proper setup helps protect both people and property while cooking.

Maintenance and Cleaning

Regular maintenance ensures longevity. Clean the oven and accessories after each use to prevent food residue buildup. Always check and replace worn-out components for optimal performance.

7.1 Cleaning the Oven and Accessories

Regular cleaning is essential for maintaining your Uuni pizza oven’s performance and hygiene. Allow the oven to cool completely before cleaning. Use a stiff brush to remove food residue from the stone and surfaces. Wipe down all areas with a damp cloth, avoiding harsh chemicals. Clean removable accessories like the pizza peel and racks separately. After cleaning, ensure all parts are dry to prevent rust. Always check and replace any worn-out components to maintain optimal functionality.

Accessories for Enhanced Cooking

Essential tools like pizza peels, brushes, and turning tools enhance your Uuni pizza-making experience, ensuring efficient dough handling and perfectly cooked crusts every time.

8.1 Essential Tools for Pizza Making

A pizza peel is crucial for transferring dough to the oven, while a brush helps apply sauce or olive oil evenly. A turning tool ensures even cooking, and a dough scraper aids in portioning dough. These accessories streamline the pizza-making process, enhancing both efficiency and results. Invest in high-quality tools to elevate your Uuni pizza oven experience and achieve perfectly cooked crusts every time.

Common Issues and Solutions

Common issues include uneven cooking or crust burning. Solutions involve proper preheating, using a pizza peel, and monitoring the pizza during cooking for consistent results;

9.1 Preventing the Crust from Burning

To prevent the crust from burning, ensure the oven is preheated correctly and maintain consistent temperatures. Use a pizza peel for quick loading, and rotate the pizza midway. Monitor closely, as cooking times are short. Proper dough thickness and balanced toppings also help. Keep ingredients minimal to avoid overloading, which can lead to uneven cooking. Practice makes perfect in achieving the ideal crust texture and color.

Tips for Beginners

Start with a preheated oven and use a gas burner for easier temperature control. Keep dough thin and toppings simple. Practice makes perfect—enjoy the learning process!

10.1 First-Time User Recommendations

For first-time users, start by preheating your Uuni oven to the recommended temperature. Use a pizza peel to transfer dough easily. Keep toppings simple and balanced to avoid overwhelming the pizza. Experiment with short cooking times and monitor the crust closely. Practice controlling the flame to achieve even cooking. Don’t overload the pizza, as this can lead to uneven results. Always use oven mitts for safety and allow the oven to cool before cleaning. Remember, practice makes perfect, so enjoy the process of mastering your Uuni pizza oven!

Advanced Techniques

Master high-temperature cooking by optimizing wood or gas burner settings for precise control. Experiment with advanced dough techniques and ingredient combinations to elevate your pizza-making skills and achieve professional results.

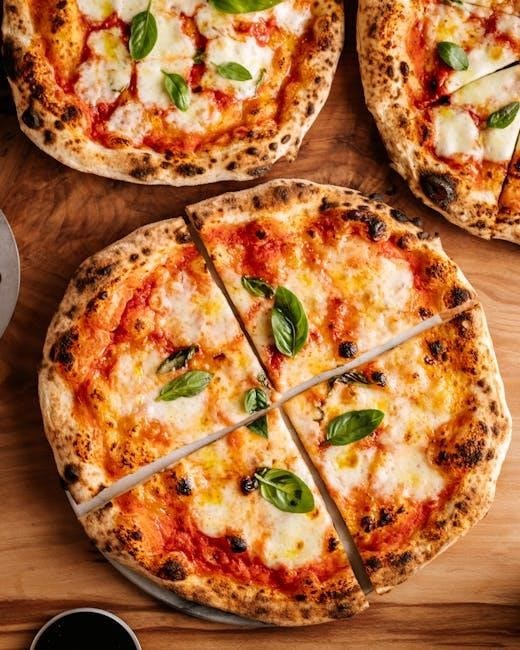
11.1 Achieving Neapolitan-Style Results

To achieve authentic Neapolitan-style pizza, preheat your Uuni oven to 500°F (260°C) and cook for 90 seconds. Use a high-protein flour for a chewy crust, and top sparingly with ingredients like San Marzano tomatoes and fresh mozzarella. Ensure the dough is well-rested and shaped gently to maintain air pockets. A pizza peel is essential for smooth loading and quick turns, enhancing the crust’s char and texture for that classic Neapolitan-style finish.

Comparing Uuni to Other Pizza Ovens

Uuni pizza ovens excel in portability and efficiency, offering quick preheating and cooking times compared to traditional ovens, making them ideal for high-quality, home-cooked pizzas with ease.

12.1 Uuni vs. Traditional Ovens

Uuni pizza ovens surpass traditional ovens in portability, preheating speed, and high-temperature performance. They achieve Neapolitan-style results in minutes, unlike conventional ovens that require longer cooking times and more space. Uuni’s compact design and fuel efficiency make it ideal for outdoor use, offering a unique cooking experience that enhances flavor and texture, setting it apart from standard home ovens.

Mastering your Uuni pizza oven opens up a world of culinary possibilities; This portable, efficient appliance allows you to achieve professional-quality, Neapolitan-style pizzas with ease and precision.

13.1 Mastering Your Uuni Pizza Oven

Mastering your Uuni pizza oven involves understanding its unique capabilities and optimizing your cooking techniques. Achieve perfect results by preheating thoroughly, using the right tools like a pizza peel, and turning pizzas evenly. Experiment with dough recipes and toppings to enhance flavor. Regular cleaning and maintenance ensure longevity. With practice, you’ll unlock the full potential of your Uuni, creating authentic, wood-fired pizzas effortlessly at home. Enjoy the journey of perfecting your craft!

air innovations humidifier instruction manual

Welcome to the Air Innovations humidifier instruction manual. This guide provides essential information to ensure safe and effective use of your humidifier. Learn about setup‚ operation‚ and troubleshooting.

1.1 Purpose of the Manual

This manual is designed to guide users in safely and effectively operating their Air Innovations humidifier. It provides detailed instructions for setup‚ maintenance‚ and troubleshooting. The manual ensures optimal performance by outlining proper usage‚ cleaning‚ and safety precautions. It also covers warranty information and model-specific instructions. By following this guide‚ users can maximize the benefits of their humidifier while minimizing potential risks. Reading this manual thoroughly before use is essential for understanding its features and ensuring longevity. This resource is tailored to help users achieve the best experience with their Air Innovations humidifier.

1.2 Overview of the Air Innovations Humidifier Models

Air Innovations offers a range of humidifier models designed for various needs. The MH-325 is compact and ideal for small spaces‚ while the MH-408 is known for its larger capacity. The MH-519 stands out as a smart humidifier with Wi-Fi connectivity. Each model features advanced ultrasonic technology for silent operation and efficient mist creation. Some models include aroma trays for added convenience. These humidifiers are built with durability and user-friendly designs‚ catering to different preferences and room sizes. They are equipped with modern features to enhance indoor air quality and comfort.

Safety Precautions and Warnings

Always read this manual carefully before use. Keep the humidifier indoors and unplug it before cleaning. Avoid touching water in the base to ensure safe operation.

2.1 General Safety Guidelines

Ensure the humidifier is placed on a flat‚ stable surface away from children and pets. Avoid using it near flammable materials or in areas prone to water damage. Always unplug the unit before cleaning or maintenance. Never touch the water in the base‚ and refrain from filling the tank while the device is operational. Keep the humidifier indoors‚ as outdoor use is strictly prohibited. Follow all manufacturer instructions to prevent accidents and ensure safe operation. Regularly inspect for damage or wear and tear. Adhere to these guidelines for optimal performance and safety.

2.2 Specific Warnings for Outdoor Use

WARNING: Air Innovations humidifiers are designed exclusively for indoor use. Using the device outdoors is strictly prohibited due to potential damage from environmental elements and increased risk of electrical hazards. Avoid exposing the unit to rain‚ moisture‚ or extreme temperatures. Never operate the humidifier near flammable materials or on wet surfaces. Always unplug the unit before moving it to prevent accidents. Failure to comply with these guidelines may void the warranty and pose serious safety risks. Refer to the manual for additional details on safe usage and precautions.

Humidifier Setup and Assembly

Follow the guidelines to assemble your humidifier correctly. Align all components properly and ensure the unit is placed on a flat‚ dry surface. Refer to the manual for detailed steps to complete the setup successfully.

3.1 Unpacking and Identifying Components

Begin by carefully unpacking the humidifier from its box. Ensure all components‚ such as the water tank‚ base unit‚ and power cord‚ are included. Inspect for any visible damage. Refer to the manual for a detailed list of parts. Familiarize yourself with each component’s purpose to ensure proper assembly. If any items are missing or damaged‚ contact customer support immediately. Keep the packaging for future reference or potential returns.

3.2 Step-by-Step Assembly Instructions

Follow these steps to assemble your Air Innovations humidifier properly. First‚ place the base unit on a flat‚ stable surface. Next‚ align the water tank with the base and gently twist until it clicks securely into place. Ensure all components‚ such as the mist outlet and aroma tray‚ are properly aligned. Refer to the diagram in your manual for visual guidance. If your model includes a remote control‚ insert the batteries before use; Double-check that all parts are securely connected to avoid leaks or performance issues. Assembly should be completed before adding water.

Operating Instructions

Learn how to operate your Air Innovations humidifier safely and efficiently. Discover features like ultrasonic technology‚ aroma tray usage‚ and remote control functionality for optimal performance and comfort.

4.1 Filling the Water Tank Safely

Always unplug the humidifier before filling the water tank to ensure safety. Carefully remove the tank and fill it with clean‚ distilled water. Avoid overfilling to prevent leaks. Never fill the tank from the top of the unit‚ as this can cause damage. After filling‚ securely reattach the tank to the base. Ensure all connections are tight to avoid leakage. Regularly check the water level and refill as needed. Keep the area around the humidifier dry to prevent slipping hazards.

4.2 Using Ultrasonic Technology for Instant Humidity

The Air Innovations humidifier utilizes advanced ultrasonic technology to generate a fine mist instantly. This quiet and efficient process ensures optimal humidity levels in your space. To use this feature‚ simply fill the water tank and turn on the device. The ultrasonic waves will create a soothing mist‚ enhancing comfort. For best results‚ use distilled water to minimize mineral buildup. Adjust the settings as needed to maintain your desired humidity level. This technology ensures a silent and effective operation‚ making it ideal for daily use.

4.3 Aroma Tray Usage for Enhanced Experience

The Air Innovations humidifier features an aroma tray designed to enhance your experience. To use it‚ add a few drops of your preferred essential oil to the tray. As the humidifier operates‚ the fragrance will be gently released into the air. This feature promotes relaxation and improves air quality. Ensure the tray is clean and dry before adding oils to prevent buildup. For optimal results‚ use high-quality essential oils and avoid overfilling the tray. Regularly clean the tray to maintain hygiene and performance. This feature adds a luxurious touch to your humidification experience.

Cleaning and Maintenance

Regular cleaning and maintenance are crucial for optimal performance. Clean the water tank and base with water and vinegar to remove mineral buildup and bacteria growth.

5.1 Cleaning the Water Tank and Base

Cleaning the water tank and base regularly is essential to prevent mineral buildup and bacteria growth. Mix 1 cup of white vinegar with 1 gallon of water. Soak the tank for 30 minutes‚ then scrub gently with a soft brush. Rinse thoroughly with clean water to remove any vinegar residue. For the base‚ wipe it down with a damp cloth and dry completely. Repeat this process weekly to maintain hygiene and ensure optimal performance.

Always unplug the humidifier before cleaning and avoid using harsh chemicals‚ as they may damage the unit or leave harmful residues.

5.2 Regular Maintenance to Prevent Mineral Buildup

Regular maintenance is crucial to prevent mineral buildup in your Air Innovations humidifier. Use distilled or demineralized water to reduce mineral deposits. After cleaning‚ dry the unit thoroughly to inhibit bacterial growth. For stubborn buildup‚ soak parts in a mixture of water and white vinegar for 30 minutes. Replace filters as recommended and check for buildup monthly. This routine ensures optimal performance and extends the lifespan of your humidifier.

Troubleshooting Common Issues

Identify and resolve common issues with your Air Innovations humidifier. Address low humidity output‚ unusual noise‚ or leakage by following specific solutions outlined in this section.

6.1 Low Humidity Output Solutions

If your Air Innovations humidifier is producing low humidity‚ check the water level in the tank and ensure it’s filled properly. Clean or replace the filter if clogged. Verify the humidistat setting and adjust it to increase output. Ensure the unit is placed on a flat‚ stable surface away from walls. Check for any blockages in the mist outlet or tubing. For models like MH-325 and MH-408‚ ensure the ultrasonic membrane is free from mineral buildup. Refer to the specific model’s troubleshooting guide for tailored solutions.

6.2 Addressing Noise or Leakage Problems

If your Air Innovations humidifier is noisy or leaking‚ check for loose parts and ensure all components are securely tightened. Verify the water tank is properly aligned and not overfilled‚ as excess water can cause leaks. For noise‚ clean the ultrasonic membrane and ensure it’s free from mineral buildup. For models like MH-408 and MH-519‚ inspect the tubing and mist outlet for blockages. If issues persist‚ refer to the specific model’s manual for detailed troubleshooting steps or contact customer support for assistance.

Warranty and Customer Support

Your Air Innovations humidifier is backed by a comprehensive warranty. Register your product for coverage details. For assistance‚ contact customer support via phone or email‚ or visit their website.

7.1 Warranty Coverage Details

Your Air Innovations humidifier is protected by a limited warranty covering parts and labor for a specified period‚ typically 1-2 years from purchase. Proper registration is required to activate coverage. The warranty addresses manufacturing defects and ensures your humidifier operates as intended. For full details‚ refer to the warranty section in your manual. Always follow guidelines to maintain coverage. Questions? Contact customer support for clarification or assistance.

7.2 Contacting Air Innovations Customer Service

For assistance with your Air Innovations humidifier‚ visit their official website for contact options. You can reach customer service via email‚ phone‚ or live chat. Support is available Monday-Friday‚ 8:30 AM to 5:30 PM EST. When contacting‚ have your model number and purchase date ready for quicker service. Their dedicated team is ready to address any inquiries or concerns‚ ensuring a smooth and satisfying experience with your Air Innovations product.

Model-Specific Instructions

This section provides detailed guidance for specific Air Innovations models‚ ensuring optimal performance and personalized use of your humidifier based on its unique features and design.

8.1 Air Innovations MH-325 Setup Guide

Unpack the MH-325 humidifier carefully and identify all components‚ including the water tank‚ base‚ and power cord. Place the unit on a flat‚ stable surface. Align the water tank with the base‚ ensuring it clicks securely into place. Plug in the device and refer to the manual for specific settings. Ensure all parts are properly assembled before operation. For detailed instructions‚ consult the MH-325 setup diagram in the manual. Proper assembly ensures optimal performance and safety.

8.2 Air Innovations MH-408 Cleaning Tutorial

Unplug the MH-408 humidifier before cleaning. Empty any remaining water from the tank and base. Wash the tank and base with mild soap and warm water. Rinse thoroughly to remove any residue. Use a soft cloth to dry all parts. For mineral buildup‚ soak components in a vinegar solution for 30 minutes. Regular cleaning prevents bacteria growth and ensures efficient operation. After cleaning‚ allow all parts to air dry before reassembling and using the humidifier.

8.3 Air Innovations MH-519 Smart Humidifier Features

The MH-519 features advanced smart technology‚ allowing Wi-Fi connectivity and app control. It includes a large LED display‚ remote control‚ and aromatherapy tray. The humidifier uses ultrasonic technology for silent operation. Built-in sensors monitor humidity levels‚ adjusting automatically for optimal comfort. Programmable timers and multiple mist settings enhance customization. The MH-519 also includes a 360-degree rotating mist nozzle for even coverage. Its sleek design and smart features make it ideal for modern homes‚ ensuring efficient and convenient humidity control with minimal effort required from the user.

talstar p mixing instructions

Talstar P is a concentrated insecticide containing Bifenthrin, effective against various pests. Proper mixing is essential for safe and effective application, ensuring optimal pest control results always.

Safety Guidelines for Mixing Talstar P

Wear NIOSH-approved respirators, gloves, and eye protection. Avoid using household utensils for measuring. Ensure good ventilation and avoid skin contact. Wash thoroughly with soap and water if exposed.

Personal Protective Equipment (PPE) Requirements

When mixing Talstar P, wear a NIOSH-approved respirator with an organic vapor (OV) cartridge or HE prefilter. Use chemical-resistant gloves, long-sleeved shirts, and pants to prevent skin exposure. Protective eyewear, such as goggles or a face shield, is essential to safeguard against splashes. Ensure all PPE meets the manufacturer’s guidelines for pesticide handling. Avoid using household utensils for measuring Talstar P to prevent contamination. After mixing, wash PPE thoroughly with detergent and hot water. If specific cleaning instructions are unavailable, default to this method. Proper PPE use minimizes health risks and ensures safe handling of the product. Always prioritize protective gear to maintain safety during the mixing process.

Precautions for Safe Handling

When handling Talstar P, avoid skin contact and inhalation of fumes. Wear chemical-resistant gloves to prevent absorption through the skin. Keep the product away from food, water sources, and open flames. Ensure good ventilation in the mixing area to avoid inhaling vapors. Do not eat, drink, or smoke while handling Talstar P. If accidental contact occurs, wash the affected area immediately with soap and water. In case of spillage, contain the liquid and clean it up promptly using absorbent materials. Avoid contamination of nearby surfaces or waterways. Store the product in its original container, tightly sealed, and out of reach of children and pets. Always follow the label instructions for safe handling and disposal.

Mixing Instructions for Talstar P

Talstar P must be diluted with water at 0.02% to 0.06% concentration. Fill sprayer with water, add Talstar P, and shake thoroughly to mix evenly.

Recommended Dilution Rates

The recommended dilution rates for Talstar P vary based on the severity of the pest infestation. For general pest control, a 0.02% to 0.06% concentration is typically used. To achieve a 0.02% dilution, mix 0.33 fluid ounces of Talstar P with 1 gallon of water. For a 0.06% dilution, use 1 fluid ounce of Talstar P per gallon of water. These rates ensure effective pest control while maintaining safety. Always use the higher concentration for severe infestations and the lower for preventive treatments. Proper measurement is crucial, so avoid using household utensils for accurate mixing. Adhering to these rates ensures optimal performance and safety for both indoor and outdoor applications.

Proper Mixing Techniques

Proper mixing of Talstar P is essential for effective pest control. Begin by filling your sprayer with the desired volume of clean water. Add the recommended amount of Talstar P concentrate to the water, ensuring accurate measurement. Use a drill with a mixing attachment or shake the sprayer thoroughly to ensure the solution is well-mixed. Avoid using household utensils or measuring devices to prevent contamination. For optimal results, mix the solution just before application. Always test the mixture by spraying a small area to ensure even distribution. Proper mixing ensures the active ingredient, Bifenthrin, is evenly distributed, maximizing its effectiveness. Follow the label instructions carefully and avoid over-mixing, as it can lead to foam formation. If unsure, consult the product label or a pest control professional for guidance.

Application Methods and Best Practices

Talstar P is typically applied as a coarse, low-pressure spray. Apply to areas where pests are observed or suspected, ensuring thorough coverage for optimal effectiveness.

General Pest Control Applications

Talstar P is widely used for general pest control, targeting ants, spiders, cockroaches, and centipedes. It is applied as a coarse, low-pressure spray, ensuring thorough coverage of infested areas. For general applications, mix 0.5 to 1 fluid ounce of Talstar P per gallon of water, depending on pest severity. Spray directly on surfaces where pests are observed or suspected, such as cracks, crevices, and entry points. This method provides effective residual control, lasting up to several weeks. Always follow label instructions for specific pests and dilution rates to ensure safety and efficacy. Proper application techniques help maximize pest control while minimizing environmental impact.

Outdoor and Indoor Use Guidelines

Talstar P can be applied both outdoors and indoors for effective pest control. Outdoors, it is commonly used on surfaces such as building foundations, lawns, and landscaping to target pests like ants and spiders. Indoors, it is applied in areas like kitchens, bathrooms, and along baseboards to combat pests such as cockroaches and centipedes. Always apply Talstar P as a coarse, low-pressure spray to ensure even coverage. For outdoor use, avoid spraying during heavy rain or extreme heat to maintain efficacy. Indoors, focus on cracks, crevices, and entry points where pests are most active. Follow label instructions for specific application rates and safety precautions to ensure effective pest management in both settings.

Common Mistakes to Avoid When Mixing Talstar P

When mixing Talstar P, avoid using incorrect dilution rates, as this can reduce effectiveness or pose safety risks. Never use household utensils for measuring, as they may not provide accurate measurements. Overmixing or undermixing can lead to uneven distribution of the active ingredient, Bifenthrin. Failing to shake the mixture properly can result in inadequate suspension, reducing efficacy. Applying Talstar P without proper personal protective equipment (PPE) can expose you to potential health risks. Spraying during windy or rainy conditions can lead to drift or reduced effectiveness. Lastly, avoid applying Talstar P in direct sunlight, as it may degrade the product. Following the label instructions carefully is essential for safe and effective pest control.

Storage and Disposal of Talstar P

Proper storage and disposal of Talstar P are crucial for safety and environmental protection. Store the product in its original container, tightly sealed, in a cool, dry place away from direct sunlight and out of reach of children and pets. Avoid storing it near food, water, or flammable materials. For disposal, follow local, state, and federal regulations regarding pesticide disposal. Do not pour unused Talstar P down drains or sewers, as it can contaminate water sources. Check with local waste management agencies for guidance on disposing of pesticide containers and unused product. Always handle empty containers with care, ensuring they are rinsed and disposed of properly. Adhering to these guidelines helps protect the environment and ensures compliance with safety standards.

Troubleshooting Common Mixing Issues

Common mixing issues with Talstar P often arise from inaccurate measurements or improper techniques. One frequent problem is incorrect dilution rates, leading to either weak or overly concentrated solutions. To resolve this, always use a pesticide-rated measuring cup and refer to the label for exact ratios. Another issue is insufficient mixing, which can result in uneven distribution of the active ingredient. Agitate the mixture thoroughly, ideally with a drill mixer, to ensure uniformity. If sediment forms, allow the solution to sit before re-mixing. Avoid using household utensils, as they may not measure accurately or withstand the chemical. If the mixture appears separated or cloudy, re-agitate and ensure all ingredients are fully incorporated. Proper mixing ensures effective pest control and safety, so double-checking the process is essential.

Properly mixing Talstar P is crucial for effective pest control and safety. Always follow the label instructions, use accurate measurements, and ensure thorough mixing. This ensures the solution is uniform and effective against target pests. Remember to wear appropriate PPE and avoid using household items for measuring. By adhering to the guidelines, you can achieve optimal results while minimizing risks. Proper mixing and application of Talstar P are key to managing infestations successfully and preventing future pest issues. Always double-check your mixture and follow safety precautions to ensure a safe and effective treatment process.

schedule a form 990 instructions

Schedule A (Form 990) is a critical document for nonprofits and tax-exempt organizations to establish public charity status and report public support. Filed with Form 990 or 990-EZ‚ it ensures compliance with IRS requirements.

Overview of Schedule A

Schedule A (Form 990) is a document required for tax-exempt organizations‚ particularly those classified under Section 501(c)(3)‚ to report their public charity status and public support. It is filed alongside Form 990 or Form 990-EZ and provides essential financial and operational insights. This schedule helps the IRS and the public assess the organization’s compliance with tax-exempt requirements and its financial standing.

Importance of Schedule A in Tax-Exempt Filings

Schedule A (Form 990) is crucial for tax-exempt organizations to demonstrate compliance with IRS regulations and maintain public charity status. It verifies public support‚ ensuring transparency and accountability. Accurate filing helps avoid penalties and is essential for maintaining tax-exempt status‚ while also building donor confidence and public trust in the organization’s financial integrity and operations.

Structure of Schedule A

Schedule A (Form 990) is attached to Form 990 or 990-EZ‚ detailing public charity status‚ financial data‚ and governance; Its structured sections ensure compliance and transparency for tax-exempt organizations.

Sections and Parts of Schedule A

Schedule A includes multiple sections: Part I for public support calculation‚ Part II for identifying governing documents‚ and Part III for compliance with IRS rules. Each part ensures nonprofits accurately report financial and operational details‚ maintaining transparency and compliance. Proper completion of all sections is essential for verifying public charity status and adhering to tax-exempt requirements.

Key Components to Be Reported

Schedule A requires reporting public support calculations‚ financial disclosures‚ and governance details. Organizations must provide total support amounts‚ contributions‚ and revenue streams. Additionally‚ they must disclose financial statements‚ governance policies‚ and compliance with IRS rules. Accurate reporting of these components ensures transparency and verifies the organization’s eligibility for tax-exempt status under Section 501(c)(3).

Eligibility Criteria for Filing Schedule A

Schedule A is required for Section 501(c)(3) organizations classified as public charities. All 501(c)(3) entities filing Form 990 or 990-EZ must complete and attach Schedule A.

Organizations Required to File Schedule A

Schedule A is mandatory for Section 501(c)(3) organizations classified as public charities. All 501(c)(3) entities filing Form 990 or 990-EZ must complete and attach Schedule A to ensure compliance with IRS requirements. This includes organizations that are not automatically classified as public charities and need to demonstrate their public support. Filing Schedule A is essential for maintaining tax-exempt status and verifying public charity status.

Thresholds and Exceptions for Filing

Schedule A filing is generally required for organizations with gross receipts exceeding $200‚000 or total assets over $500‚000. However‚ certain entities‚ such as churches and government-affiliated organizations‚ are exempt. Additionally‚ organizations classified as private foundations or 501(c)(3) entities automatically deemed public charities may not need to file Schedule A. Specific exceptions apply based on IRS guidelines.

Public Support Calculation and Reporting

Public support includes donations‚ grants‚ and membership fees‚ comprising at least 33.33% of total revenue to maintain public charity status. Accurate reporting is essential for compliance.

Understanding Public Support and Its Significance

Public support refers to contributions from diverse sources‚ such as donations‚ grants‚ and membership fees‚ which are crucial for maintaining a nonprofit’s public charity status. It demonstrates community engagement and financial diversity. Organizations must meet specific thresholds‚ typically 33.33% of total revenue‚ to qualify as publicly supported‚ ensuring tax-exempt status under Section 501(c)(3). Accurate calculation and reporting are essential for compliance and maintaining public trust.

Methods for Calculating Public Support

Public support is calculated by summing contributions from diverse sources‚ such as donations‚ grants‚ and membership fees‚ excluding government grants. Organizations must meet specific thresholds‚ typically 33.33% of total revenue‚ to qualify as publicly supported under Section 501(c)(3). Accurate calculation involves including qualifying contributions and comparing them to total revenue‚ ensuring compliance with IRS guidelines for public charity status.

Instructions for Completing Schedule A

Completing Schedule A involves determining public charity status‚ calculating public support‚ and ensuring accurate reporting. Adhere to IRS guidelines for compliance.

Step-by-Step Guide to Filling Out Schedule A

Filling out Schedule A requires determining your organization’s public charity status and calculating public support. Start by identifying your organization type under IRC Section 501(c)(3). Calculate total support by summing contributions‚ gross income‚ and other receipts. Complete Parts I through V‚ ensuring accuracy in reporting financial data. Attach required documentation and verify compliance with IRS guidelines before submission.

Specific Instructions for Each Part of Schedule A

Part I confirms the organization’s public charity status under IRC Section 501(c)(3). Part II details public support‚ including donations‚ membership fees‚ and grants. Part III reports gross income from specific activities like interest and rents. Part IV calculates total support‚ distinguishing between lines 11 and 12. Part V requires certification‚ ensuring a responsible official signs and dates the form.

Common Challenges and Solutions

Common challenges include accurately calculating public support and understanding complex reporting requirements. Solutions involve meticulous record-keeping‚ IRS guidance consultation‚ and seeking professional expertise for compliance.

Overcoming Difficulties in Schedule A Preparation

Common difficulties in Schedule A preparation include accurately calculating public support and interpreting complex IRS guidelines. Organizations can overcome these challenges by maintaining detailed financial records‚ consulting IRS resources‚ and seeking professional advice to ensure compliance and avoid errors in reporting public charity status and support.

Frequently Encountered Issues and Resolutions

Common issues include accurately calculating public support‚ interpreting complex IRS guidelines‚ and ensuring compliance with reporting requirements. Resolutions involve consulting IRS resources‚ maintaining detailed financial records‚ and seeking professional guidance to address errors or misunderstandings‚ ensuring accurate and timely filing of Schedule A.

Filing Requirements and Deadlines

Schedule A must be submitted with Form 990 or 990-EZ annually. File electronically or mail to the IRS address listed in the instructions. Late filings may result in penalties.

Where and How to Submit Schedule A

Schedule A must be submitted with Form 990 or 990-EZ. File electronically through the IRS e-file system or mail to the address listed in the Form 990 instructions. Ensure the correct IRS address is used based on your organization’s location. Late submissions may result in penalties. Always verify the IRS website for the most current filing address and requirements to avoid errors or delays.

Important Dates and Deadlines for Filing

The deadline for filing Schedule A with Form 990 or 990-EZ is typically May 15th or the 15th day of the 5th month after the tax year ends. Extensions are available by filing Form 8868‚ granting an additional 6 months. Late filings may incur penalties of $20 per day‚ up to $10‚000 or $5‚000 for smaller organizations. Always verify the IRS website for the most current deadlines to ensure compliance and avoid errors.

Public Disclosure Requirements

Schedule A must be made publicly available upon request‚ ensuring transparency in public charity status and support. Compliance with IRS disclosure rules is mandatory to maintain tax-exempt accountability.

Making Schedule A Publicly Available

Schedule A must be made available to the public upon request‚ ensuring transparency in public charity status and support. Organizations must provide copies promptly without charge‚ as required by IRS rules. This ensures accountability and compliance with disclosure regulations‚ maintaining public trust in tax-exempt entities. The IRS mandates this accessibility to uphold transparency standards for nonprofit operations and financial disclosures.

Compliance with IRS Disclosure Rules

Compliance with IRS disclosure rules is essential for maintaining tax-exempt status. Organizations must accurately report public support and governance practices on Schedule A. Failure to comply may result in penalties or loss of exempt status. Understanding IRS guidelines ensures proper disclosure and avoids legal complications‚ maintaining trust and accountability in nonprofit operations.

Consequences of Errors or Non-Compliance

Consequences of errors or non-compliance with Schedule A include IRS penalties‚ loss of tax-exempt status‚ and legal complications. Inaccuracies can lead to audits and reputational damage‚ emphasizing the importance of accurate and timely filings.

Risks Associated with Inaccurate or Late Filings

Inaccurate or late filings of Schedule A can result in IRS penalties‚ audits‚ and potential loss of tax-exempt status. Errors may lead to reputational damage‚ legal complications‚ and financial repercussions. Organizations must ensure timely and accurate submissions to avoid these risks and maintain compliance with IRS regulations. Proper preparation and review are essential to mitigate these consequences effectively.

Penalties for Non-Compliance with Schedule A Requirements

Non-compliance with Schedule A requirements can lead to penalties‚ including fines and loss of tax-exempt status. The IRS may impose monetary penalties for late or inaccurate filings. Organizations may face audits‚ reputational damage‚ and legal consequences. Timely and accurate submissions are crucial to avoid these penalties and maintain compliance with IRS regulations. Proper preparation and review are essential to ensure adherence to all requirements.

Examples and Illustrations

Examples of completed Schedule A sections demonstrate proper reporting of public support and revenue calculations. Illustrations include sample calculations for public charity status and revenue thresholds‚ ensuring clarity in compliance with IRS requirements.

Sample Completed Sections of Schedule A

Sample sections of Schedule A provide clear examples of how to report public support and revenue calculations. For instance‚ Part II illustrates the calculation of public support percentages‚ while Part III shows detailed financial disclosures. These examples help organizations ensure accurate reporting of contributions‚ grants‚ and program-related income‚ aligning with IRS guidelines.

Case Studies for Better Understanding

Case studies provide practical insights into completing Schedule A. For example‚ a small public charity reporting $500‚000 in total support‚ with $300‚000 from public donations‚ calculates a 60% public support ratio. This demonstrates how organizations can apply IRS guidelines to maintain tax-exempt status and ensure compliance with reporting requirements.

Additional Resources and Guidance

IRS publications and support materials‚ such as instructions for Form 990-EZ and Schedule A‚ provide detailed guidance. Visit www.irs.gov for official resources and compliance support.

IRS Publications and Support Materials

The IRS provides comprehensive resources‚ including detailed instructions for Form 990 and Schedule A‚ to guide nonprofits in accurate reporting. Visit www.irs.gov for access to official documents‚ such as the Instructions for Schedule A and related forms. These materials ensure compliance and clarify reporting requirements for public charity status and public support calculations.

Recommended Tools and References for Schedule A Preparation

Utilize IRS resources like www.irs.gov for detailed instructions and forms. Tax software‚ such as TurboTax or specialized nonprofit tools‚ can streamline preparation. Additionally‚ consult the IRS Instructions for Schedule A and related publications for clarity. The Form 990 and 990-EZ instructions are also essential references. Leverage IRS guidelines on public support calculations and consider professional tax advice for complex scenarios to ensure accuracy.

Best Practices for Schedule A Preparation

Thoroughly review IRS guidelines and ensure accurate calculation of public support. Understand compliance requirements and seek professional advice for complex scenarios to maintain precision and avoid errors.

Strategies for Accurate and Timely Filing

Consult IRS guidelines thoroughly to ensure compliance with all requirements.
Accurately calculate public support using detailed financial records.
Submit Schedule A with Form 990 or 990-EZ by the designated deadline.
Highlight compliance with IRS rules to avoid penalties.
Seek professional advice for complex calculations or interpretations.
Regularly review and update processes to maintain accuracy and efficiency.

Professional Advice and Consultation

Consulting tax professionals or legal advisors ensures accurate completion of Schedule A.
Expert guidance helps navigate complex IRS requirements and avoid errors.
Utilize IRS publications and webinars for detailed instructions.
Professional review enhances compliance and minimizes penalty risks.
Collaborate with experts to interpret financial data and ensure timely filing.

fly fresh pen instructions

The Fly Fresh Pen is a cutting-edge vaporizer designed for portability and efficiency, offering a sleek, lightweight design with variable voltage options for optimal performance;

1.1 Overview of the Fly Fresh Pen

The Fly Fresh Pen is a versatile, portable vaporizer designed for ease of use and discretion. Featuring a sleek, lightweight design, it uses 510-threading for compatibility with a wide range of cartridges. With a simple five-click on/off mechanism and variable voltage settings, it delivers consistent performance. Its ergonomic build and stylish aesthetics make it a popular choice for both novices and experienced users seeking convenience and efficiency.

1.2 Importance of Following Instructions

Adhering to the Fly Fresh Pen’s instructions ensures optimal functionality, safety, and longevity. Proper use prevents overheating and preserves battery life, while incorrect usage can lead to malfunctions or safety risks. Following guidelines ensures a seamless and enjoyable experience, making it essential to read and understand all provided directions carefully before operating the device.

Safety Precautions

Adhere to all safety precautions to prevent electric shock, fire, or injury. Avoid overheating, monitor battery levels, and keep the pen away from flammable materials.

2.1 General Power Tool Safety Warnings

Read all safety warnings and instructions carefully to avoid electric shock, fire, or serious injury. Failure to follow guidelines can result in severe consequences. Keep the pen away from flammable materials, avoid overheating, and ensure proper ventilation. Do not submerge the device in water or expose it to extreme temperatures. Regularly inspect for damage and maintain the tool to ensure safe operation. Always keep out of reach of children.

2.2 Specific Safety Instructions for Fly Fresh Pen

Always use the Fly Fresh Pen as intended, avoiding flammable materials. Do not submerge the device in water or expose it to extreme temperatures. Keep the pen away from children and pets. Monitor the temperature settings to prevent overheating. Use only the original charger provided to avoid damage. Store the pen in a cool, dry place when not in use to ensure optimal performance and safety.

Assembly and Preparation

Unpack the Fly Fresh Pen carefully and ensure all components are included. Charge the battery fully before first use to ensure optimal performance and longevity of the device.

3.1 Unpacking and Initial Setup

Begin by carefully unpacking the Fly Fresh Pen and its accessories, ensuring all components are included and undamaged. Remove any protective packaging and inspect the device. Familiarize yourself with the pen’s features, such as the power button, cartridge slot, and charging port. Before first use, charge the battery fully and ensure the cartridge is properly seated for a seamless experience.

3.2 Charging the Battery

Locate the Micro-USB charging port at the bottom of the Fly Fresh Pen. Gently insert the provided USB charger into a power source. The pen’s light will illuminate during charging and turn off when fully charged, typically within 2-3 hours. Avoid overcharging to preserve battery life. Always use the original charger to ensure safety and optimal performance.

Operating the Fly Fresh Pen

Press the power button five times to turn the pen on or off. Use the button to regulate temperature and ensure smooth operation during vaping sessions.

4.1 Turning the Pen On/Off

To turn the Fly Fresh Pen on or off, press the power button five times rapidly. The LED light will illuminate green when the pen is active and red when powering off. Ensure the device is off when not in use to conserve battery life and maintain safety. The button also serves as the primary control for temperature adjustment during operation.

4.2 Adjusting Temperature Settings

To adjust the temperature on the Fly Fresh Pen, press the power button three times to cycle through the voltage levels. The LED light will change color to indicate the current setting. Use the variable voltage dial located at the base of the pen to fine-tune the temperature for optimal vapor production. Always start with a lower setting and gradually increase to find your preferred level.

Using the Pen

Press the power button, inhale gently, and monitor vapor production. Adjust settings for optimal performance and flavor, ensuring a smooth vaping experience every time.

5.1 Inhaling Techniques

Start with slow, gentle draws to activate the pen, then gradually increase inhalation speed. Press and hold the power button while inhaling to ensure efficient vapor production. Avoid over-inhalation to prevent overheating and maintain a smooth, consistent experience. Proper technique enhances flavor and vapor quality, making each session enjoyable and satisfying.

5.2 Monitoring Battery Life

Regularly check the battery indicator to avoid unexpected power issues. A blinking light often signals low charge. Charge the pen when the battery level is below 20% to maintain optimal performance. Avoid overcharging, as it can reduce battery longevity; Use the provided charger to ensure compatibility and safety. A well-monitored battery ensures consistent vapor production and extends the pen’s lifespan.

Maintenance and Cleaning

Regular cleaning and proper storage are essential to maintain performance. Use a soft cloth to wipe down the pen and avoid harsh chemicals to prevent damage.

6.1 Cleaning the Pen Regularly

Cleaning the Fly Fresh Pen regularly is crucial for maintaining its functionality. Use a soft, dry cloth to wipe down the exterior and mouthpiece. For the chamber, dampen a cotton swab with water and gently remove any residue. Avoid using harsh chemicals or liquids, as they may damage the device. Regular cleaning ensures optimal vapor quality and longevity of the pen.

6.2 Storing the Pen Properly

Store the Fly Fresh Pen in a cool, dry place away from direct sunlight and moisture. Use the provided case or a protective pouch to prevent damage. Avoid extreme temperatures and ensure the pen is upright to prevent leakage. Keep it out of reach of children and pets. For long-term storage, discharge the battery to 50% and secure all components tightly.

Troubleshooting Common Issues

Address common issues like weak vapor or battery drain by cleaning connections, checking for blockages, and ensuring proper cartridge installation. Regular maintenance prevents most problems.

7.1 Fixing Battery Life Issues

To improve battery life, ensure proper charging cycles and avoid overcharging. Clean connections regularly to maintain conductivity. If issues persist, replace the battery or consult customer support for assistance. Always use the provided charger to prevent damage. Monitoring usage patterns can also help extend battery longevity and performance over time.

7.2 Dealing with Clogged Cartridges

If your Fly Fresh Pen cartridge is clogged, start by gently cleaning the connection points with a cotton swab dipped in a small amount of cleaning solution. Avoid using excessive liquid to prevent damage. Allow the cartridge to dry completely before reattaching it. If the issue persists, consider replacing the cartridge or consulting the troubleshooting guide for further assistance.

Replacement Parts and Accessories

Replacement coils and batteries for the Fly Fresh Pen are available online. Ensure to purchase from authorized retailers to maintain warranty and product quality standards.

8.1 Replacing Coils

To replace the coil in your Fly Fresh Pen, start by turning the device off. Remove the cartridge and carefully detach the old coil. Install the new coil by screwing it into place securely. Reattach the cartridge and ensure it is tightly connected. Regular coil replacement is essential for maintaining optimal vapor quality and preventing damage to the pen. Always use compatible coils to ensure proper functionality and safety.

8.2 Purchasing Additional Accessories

For the Fly Fresh Pen, purchase additional accessories like replacement coils or cartridges from authorized retailers. Ensure compatibility by checking product descriptions. Authentic accessories guarantee optimal performance and safety. Visit official websites or trusted vendors to avoid counterfeit products. Always verify reviews and product details before making a purchase to ensure you receive high-quality items tailored to your device.

Warranty and Support

The Fly Fresh Pen is backed by a limited warranty covering manufacturing defects. For inquiries or issues, contact customer support via email or phone for assistance.

9.1 Understanding the Warranty

The Fly Fresh Pen is covered by a limited warranty that protects against manufacturing defects for a specified period. The warranty typically covers repairs or replacements for faulty components. However, it may not apply if the device is misused, tampered with, or damaged due to improper care. Review the warranty document for full terms and conditions to ensure coverage remains valid.

9.2 Contacting Customer Support

For assistance with the Fly Fresh Pen, customers can reach support via email or phone. The support team is available to address troubleshooting, warranty claims, or general inquiries. Visit the official website for contact details and additional resources. Ensure to have your product details ready for faster service. Representatives are trained to provide clear guidance and resolve issues promptly.

Tips for Optimal Use

For the best experience, inhale gently, adjust temperature settings wisely, and monitor battery life. Regular cleaning and proper storage ensure longevity and consistent performance of the pen.

10.1 Maximizing Vapor Quality

To enhance vapor quality, ensure the pen is fully charged and use medium heat settings. Avoid overloading the cartridge and inhale slowly, allowing the coil to heat evenly. Cleaning the pen regularly prevents residue buildup, which can degrade vapor flavor and smoothness. Proper storage also maintains cartridge freshness, ensuring consistent and flavorful hits every time you use the Fly Fresh Pen.

10.2 Avoiding Common Mistakes

Avoid overloading the cartridge, as this can reduce vapor quality. Ensure the pen is fully charged before use and clean it regularly to prevent residue buildup. Inhale slowly and avoid pressing the power button excessively, as this can overheat the coil. Store the pen upright to prevent leakage and always use genuine replacement parts to maintain performance and vapor quality.

The Fly Fresh Pen offers a seamless vaping experience with its efficient design and user-friendly features, ensuring optimal performance when used correctly.

11.1 Final Thoughts on Using Fly Fresh Pen

The Fly Fresh Pen is a reliable and efficient vaping device designed for seamless performance. By following the guidelines, users can ensure a satisfying experience. Its portable design and variable voltage features make it ideal for everyday use. Proper maintenance and care will extend the pen’s lifespan, while monitoring battery life ensures consistent vapor production. Always prioritize safety and optimal usage techniques for the best results.

sky rover rc helicopter instructions

Unboxing and Contents

The package includes the Sky Rover RC helicopter, remote control, USB charging cable, main blades a and b, and a detailed user manual for easy setup.

1.1. What’s Included in the Package

The Sky Rover RC helicopter package includes: the helicopter itself, a 2.4 GHz remote control, a USB charging cable, main blade sets (A and B), and a detailed user manual. Additional components may vary, but these are the standard items provided for initial setup and operation.

1.2. Initial Inspection and Inventory

Inspect the helicopter for any visible damage. Ensure all components, such as the remote control, USB charging cable, and main blades, are included. Verify that the helicopter and remote are functioning correctly. Review the user manual to familiarize yourself with the parts and their proper assembly. Contact customer support if any issues are found.

Safety Precautions and Warnings

Ensure adult supervision during charging and flight. Avoid flying indoors. Recommended for users aged 12 and above. Always inspect the helicopter for damage before use. Follow manufacturer guidelines to ensure safe operation and avoid potential hazards.

2.1. General Safety Guidelines

Always ensure adult supervision during operation. Avoid flying indoors to prevent damage or injury. Keep the helicopter away from eyes and loose clothing. Recommended for users aged 12 and above. Inspect the device for damage before use. Follow all manufacturer guidelines to ensure safe and enjoyable operation.

2.2. Charging Safety Tips

Always charge the helicopter with adult supervision. Use only the provided USB cable and avoid overcharging (maximum 60 minutes). Ensure the helicopter is turned off during charging. Keep the charging area away from flammable materials. Never charge near water or in extreme temperatures. The charging indicator will turn off when fully charged.

2.3. Age Recommendations and Supervision

The Sky Rover RC helicopter is recommended for users aged 12 and above. Adult supervision is required, especially during charging and initial flights, to ensure safe operation. Younger users should be closely guided to avoid accidents and improve their control skills gradually.

Assembly and Preparation

Attach the main blades and tail rotor carefully. Connect the battery to the helicopter and ensure it is securely fastened. Power on the remote and helicopter, then sync the controls for proper function.

3.1. Step-by-Step Assembly Process

Carefully unpack all components, including the helicopter, remote, blades, and USB cable. 2. Attach the main blades and tail rotor securely. 3. Install the battery in the helicopter. 4. Charge the battery fully using the USB cable. 5. Sync the remote control with the helicopter by powering both on and adjusting trims as needed.

3.2. Connecting the Battery and Powering On

Insert the battery into the helicopter’s battery compartment; Use the provided USB charging cable to connect the helicopter to a power source. Turn on the power switch located on the helicopter. The LED indicator will light up, signaling the helicopter is ready for use. Ensure the battery is fully charged before first use.

3.3. Syncing the Remote Control with the Helicopter

Turn on the remote control and the helicopter. The LED indicator on the helicopter will begin blinking, indicating it is ready to sync. Move the throttle stick on the remote to the highest position and back to the lowest. The LED will stop blinking once syncing is complete.

Understanding the Controls

The Sky Rover RC helicopter’s remote control features throttle, pitch, and yaw sticks for precise movement. Trim buttons adjust spinning, ensuring stable flight. The remote operates on 2.4GHz for reliable control.

4.1. Remote Control Layout and Functions

The Sky Rover RC helicopter’s remote features a 2.4GHz frequency for stable control. It includes throttle, pitch, and yaw sticks, with trim buttons to adjust spinning. The left stick controls throttle and yaw, while the right stick manages pitch and roll. LEDs indicate power and connection status for seamless operation.

4.2. Trimming and Adjusting the Helicopter

Use the remote’s trim buttons to adjust the helicopter’s balance. If it spins counterclockwise, press the right trim until stable. For clockwise spins, press left. Ensure proper alignment of blades for even flight. Regular trimming ensures smooth operation. Always test in an open area, avoiding indoor obstacles.

4.3. Basic Flight Modes and Settings

Set the helicopter to beginner mode for stable flights. Adjust the throttle and pitch for smooth takeoffs. Ensure the remote is synced and the helicopter is fully charged. Select open spaces for flights, avoiding obstacles. Use the trim buttons to balance the helicopter before flight. Always follow the manual for optimal performance.

Charging and Battery Maintenance

Charge the helicopter using the USB cable provided. Ensure the battery is fully charged (approximately 60 minutes) before first use. Always supervise charging to prevent overheating and extend battery life.

5.1. Charging Instructions and Time

The Sky Rover RC helicopter requires 60 minutes for a full charge using the provided USB cable. Ensure the power switch is off during charging. The charger light will indicate when charging is complete. Always supervise the charging process to avoid overheating and ensure proper battery maintenance for optimal performance.

5.2. Battery Care and Storage Tips

Store the battery in a cool, dry place away from direct sunlight. Avoid extreme temperatures and ensure the battery is fully charged before storage. Regularly inspect for damage or wear. Do not overcharge, as this can reduce battery life. Always use the original charger to maintain optimal battery health and performance.

5.3. Troubleshooting Battery Issues

If the helicopter won’t fly or the battery won’t charge, check connections for looseness or damage. Ensure the battery is properly seated and charged for at least 60 minutes. Reset the power system by turning the helicopter off and on. Avoid overcharging, as it can damage the battery. Use the original charger to prevent issues.

Basic Flight Instructions

Ensure the area is clear, power on the remote and helicopter, and wait for syncing. Gently increase throttle for takeoff, stabilize, and navigate using the control sticks.

6.1. Pre-Flight Checklist

  • Ensure the battery is fully charged and properly connected to the helicopter.
  • Choose a clear, open space away from obstacles and people.
  • Turn on the remote control and wait for the helicopter to sync.
  • Test the controls to ensure proper movement and responsiveness.

6.2. Takeoff and Landing Procedures

  • Ensure the area is clear of obstacles and people before takeoff.
  • Slowly increase the throttle to lift the helicopter off the ground.
  • Adjust the trim as needed to stabilize the helicopter in the air.
  • Gradually reduce the throttle to descend and land gently on a flat surface.
  • Practice in an open space to master takeoff and landing techniques.

6.3. Navigating the Helicopter in the Air

  • Use the remote control sticks to adjust direction and altitude smoothly.
  • Maintain steady control to avoid sudden movements and ensure balance.
  • Adjust the trim if the helicopter drifts sideways during flight.
  • Keep the helicopter within the remote control range (less than 10 meters).
  • Monitor battery life and land before the helicopter loses power.

Advanced Flight Techniques

Master hovering, stability control, and basic stunts like flips and turns. Practice flying in various weather conditions to enhance your piloting skills and confidence.

7.1. Hovering and Stability Control

Start by ensuring the helicopter is on a flat surface. Adjust the trim buttons to stop any spinning. Use the remote control to gradually increase throttle while making fine adjustments for stability. Once airborne, maintain steady altitude and orientation by balancing the controls. Practice hovering to improve your overall flight control and precision.

7.2. Performing Basic Stunts and Maneuvers

Master basic stunts like forward, backward, and side movements by adjusting the remote control’s joysticks. Practice gentle tilts and turns to build control. Once comfortable, progress to more complex maneuvers like figure-eights. Always perform stunts in open spaces to avoid obstacles and ensure smooth execution. Regular practice enhances precision and confidence.

7.3. Flying in Different Weather Conditions

Avoid flying in strong winds or rain, as they can destabilize the helicopter. Ensure clear visibility and calm conditions for optimal performance. Never fly in extreme temperatures or humidity. Always check weather forecasts before flight and follow manual guidelines for safe operation in varying conditions.

Maintenance and Repair

Regularly inspect and clean the helicopter. Tighten any loose parts and replace damaged blades. Refer to the user manual for detailed maintenance and repair guidelines.

8.1. Regular Maintenance Schedule

The Sky Rover RC helicopter requires regular maintenance. Clean the helicopter after each use, check for loose parts, and lubricate moving components. Inspect the blades for damage and replace them if necessary. Perform a thorough check every 10 flights and follow the schedule outlined in the user manual to ensure optimal performance and longevity.

8.2. Common Issues and Solutions

Common issues include battery disconnection, motor malfunction, or blade damage. Solutions: Check connections, reset the power system, or replace faulty parts; For blade damage, replace with new blades. Consult the user manual or contact support for further assistance to resolve these issues effectively and ensure smooth operation.

8.3. Replacing Parts and Upgrading

To replace parts, disconnect the battery first. Use screwdrivers to remove damaged components like blades or gears, then install new ones securely. Upgrading options include swapping to carbon fiber parts for durability. Ensure all replacements align with the manufacturer’s specifications for optimal performance and safety.

Additional Resources and Support

Refer to the user manual for detailed instructions. Contact Alpha Group US, LLC at (844) 303-8936 or visit their website for support. Online forums and communities also offer troubleshooting tips and upgrade advice.

9.1. User Manuals and Documentation

The Sky Rover RC helicopter comes with a comprehensive user manual detailing setup, operation, and troubleshooting. Manuals for models like US858922 and US858952 are available online, including FCC compliance documents and guides for syncing and resetting the device. These resources ensure optimal performance and address common user queries effectively.

9.2. Manufacturer Support and Contact Info

For assistance, contact ALPHA GROUP US, LLC at 13048 Valley Blvd, Fontana, CA 92335, or call (844) 303-8936. They provide support for troubleshooting, repairs, and parts replacement. The user manual directs users to contact them for any inquiries or issues regarding the Sky Rover RC helicopter.

9.3. Online Communities and Forums

Join online forums and communities like Reddit’s RC helicopter groups or Facebook’s Sky Rover enthusiast pages. These platforms offer tips, troubleshooting advice, and user experiences. Engage with fellow pilots to enhance your flying skills and resolve issues. Online forums are invaluable for sharing knowledge and staying updated on the latest trends.

red baron mini pizza cooking instructions

Red Baron Mini Pizzas offer a convenient and delicious meal solution. These pre-made, individual-sized pizzas feature a crispy crust and flavorful toppings. Perfect for quick meals, they can be cooked in an oven, air fryer, or microwave, making them ideal for busy households seeking hassle-free, customizable dining options.

Overview of Red Baron Mini Pizzas

Red Baron Mini Pizzas are pre-made, individual-sized frozen pizzas designed for convenience and quick cooking. They feature a crispy crust and a variety of flavorful toppings, such as cheese, pepperoni, and sausage. Perfect for snacks or meals, these mini pizzas come in packages of two, allowing you to cook one or both depending on your needs. Their compact size and simple preparation make them a popular choice for families and individuals alike.

Importance of Following Cooking Instructions

Following the cooking instructions for Red Baron Mini Pizzas ensures optimal flavor and texture. Proper cooking times and temperatures prevent undercooking or burning, while adhering to specific methods (oven, air fryer, or microwave) guarantees a crispy crust and evenly melted cheese. Neglecting these guidelines can result in an unsatisfactory dining experience, making it crucial to follow the provided directions carefully for the best results.

Oven Cooking Instructions for Red Baron Mini Pizza

Preheating the oven to 425°F is essential for achieving a crispy crust and even cooking. Allow the oven to preheat for at least 10 minutes before cooking.

Preheating the Oven

Preheating the oven to 425°F is crucial for achieving a crispy crust and even cooking. Ensure the oven is empty and preheated for at least 10-15 minutes before placing the pizza inside. Avoid opening the oven door during preheating to maintain consistent temperature. Use a food thermometer to verify the oven has reached the correct temperature for optimal results. Proper preheating ensures the pizza cooks evenly and prevents undercooking.

Placing the Pizza on the Baking Sheet

Once the oven is preheated, carefully remove the pizza from its packaging and place it on a lightly oiled or parchment-lined baking sheet. Position the pizza in the center of the sheet to ensure even cooking. Avoid overcrowding the baking sheet, as this can interfere with airflow and result in uneven browning. Place the baking sheet on the middle rack of the oven for optimal cooking performance.

Cooking Time and Temperature

Preheat the oven to 425°F (220°C). For refrigerated pizzas, bake for 10 to 14 minutes, while frozen pizzas require 16 to 20 minutes. The pizza is done when the crust is golden brown and the cheese is melted and bubbly. Keep an eye on the pizza during the last few minutes to ensure it doesn’t overcook. Let it cool slightly before serving for the best results.

Air Fryer Cooking Instructions for Red Baron Mini Pizza

Preheat the air fryer to 350°F. Place the pizza on the air fryer basket, leaving space for even cooking. Cook for 8 to 12 minutes, or until crispy and golden, ensuring a perfectly cooked crust and melted cheese.

Preheating the Air Fryer

Preheating the air fryer is essential for even cooking. Set the air fryer to 350°F and let it preheat for 2-3 minutes. This ensures the pizza cooks uniformly and achieves a crispy crust. Always check your air fryer’s preheat setting, as some models may vary. A preheated air fryer guarantees the best results for your Red Baron Mini Pizza, ensuring a perfectly cooked crust and melted toppings every time.

Placing the Pizza in the Air Fryer

Place the Red Baron Mini Pizza in the air fryer basket after preheating. Remove the pizza from its clear plastic wrap and discard the silver cooking tray. Position the pizza flat in the center of the air fryer basket for even cooking. Ensure the pizza is not overlapping with any walls or edges of the basket. Cook one pizza at a time for optimal results. Proper placement ensures a crispy crust and well-cooked toppings every time.

Cook Red Baron Mini Pizzas in the air fryer at 350°F for 5 to 7 minutes. This ensures a crispy crust and melted cheese. Preheat the air fryer before placing the pizza inside. Cook one pizza at a time to avoid overcrowding. Check the pizza after 5 minutes to ensure it’s cooked to your liking, as cooking times may vary slightly depending on the air fryer model and personal preference for crispiness.

Microwave Cooking Instructions for Red Baron Mini Pizza

Place the pizza on a microwave-safe plate and cook on high power for 2-3 minutes. This method ensures a quick and easy meal with a crispy crust.

Placing the Pizza on a Microwave-Safe Plate

Place the frozen pizza directly on a microwave-safe plate, ensuring it’s centered for even cooking. Avoid using the provided silver tray, as it’s not suitable for microwave use. Make sure the plate is large enough to accommodate the pizza without overcrowding. This step ensures safe and even heating, preventing uneven cooking or potential hazards during the microwave process.

Cooking Time and Power Level

Cook the pizza on high power (100%) for 2 to 3 minutes and 30 seconds. Adjust the time based on your microwave’s wattage and the pizza’s thickness. Ensure the cheese is melted and the crust is crispy. Let it stand for a minute before serving. Always follow the recommended power level to achieve the best results without overcooking or undercooking the pizza.

Other Cooking Methods for Red Baron Mini Pizza

Explore alternative cooking methods like toaster oven or grilling for a crispy crust. Preheat the toaster oven to 400°F and cook for 10-12 minutes. For grilling, place the pizza away from direct heat and cook until the crust is golden brown and toppings are heated through evenly.

Toaster Oven Instructions

Preheat the toaster oven to 400°F (200°C). Place the Red Baron Mini Pizza directly on the oven rack or a baking sheet. Cook for 10-12 minutes, or until the crust is golden brown and the cheese is melted and bubbly. Keep an eye on the pizza during the last few minutes to ensure it doesn’t overcook. Let it cool for a minute before serving for the best experience.

Grilling Instructions

Preheat your grill to medium heat (around 375°F). Place the Red Baron Mini Pizza directly on the grill rack. Cook for 4-6 minutes per side, or until the crust is golden brown and the cheese is melted. For extra crispiness, grill the pizza over indirect heat after flipping. Let it cool for a minute before serving to enjoy the perfect grilled mini pizza experience.

Tips for Achieving the Best Results

  • Always thaw frozen pizzas before cooking for even heating.
  • Preheat your oven, air fryer, or grill to ensure optimal results.
  • Avoid overcrowding the cooking surface for consistent cooking.
  • Monitor cooking time closely to prevent burning or undercooking.

Thawing the Pizza

For optimal cooking results, thaw Red Baron Mini Pizzas in the refrigerator overnight or at room temperature for 1-2 hours. Avoid microwave thawing, as it may partially cook the pizza. If thawing multiple pizzas, ensure they are separated to prevent sticking. Proper thawing ensures even cooking and a crispy crust. Always follow package instructions for best outcomes.

Adding Toppings

Personalize your Red Baron Mini Pizza by adding your favorite toppings before cooking. For best results, add toppings evenly to avoid overloading the pizza. Pre-cooking toppings like meats or vegetables ensures they’re fully cooked. Fresh toppings like herbs or greens can be added after cooking for crisp texture. Experiment with combinations to enhance flavor and texture, but always follow package instructions for optimal results.

Safety Precautions and Troubleshooting

Always handle hot pizzas with care to avoid burns. Ensure proper oven ventilation and never leave cooking unattended. If issues arise, adjust cooking times or temperatures for better results.

Cautions When Handling Hot Pizzas

Always use oven mitts or tongs to handle hot pizzas to avoid burns. Place cooked pizzas on a heat-resistant surface immediately. Be cautious of steam when removing from the microwave. Never touch the hot pizza surface directly. Keep children away from hot pizzas and cooking areas. Allow the pizza to cool slightly before serving to prevent burns from melted cheese and hot toppings.

Troubleshooting Common Issues

If the crust isn’t crispy, ensure the oven or air fryer is preheated correctly. For undercooked pizza, extend cooking time in 1-minute increments. If cheese isn’t melted, check temperature settings. Avoid overcrowding the cooking surface to prevent uneven cooking. If the pizza browns too quickly, reduce heat or cover edges with foil. Always refer to the instructions for specific guidance on achieving the best results.

Storage and Reheating Instructions

Store cooked pizzas in an airtight container in the refrigerator for up to 3 days. Reheat in the oven at 350°F for 5-7 minutes or microwave for 20-30 seconds until warmed through.

Storing Cooked Pizzas

Cooked Red Baron Mini Pizzas should be stored in an airtight container in the refrigerator within two hours of cooking. They can be kept refrigerated for up to 3 days. For longer storage, place them in a freezer-safe container or plastic bag and freeze for up to 2 months. When freezing, ensure pizzas are completely cooled to prevent moisture buildup. Reheat safely when ready to enjoy.

Reheating Leftovers

Reheat leftover Red Baron Mini Pizzas in the oven at 350°F for 5-7 minutes or in the microwave for 20-30 seconds. For crispiness, use an air fryer at 300°F for 3-4 minutes. Ensure the pizza is heated through but not overcooked. Let leftovers cool before refrigerating to maintain crispiness. Reheating brings back the perfect texture and flavor for an enjoyable meal.

Cooking Red Baron Mini Pizzas is simple and rewarding, offering a delicious meal with minimal effort. Whether baked, air-fried, or microwaved, they deliver crispy crusts and melted cheese every time. Enjoy your perfectly cooked mini pizzas!

Final Tips for Enjoying Red Baron Mini Pizzas

For the best experience, preheat your oven or air fryer thoroughly. Let the pizza rest for a minute after cooking to set the cheese. Add fresh toppings like herbs or spices for extra flavor. Experiment with cooking methods to find your preferred crispiness. Always handle hot pizzas with care to avoid burns. Enjoy your Red Baron Mini Pizza as a quick, satisfying meal or snack!

wolf oven instructions

Welcome to the comprehensive guide for Wolf oven instructions; This manual is designed to help you understand and utilize your Wolf oven’s features effectively. With versatile cooking modes‚ advanced control panels‚ and safety-first designs‚ Wolf ovens offer precision and reliability. Read on to explore installation‚ operation‚ and expert cooking techniques.

Installation and Safety Precautions

Proper installation is crucial for safe and efficient Wolf oven operation. Ensure a 220/240V power supply for models requiring it. Install with adequate ventilation and level the unit. Follow pre-installation checks‚ such as verifying measurements and ensuring a stable surface. Always adhere to safety guidelines to avoid hazards; Read the manual thoroughly before use.

Pre-Installation Requirements

Before installing your Wolf oven‚ ensure all pre-installation requirements are met to guarantee safe and proper operation. First‚ verify the power supply specifications; most Wolf ovens require a 220/240V electrical connection. Check that the installation location has adequate ventilation to prevent moisture buildup and ensure proper air circulation. Measure the space carefully to confirm the oven will fit seamlessly into your kitchen. Additionally‚ ensure the installation surface is stable and level. If you’re replacing an old oven‚ disconnect and remove it safely. Review local building codes and regulations to comply with installation standards. Lastly‚ consult the Wolf oven manual for specific model requirements‚ as some may have unique installation needs. Proper preparation ensures a smooth and hazard-free installation process. Always follow manufacturer guidelines to avoid potential issues.

Step-by-Step Installation Guide

To ensure a successful installation of your Wolf oven‚ follow these detailed steps:
Prepare the Installation Site: Ensure the area is clear of debris and obstacles. Verify the dimensions of the space where the oven will be installed to ensure a proper fit.
Connect Electrical Supply: Wolf ovens require a 220/240V electrical connection. Hire a licensed electrician to install a suitable outlet and ensure all wiring meets local codes.
Install Ventilation: Proper ventilation is crucial. Install a vent hood or exhaust system that meets Wolf’s specifications to maintain air quality and safety.
Position the Oven: Carefully place the oven into the designated space‚ ensuring it is level. Use shims if necessary to adjust the alignment.

Secure the Oven: Anchor the oven to the surrounding countertops or cabinetry using the provided hardware to prevent movement during operation.
Connect Gas (if applicable): For dual-fuel models‚ connect the gas line according to the manufacturer’s instructions. Ensure all connections are leak-tested.
Test the Oven: Once installed‚ turn on the oven to verify all functions are working correctly. Check heating elements‚ controls‚ and ventilation.
Final Inspection: Double-check all connections‚ ensure the oven is level‚ and confirm that all safety features are operational.

By following these steps‚ you can ensure a safe and efficient installation of your Wolf oven. Always refer to the official Wolf manual for model-specific instructions.

Safety Guidelines for Oven Operation

To ensure safe and efficient operation of your Wolf oven‚ adhere to the following guidelines:
Read the Manual: Before using your Wolf oven‚ thoroughly read the use and care guide to understand its features and safety precautions.
Prevent Accidents: Never leave cooking unattended‚ especially when using high-temperature modes like broiling or convection roasting.
Use Proper Cookware: Avoid placing cookware directly on the oven floor‚ as this can damage the appliance or cause fires. Always use oven-safe racks and cookware.

Monitor Children: Keep children away from the oven while it is in operation. Use the control panel lock to prevent accidental start-ups.
Handle Hot Surfaces: Oven doors‚ windows‚ and surrounding areas become extremely hot during operation. Always use oven mitts or tongs to handle hot cookware.

Ensure Proper Ventilation: Maintain adequate ventilation in your kitchen to prevent the accumulation of fumes and heat. Use a vent hood or exhaust fan as recommended.
Check Oven Light Usage: The oven light remains on while the oven is in operation. Use it to monitor cooking progress without frequently opening the door.
Avoid Overheating: Set cooking times and temperatures accurately to prevent overheating‚ which can damage the oven or cause fires.
Clean Regularly: Keep the oven interior clean to prevent food residue from igniting. Use the self-cleaning feature or manual cleaning methods as specified in the manual.
Follow Power Guidelines: For dual-fuel ovens‚ ensure gas lines are properly connected and maintained to avoid leaks or hazards.

By following these safety guidelines‚ you can enjoy safe and efficient cooking with your Wolf oven. Always prioritize caution and refer to the official Wolf manual for model-specific advice.

Operating Modes and Functions

Wolf ovens offer versatile operating modes for precise cooking. Modes include Bake‚ Convection‚ Roast‚ Broil‚ and more. Dual-fuel models combine gas and electric elements‚ while electric ovens provide consistent heat. Intuitive control panels and touchscreens simplify mode selection‚ allowing you to achieve professional results with ease.

Cooking Modes Overview

Wolf ovens are equipped with a wide range of cooking modes designed to cater to various culinary needs. These include Bake‚ Convection‚ Roast‚ Convection Roast‚ Broil‚ and more‚ ensuring precise control over your dishes. The Bake mode provides consistent heat for perfect pastries and bread‚ while Convection mode uses circulating air for even cooking and faster results. Roast mode is ideal for achieving caramelized crusts on meats‚ and Convection Roast enhances this with airflow for crispy textures.

The Broil mode allows for high-heat searing‚ perfect for steak or fish. Dual-fuel models combine the responsiveness of gas with the precision of electric elements‚ offering unparalleled versatility. Each mode is easily selectable via the intuitive control panel or touchscreen‚ ensuring a seamless cooking experience.

These modes are designed to deliver professional-grade results‚ whether you’re preparing a hearty roast or delicate desserts. By leveraging Wolf’s advanced technology‚ you can achieve consistent‚ flavorful outcomes with minimal effort. Explore these modes to unlock the full potential of your Wolf oven and elevate your culinary creations.

Using Convection Mode Effectively

Convection mode in Wolf ovens is a powerful feature that enhances cooking efficiency by circulating hot air evenly around your dishes. To use it effectively‚ start by understanding its benefits: faster cooking times‚ crisier textures‚ and uniform browning. When activating convection‚ reduce the recipe temperature by 25°F (15°C) to avoid overcooking‚ as convection heat is more intense.

For optimal results‚ ensure food is evenly spaced on racks to allow proper air circulation. Avoid overcrowding‚ as this can hinder airflow and reduce effectiveness. Use shallow pans or roasting racks to maximize exposure to circulating air. For delicate items like pastries or fish‚ consider a lower convection setting to prevent drying out.

Wolf ovens offer precise control over convection settings‚ allowing you to customize for specific dishes. For meats and vegetables‚ higher convection speeds enhance browning and crispiness. When cooking multiple trays‚ rotate them halfway through to ensure even cooking. Always refer to your Wolf oven’s manual for specific guidelines‚ as settings may vary slightly between models.

By mastering convection mode‚ you can achieve professional-quality results with less effort. Remember to monitor cooking times closely‚ as convection typically reduces them by 20-30%. This feature is especially useful for roasted dishes‚ baked goods‚ and crispy snacks‚ making it a versatile tool in your culinary arsenal.

Dual Fuel vs. Electric Oven Operations

When choosing between a dual fuel and electric Wolf oven‚ understanding their operational differences is essential. Dual fuel ovens combine a gas cooktop with an electric oven‚ offering precise control over surface cooking and even heat distribution in baking. Electric ovens‚ on the other hand‚ rely solely on electricity for both cooking surfaces and the oven‚ providing consistent and energy-efficient performance.

Dual fuel ovens are ideal for those who value the responsiveness of gas burners for stovetop cooking while still benefiting from the reliability of electric oven heat. They are particularly suited for professional-style cooking‚ where precise temperature control and rapid heat adjustments are crucial. Electric ovens‚ however‚ are often preferred for their ease of use and lower maintenance‚ as they eliminate the need for gas lines and complex fuel systems.

Both options offer advanced features like convection cooking and touchscreen controls‚ but their operational styles cater to different culinary preferences. Dual fuel ovens are better for searing and frying on the stovetop‚ while electric ovens excel in uniform heat distribution for baking and roasting. Energy efficiency also varies‚ with electric models often being more efficient for long cooking tasks.

Ultimately‚ the choice depends on your cooking habits and kitchen setup. Dual fuel ovens provide flexibility and professional-grade performance‚ while electric ovens deliver simplicity and consistency. Refer to your Wolf oven manual for specific operational guidelines tailored to your model.

Cooking Techniques and Tips

Mastering your Wolf oven begins with understanding its advanced features and optimizing your cooking techniques. Start by familiarizing yourself with the oven’s cooking modes‚ such as Bake‚ Convection‚ Roast‚ and Broil‚ to achieve the best results for your dishes. For convection cooking‚ ensure even air circulation by properly positioning racks and avoiding overcrowding pans. This maximizes the oven’s ability to distribute heat uniformly.

When using dual fuel ovens‚ take advantage of the gas cooktop for precise stovetop control‚ while relying on the electric oven for consistent baking and roasting. To enhance flavor‚ preheat your oven thoroughly before cooking‚ as this ensures accurate temperature performance. For delicate dishes‚ consider using the convection mode at a slightly lower temperature to prevent overcooking.

Invest in high-quality cookware that distributes heat evenly‚ such as stainless steel or cast iron‚ to make the most of your Wolf oven’s capabilities. Always measure ingredients accurately and follow recipe guidelines to avoid cooking inconsistencies. Additionally‚ don’t forget to use the oven’s built-in timer for precise control over cooking durations.

Regularly cleaning your oven is essential for maintaining its performance. Avoid using abrasive cleaners‚ as they may damage the interior. Instead‚ wipe down surfaces after each use and utilize the oven’s self-cleaning cycle when necessary. For more detailed tips and model-specific advice‚ consult your Wolf oven manual. By combining these techniques with practice‚ you’ll unlock the full potential of your Wolf oven.