manual propress

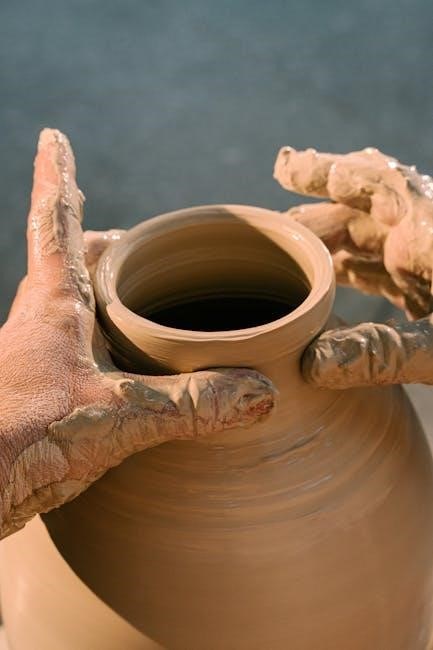
Manual ProPress is a revolutionary tool for copper piping, offering efficient press fittings and reliable connections, ideal for plumbing professionals seeking time-saving solutions with consistent results.

Overview of ProPress Technology

ProPress technology revolutionizes copper piping systems by eliminating the need for soldering, offering a faster, cleaner, and more reliable connection method. Utilizing press fittings with O-rings, it ensures leak-proof seals and long-term durability. The system is ideal for residential, commercial, and industrial applications, providing consistent performance in various environments. Its innovative design reduces installation time while maintaining high-quality connections, making it a preferred choice for modern plumbing professionals.

History and Evolution of ProPress Systems

The ProPress system was introduced in the early 2000s as a groundbreaking alternative to traditional soldering methods. Developed by companies like Viega, it quickly gained popularity for its efficiency and reliability. Over the years, advancements in O-ring technology and tool design have enhanced its performance, making it a staple in modern plumbing. Its evolution has led to widespread adoption across residential, commercial, and industrial sectors, solidifying its reputation as a time-saving, durable solution.

What is ProPress?

ProPress is a modern press fitting system designed for efficient and reliable pipe connections. It uses press tools and O-rings to create secure, watertight seals without soldering, offering time savings, ease of use, and enhanced safety.

Definition and Key Features

ProPress is a innovative press fitting system designed for copper piping, eliminating the need for soldering. Key features include a press tool for secure connections, O-rings for watertight seals, and compatibility with various pipe sizes. Its ergonomic design enhances ease of use, while its portability makes it ideal for tight spaces. The system offers faster installation, reduced fire hazards, and consistent reliability, making it a preferred choice for plumbing professionals and DIY enthusiasts alike.

How ProPress Differs from Traditional Press Systems

ProPress stands out by eliminating the need for soldering, utilizing press fittings with O-rings for secure, watertight connections. Unlike traditional systems that often require more labor and equipment, ProPress is highly portable and streamlines installation. Its O-ring technology enhances seal reliability and reduces leakage risks. Additionally, ProPress minimizes fire hazards associated with soldering and offers faster, more efficient connections, making it a safer and more convenient alternative to traditional methods.

Components of the ProPress System

The ProPress system includes press fittings, O-rings, a hydraulic press tool, and copper tubing. These components work together to create secure, leak-resistant connections without soldering.

Key Parts and Accessories

The ProPress system features essential components like press fittings, O-rings, and a hydraulic press tool. Accessories include a press tool with a relief valve, tight space adapters, and a go/no-go gauge. These parts ensure precise, leak-free connections, while the tool’s portability and ergonomic design enhance usability. Additional accessories like die sets and rings further customize the system for various pipe sizes and types, making it versatile for different plumbing projects.

Role of O-Rings in ProPress Fittings

O-rings are the primary sealing elements in ProPress fittings, ensuring a watertight connection. Made from durable materials like EPDM, they provide excellent resistance to heat and chemicals. The O-ring is compressed during the crimping process, creating a secure seal. While the crimp holds the fitting in place, the O-ring ensures leak prevention, making it a critical component for the system’s reliability and long-term performance in plumbing applications.

Advantages of Using ProPress

ProPress offers unmatched efficiency, saving time by eliminating soldering. It ensures durable, leak-resistant connections, reducing callbacks and enhancing system longevity, making it a cost-effective, reliable solution.

Efficiency and Time Savings

ProPress systems streamline plumbing processes by eliminating soldering, saving significant time on installation. The manual press tool enables quick, precise connections, reducing labor and boosting productivity. Its simplicity minimizes the need for specialized training, allowing professionals to complete tasks efficiently. This method ensures rapid project completion without compromising quality, making it ideal for professionals seeking to save time while maintaining reliable outcomes in demanding environments.

Reliability and Durability of Connections

Reliability and Duriability of Connections

ProPress connections are highly reliable and durable, utilizing press fittings that create leak-proof seals. The O-ring serves as the primary sealing element, while the crimp ensures a secure hold. This eliminates the risks associated with soldering, such as corrosion or joint failure. The system’s design ensures long-lasting performance, making it ideal for demanding environments. Its resistance to leaks and corrosion ensures consistent reliability over time, delivering trustworthy results for plumbing professionals.

Step-by-Step Guide to Using ProPress

Using ProPress involves preparing the tubing, aligning fittings, and pressing connections with a hydraulic tool, ensuring secure, leak-proof joints efficiently and safely.

Preparation and Safety Precautions

Before using ProPress, ensure the work area is clear and well-ventilated. Wear safety goggles and gloves to protect against debris. Cut and clean tubing ends thoroughly, removing any burrs or oxidation. Inspect O-rings for damage and ensure fittings are compatible with the tubing size. Keep a fire extinguisher or blanket nearby, especially when working near flammable materials. Always use the correct press tool and follow manufacturer guidelines to avoid accidents and ensure proper connections.

Installation Process and Best Practices

Align the tubing with the fitting, ensuring proper O-ring placement. Position the press tool squarely on the fitting, applying steady pressure until the connection is secure. Use the tool’s audible confirmation to verify crimping success. Inspect connections post-installation and test under pressure if possible. For tight spaces, consider specialized tools to maintain accuracy and avoid overtightening, ensuring long-lasting, leak-free performance. Always follow manufacturer guidelines for optimal results.

Comparing ProPress with Traditional Methods

ProPress offers faster, cleaner connections compared to traditional sweating, requiring less skill and physical effort while maintaining reliability and precision in plumbing applications.

ProPress vs. Sweating: Pros and Cons

ProPress systems offer significant advantages, including faster installation and reduced skill requirements compared to traditional sweating methods. They eliminate the need for an open flame, enhancing safety, especially in hazardous environments. ProPress provides reliable, consistent connections and is portable, making it ideal for various job sites. However, the initial investment in tools and fittings is higher, and while ProPress saves time overall, there’s a learning curve that might initially slow down new users. The choice between methods depends on project-specific needs and budget constraints.

Cost Comparison and Long-Term Benefits

While ProPress systems require an initial investment in tools and fittings, they offer long-term savings through reduced labor costs and increased efficiency. The reliability of ProPress connections minimizes leaks and repairs, making it a cost-effective choice for professionals. Compared to traditional methods, ProPress often pays for itself over time due to faster installation and reduced material waste.

Tools and Equipment Needed

The ProPress system requires a hydraulic press tool, press rings, and fitting dies. Additional accessories like a go/no-go gauge ensure precise connections, enhancing installation efficiency and safety.

Hydraulic Press Tool and Its Features

The hydraulic press tool is essential for ProPress systems, offering portable, efficient, and precise pressing of fittings. It features adjustable pressure settings, a compact design for tight spaces, and a pressure relief valve for safety. Compatible with various fitting sizes, it ensures reliable connections without soldering, making it a versatile tool for plumbing professionals. Additional features include durability and ease of maintenance, ensuring long-term performance in demanding environments.

Additional Accessories for Tight Spaces

For challenging installations in tight spaces, ProPress offers specialized accessories like compact adapters, extension bars, and swivel connectors. These tools enhance maneuverability, allowing precise fitting in confined areas. Optional right-angle presses and adjustable dies further improve accessibility, ensuring efficient and reliable connections even in difficult-to-reach locations. These accessories are designed to complement the hydraulic press tool, maximizing versatility and convenience for professionals working in tight spaces.

Troubleshooting Common Issues

Common issues with ProPress include improper crimping, leaking connections, or damaged O-rings. Ensure proper tool alignment, inspect fittings for debris, and verify O-ring integrity before use.

Identifying and Fixing Leaks

Leaks in ProPress systems often occur due to improper connections or damaged O-rings. Start by inspecting the fittings for visible damage or misalignment. Test the system under pressure to locate leaks. Replace any compromised O-rings and ensure proper seating. Re-crimp the connection if necessary, using the correct tool alignment. Double-check all connections for tightness and integrity before final testing.

Solving Crimping Problems

Crimping issues in ProPress systems often arise from misaligned fittings or improper tool use. Ensure the hydraulic press tool is calibrated and correctly positioned. Inspect the O-ring for damage or misplacement before crimping. If a connection fails, carefully cut it out and re-crimp with a new fitting, ensuring proper alignment and force. Always follow manufacturer guidelines for tool maintenance and operation to prevent recurring problems.

Safety Considerations

Always wear protective gear, follow manufacturer guidelines, and ensure the work area is secure. Proper tool handling and adherence to safety protocols prevent accidents and injuries.

Best Practices for Safe Operation

Always wear protective gear, including gloves and safety glasses, to prevent injuries. Ensure the work area is secure and well-lit, keeping flammable materials away. Follow manufacturer guidelines for tool operation and maintenance. Regularly inspect the ProPress tool and fittings for damage or wear. Properly handle the hydraulic press to avoid accidental activation. Keep loose clothing tied back and avoid distractions while operating; Regular training and familiarization with the tool enhance safety and efficiency.

Preventing Accidents and Injuries

Preventing accidents requires proper tool handling and adherence to safety guidelines. Regularly inspect the ProPress tool and fittings for damage or wear. Store tools in a secure, dry location to prevent tampering or accidental damage. Follow manufacturer instructions for operation and maintenance. Ensure all users are trained and experienced in using the tool. Properly secure loose clothing and avoid distractions while operating the tool to minimize risks.

Frequently Asked Questions

Common inquiries about Manual ProPress include its compatibility with various pipe sizes, ease of use for beginners, and the longevity of connections. Users also ask about troubleshooting leaks and the cost-effectiveness compared to traditional methods.

Common Questions About ProPress

Users often inquire about the ease of ProPress installation, its cost-effectiveness, and compatibility with different pipe materials. Questions also focus on the reliability of connections, troubleshooting leaks, and the longevity of fittings. Many wonder how ProPress compares to traditional soldering methods and whether it requires special tools. Additionally, there are queries about the role of O-rings and the best practices for tight spaces. These questions highlight its popularity and practicality in modern plumbing.

Addressing Concerns and Misconceptions

Some users worry about the cost of ProPress tools, but they often overlook long-term savings from reduced labor and materials. Concerns about O-ring durability are unfounded, as they are designed to last. Misconceptions about compatibility with certain materials are addressed by its versatility with copper, PEX, and more. ProPress is a reliable, modern solution that contradicts myths about its effectiveness compared to traditional methods.

Manual ProPress is a reliable, efficient, and durable solution for modern plumbing needs, offering significant time savings and consistent results for professionals and DIYers alike.

Manual ProPress is an innovative solution for copper piping, offering efficient press fittings and reliable connections. Its key features include ease of use, time-saving capabilities, and durability. The system relies on o-rings for sealing, ensuring leak-proof connections. Ideal for professionals and DIYers, ProPress tools simplify plumbing tasks, reducing the need for soldering. This method is cost-effective, versatile, and designed for long-term performance in various plumbing applications.

Future Prospects for ProPress Technology

ProPress technology is poised for growth, with advancements in tool design and fitting systems expected to enhance efficiency. Innovations like smart press tools and eco-friendly materials could expand its applications. As plumbing demands evolve, ProPress may integrate with automation and IoT for smarter systems. Its adoption in new industries and global markets is anticipated, solidifying its role as a leading solution in modern plumbing.

menu para diabeticos desayuno comida y cena pdf

Diabetic meal planning focuses on balancing nutrition to manage blood sugar levels effectively. It emphasizes healthy food choices and portion control to maintain overall well-being and energy.

Overview of Diabetes and Nutrition

Diabetes is a condition characterized by high blood sugar levels, which can be managed through a tailored nutritional approach. A balanced diet plays a crucial role in regulating blood glucose and preventing complications. Emphasizing whole grains, lean proteins, and healthy fats helps maintain energy levels and overall health. Avoiding sugary and processed foods is essential to prevent sudden spikes. Incorporating fiber-rich foods aids in digestion and blood sugar control. Portion control and regular meals are key to stabilizing blood sugar and supporting long-term well-being.

Importance of Meal Planning for Blood Sugar Control

Meal planning is vital for managing blood sugar levels, as it ensures a consistent intake of nutrients and prevents fluctuations. Structured meals help avoid overeating and maintain steady energy levels. By distributing calories evenly throughout the day, meal planning supports balanced insulin function and weight management. It also reduces the risk of complications associated with uncontrolled diabetes, promoting overall health and well-being for individuals with diabetes.

Breakfast Options for Diabetics

A balanced breakfast is crucial for blood sugar management. Options like whole grain cereals, yogurt, and fruits provide sustained energy and help avoid mid-morning cravings.

Healthy Carbohydrate Choices

Whole grains, legumes, and non-starchy vegetables are ideal for diabetics. Oatmeal, quinoa, and brown rice provide sustained energy and fiber, helping stabilize blood sugar levels. Include low-glycemic fruits like berries and apples, paired with nuts or yogurt for balance. These choices offer essential nutrients and prevent sharp glucose spikes, supporting overall diabetic management and promoting a steady energy supply throughout the day.

Protein-Rich Breakfast Ideas

Start your day with protein-rich options like scrambled eggs with spinach, Greek yogurt with berries, or cottage cheese. Add lean meats such as turkey or chicken slices for extra protein. These choices help stabilize blood sugar and provide sustained energy, making them ideal for diabetic meal plans. Pair with whole-grain toast or a small portion of oatmeal for a balanced and nutritious start to your day.

Low-Sugar Recipes for Morning Meals

Opt for low-sugar breakfast options like oatmeal with nuts and seeds, vegetable omelets, or whole-grain toast with avocado. Replace sugary toppings with cinnamon or vanilla for flavor. Incorporate fresh berries in moderation for natural sweetness. Smoothies made with spinach, Greek yogurt, and chia seeds are also great choices. These recipes minimize sugar spikes, providing steady energy and supporting blood sugar balance, while keeping breakfast delicious and nutritious for diabetic management.

Lunch Ideas for Diabetic Management

Include lean proteins like grilled chicken or fish, paired with vegetable salads and whole grains. Add healthy fats like avocado or olive oil for balanced nutrition and flavor.

Balanced Meals with Vegetables and Grains

Aim for meals rich in non-starchy vegetables like broccoli, spinach, and bell peppers, paired with whole grains such as quinoa or brown rice. Incorporate lean proteins like grilled chicken or fish, and add healthy fats like avocado or olive oil for flavor and nutrition. This combination ensures steady blood sugar levels, provides fiber, and keeps you satisfied throughout the day.

Lean Protein Sources for Midday Meals

Incorporate lean proteins like grilled chicken, turkey, or fish into your midday meals to stabilize blood sugar and provide energy. Plant-based options such as lentils, beans, or tofu are also excellent choices. Opt for portions of 3-4 ounces, avoiding added sugars and unhealthy fats. Pair these proteins with vegetables and whole grains for a balanced meal that supports diabetes management and overall health.

Healthy Fats to Include in Lunch

Incorporate healthy fats like avocado, nuts, seeds, or olive oil to enhance flavor and satisfaction in your midday meal. These fats support heart health and help regulate blood sugar levels. Add a small slice of avocado or a tablespoon of olive oil to salads or grains. A handful of almonds or chia seeds also provides a nutritious boost. Remember to keep portions moderate to maintain calorie balance while benefiting from these essential nutrients.

Dinner Recipes for Diabetics

Dinner recipes for diabetics focus on balanced nutrition, emphasizing lean proteins, fiber-rich vegetables, and healthy fats. Grilled fish, brown rice, and steamed vegetables are excellent low-carb, flavorful options.

Low-Carb Dinner Options

Low-carb dinner options for diabetics include grilled fish with roasted vegetables, sardines baked with herbs, or stir-fried tofu with leafy greens. These meals focus on lean proteins, fiber-rich foods, and healthy fats, ensuring balanced nutrition. Spices and herbs add flavor without adding sugar. Portion control is key to maintaining blood sugar stability. These dishes are not only delicious but also support weight management and overall health for individuals with diabetes.

Fiber-Rich Foods for Evening Meals

Fiber-rich foods are essential for evening meals as they help regulate blood sugar levels and promote digestion. Incorporate leafy greens, broccoli, and whole grains like quinoa or brown rice. A mixed green salad with cherry tomatoes, cucumbers, and a light vinaigrette is a great start. Baked sardines or grilled tofu paired with steamed vegetables provide balanced nutrition. These options not only stabilize blood sugar but also support weight management and overall well-being for diabetics.

Herbal and Spices to Enhance Flavor Without Sugar

Herbs and spices are excellent for adding flavor to meals without sugar. Turmeric, paprika, and basil provide a rich, aromatic taste to dishes like roasted vegetables or grilled proteins. Oregano and thyme enhance soups and stews naturally. Cumin and coriander add warmth to legumes and whole grains, while cinnamon or nutmeg can subtly sweeten baked goods. These seasonings not only elevate flavor but also support digestive health and blood sugar stabilization, making them ideal for diabetic-friendly meals.

Snacking Tips for Diabetics

Healthy snacks like nuts, seeds, fruits, and yogurt support blood sugar control. Opt for portion-controlled, nutrient-rich options to avoid spikes and maintain energy levels throughout the day.

Healthy Snack Choices

Opt for snacks rich in fiber, protein, and healthy fats to stabilize blood sugar levels. Fresh fruits, nuts, seeds, and yogurt are excellent choices. Vegetables like carrots or cucumbers with hummus also make great snacks. Avoid sugary or fried options. Portion control is key to preventing overconsumption. Snacks like hard-boiled eggs, avocado slices, or a small handful of almonds provide sustained energy and support overall metabolic health without causing blood sugar spikes.

Portion Control for Snacks

Portion control is essential for managing blood sugar levels and maintaining a healthy weight. Measure snacks to avoid overeating, using a food scale or standard serving sizes. Choose small, nutrient-dense options like a handful of nuts, veggie sticks with hummus, or a small piece of fruit. Avoid eating directly from large packages and use smaller plates to visually control amounts. Mindful snacking helps prevent excessive calorie intake and supports balanced blood sugar levels throughout the day.

Best Fruits and Nuts for Diabetes Management

Choose fruits low on the glycemic index, such as berries, citrus fruits, and apples, which provide fiber and antioxidants. Nuts like almonds, walnuts, and pecans are rich in healthy fats and protein, aiding in blood sugar regulation and satiety. Opt for unsweetened, unsalted varieties to avoid added sugars and sodium. Incorporate these in moderation, as part of balanced snacks, to maintain stable blood sugar levels and support overall health.

Creating a Weekly Meal Plan

A structured 7-day meal plan offers balanced options for breakfast, lunch, dinner, and snacks, ensuring variety and nutrient-rich meals to manage blood sugar levels effectively.

How to Structure a 7-Day Meal Plan

Structuring a 7-day meal plan involves organizing breakfast, lunch, dinner, and snacks with balanced portions of carbohydrates, proteins, and fats. Each day includes a variety of nutrient-rich foods to maintain blood sugar stability. Breakfast options might feature whole grains and lean proteins, while lunches and dinners incorporate vegetables, whole grains, and lean meats. Snacks are planned to prevent hunger spikes, ensuring steady energy levels throughout the day. This approach promotes consistency and makes meal preparation efficient.

Customizing the Plan Based on Personal Needs

Customizing a meal plan involves tailoring it to individual preferences, dietary needs, and health goals. Adjust portions, swap ingredients, and modify recipes to suit personal tastes. Consider allergies, cultural preferences, and lifestyle constraints to ensure the plan is realistic and sustainable. Regular monitoring of blood sugar levels helps refine the plan further, ensuring it meets specific health requirements and promotes long-term adherence to a balanced diet.

Downloading and Printing the Meal Plan in PDF Format

Downloading a meal plan in PDF format allows for easy access and organization. Users can print the document for daily reference, ensuring meals are prepared according to the plan. The PDF includes detailed recipes, portion sizes, and nutritional advice, making it a convenient tool for managing diabetes. It serves as a guide to maintain consistency in dietary habits, promoting better blood sugar control and overall health management through structured and balanced eating.

Benefits of a Diabetic Meal Plan

A diabetic meal plan offers structured eating habits, stabilizing blood sugar levels and promoting weight management. It enhances overall health and reduces the risk of complications associated with diabetes.

Stabilizing Blood Sugar Levels

A well-structured diabetic meal plan helps maintain consistent blood sugar levels by balancing carbohydrates, proteins, and fats. Balanced meals prevent sudden spikes and dips, promoting metabolic stability. Timing meals and snacks evenly throughout the day ensures glucose levels remain steady. Emphasizing whole grains, lean proteins, and healthy fats supports this balance. This approach reduces the risk of diabetes-related complications and enhances overall metabolic health, making it a cornerstone of effective blood sugar management for individuals with diabetes.

Weight Management Through Balanced Meals

Balanced meals play a key role in weight management for diabetics. Portion control and calorie monitoring help maintain a healthy weight while keeping blood sugar levels stable. Incorporating nutrient-dense foods like vegetables, lean proteins, and whole grains supports weight loss and maintenance. Regular, balanced meals prevent overeating and maintain energy levels throughout the day. This approach not only aids in weight management but also contributes to overall metabolic and glucose stability, essential for diabetic health.

Improving Overall Health and Well-being

A well-structured diabetic meal plan enhances overall health by promoting balanced nutrition and stable blood sugar levels. It encourages the consumption of nutrient-rich foods, reducing the risk of complications. Balanced meals support heart health, boost energy, and improve mental clarity. By focusing on whole foods, lean proteins, and healthy fats, individuals with diabetes can maintain optimal well-being, reducing the likelihood of chronic conditions. This approach fosters a healthier lifestyle, contributing to long-term health and quality of life.

troy bilt tb200 manual

Welcome to the Troy-Bilt TB200 manual! This guide provides essential information to help you understand, assemble, operate, and maintain your lawn mower safely and effectively.

1.1 Overview of the Troy-Bilt TB200 Lawn Mower

The Troy-Bilt TB200 is a self-propelled lawn mower designed for efficient and convenient mowing. It features adjustable mowing heights and a robust engine, making it suitable for various lawn sizes. The mower includes mulching and bagging options, allowing users to choose how they manage clippings. With a focus on ease of use and durability, the TB200 is equipped with safety features and user-friendly controls. This overview highlights its key capabilities and benefits for homeowners seeking a reliable mowing solution.

1.2 Importance of Reading the Manual

Reading the Troy-Bilt TB200 manual is crucial for safe and effective operation. It provides detailed instructions for assembly, maintenance, and troubleshooting, ensuring optimal performance. The manual highlights safety precautions to prevent accidents and outlines proper usage guidelines. By understanding the mower’s features and functions, users can maximize efficiency and extend its lifespan. Familiarizing yourself with the manual helps avoid common issues and ensures compliance with warranty terms, making it an essential resource for homeowners seeking to get the most out of their investment.

Safety Precautions and Rules

Always wear protective gear and ensure the area is clear before operating the Troy-Bilt TB200. Follow all safety guidelines in the manual to prevent accidents.

2.1 General Safety Guidelines

Always wear protective gear, including gloves, safety glasses, and sturdy shoes. Ensure the mowing area is clear of obstacles and bystanders. Keep children and pets away while operating. Never operate the mower while under the influence of alcohol or drugs. Follow all instructions in the manual and use the mower only for its intended purpose. Be cautious on slopes and uneven terrain. Avoid mowing in wet conditions or during bad weather. Regularly inspect the mower for damage or wear.

2.2 Safety Features of the Troy-Bilt TB200

The Troy-Bilt TB200 is designed with multiple safety features to ensure safe operation. It includes a blade brake system that stops the blade instantly when the handle is released, reducing accident risks. The mower also features a protective deck design to prevent debris from being thrown. Additionally, the handle is equipped with ergonomic grips and a secure locking mechanism to maintain control during use. These features are designed to protect the operator and bystanders while ensuring efficient mowing performance. Always follow the safety guidelines provided in the manual.

Assembly and Setup

Welcome to the assembly and setup section! This guide will help you unpack, inventory, and assemble your Troy-Bilt TB200 lawn mower step by step.

3.1 Unpacking and Inventory of Parts

Carefully unpack all components from the box and verify each item against the provided parts list. Ensure all hardware, tools, and accessories are included. Inspect each part for damage or defects. Organize the parts neatly to avoid misplacement during assembly. Familiarize yourself with the contents before proceeding to ensure a smooth setup process. If any items are missing or damaged, contact customer support immediately for assistance. Proper organization will help you complete the assembly efficiently and effectively.

3.2 Step-by-Step Assembly Instructions

Begin by attaching the handlebars to the mower deck using the provided bolts and washers. Tighten securely but avoid over-tightening. Next, install the wheels by aligning the axles and fastening with the supplied hardware. Ensure the mower deck is properly positioned and leveled. Refer to the diagram for correct alignment. Tighten all bolts in the order specified to maintain stability. Double-check torque specifications for critical bolts. Finally, ensure all safety features are functional before first use. If unsure, consult the manual or contact support.

Operating the Troy-Bilt TB200

Operating the Troy-Bilt TB200 involves starting the engine, adjusting mowing height, and navigating various terrain types safely and efficiently. Always follow safety guidelines for optimal performance and ease of use.

4.1 Starting and Stopping the Engine

Starting the Troy-Bilt TB200 engine involves priming the system and turning the key. Ensure the choke is in the correct position and the throttle is set to “start.” Always wear protective gear and clear the area of obstacles before operation. To stop, gradually reduce the throttle and engage the brake. Follow proper shutdown procedures to avoid damage. Regularly check the engine’s condition and fuel levels for smooth operation. Proper engine management ensures longevity and reliable performance.

4.2 Adjusting Mowing Height and Settings

Adjusting the mowing height on your Troy-Bilt TB200 is simple. Use the height adjustment lever to choose from multiple cutting positions, ensuring even results. For optimal performance, set the blade to match your grass type and desired length. Always check the mower deck for levelness to maintain consistent cutting; Proper adjustment ensures a clean cut and promotes healthy grass growth. Refer to the manual for specific guidance on setting the ideal height for your lawn.

4.3 Navigating Different Terrain Types

The Troy-Bilt TB200 excels on various terrains, including flat ground, inclines, and uneven surfaces. For flat terrain, maintain steady forward motion. On inclines, mow uphill to prevent the mower from slipping. For uneven ground, reduce speed and raise the mowing deck slightly to avoid scalping the lawn. Adjust the handlebar height for comfort and control. Always keep the mower deck clear of debris to ensure smooth operation on all terrain types. Refer to the manual for specific tips tailored to your lawn’s unique challenges.

Maintenance and Servicing

Regular maintenance ensures optimal performance and longevity of your Troy-Bilt TB200. Follow the recommended schedule for oil changes, blade sharpening, and deck cleaning. Always refer to the manual for specific servicing guidelines tailored to your mower’s needs. Proper care will keep your lawn mower running smoothly and efficiently throughout the mowing season.

5.1 Regular Maintenance Schedule

Maintain your Troy-Bilt TB200 with a routine schedule for optimal performance. Check oil levels weekly and change the oil every 50 hours of use. Inspect and sharpen the blade monthly to ensure clean cuts. Clean the mower deck after each use to prevent debris buildup. Replace the air filter every 25 hours or as needed. Lubricate moving parts seasonally, and drain old fuel before storage. Follow the manual’s guidelines for a detailed maintenance plan to keep your mower in top condition year-round.

5.2 Oil and Fuel Requirements

For optimal performance, use the recommended oil type and fuel specified in the Troy-Bilt TB200 manual. The engine requires high-quality detergent oil with an API certification. Use SAE 10W-30 oil for most conditions, adjusting viscosity for extreme temperatures. Fuel should be fresh, unleaded gasoline with an octane rating of 87 or higher. Avoid using old or mixed fuel, as it can cause engine issues. Always check the manual for specific recommendations to ensure proper engine function and longevity. Proper oil and fuel maintenance is crucial for the mower’s efficiency and durability.

5.3 Blade Sharpening and Replacement

Regular blade maintenance is essential for optimal cutting performance. Sharpen the blade when it becomes dull, using a file or grinder to maintain the original angle. Replace the blade if it is damaged or worn beyond sharpening. Always wear gloves and ensure the mower is turned off and unplugged before handling the blade. Use a blade balancer to ensure even cutting. For replacement, use only genuine Troy-Bilt parts to maintain safety and performance. Proper blade care ensures a clean, even cut and prolongs mower life.

Troubleshooting Common Issues

This section helps diagnose and resolve common problems with your Troy-Bilt TB200, such as engine issues or poor cutting performance, ensuring optimal functionality and longevity.

6.1 Engine Not Starting

If your Troy-Bilt TB200 engine fails to start, check the fuel level, air filter, and spark plug. Ensure the fuel is fresh, the air filter is clean, and the spark plug is properly connected. Verify the choke is in the correct position and that there are no blockages in the fuel line. If issues persist, consult the troubleshooting guide or contact a professional for assistance; Regular maintenance can help prevent such problems and ensure smooth operation.

6.2 Poor Cutting Performance

If your Troy-Bilt TB200 isn’t cutting evenly, check the blade for dullness or damage. A dull blade can tear grass, leading to an uneven appearance. Sharpen or replace the blade as needed. Ensure the mowing deck is at the correct height for your grass type. Varying mowing patterns can help achieve a more uniform cut. Additionally, clean the deck regularly to remove debris that might interfere with blade performance. Proper blade balance and regular maintenance will enhance cutting efficiency and leave your lawn looking healthier.

Illustrated Parts Diagram

The illustrated parts diagram provides a detailed visual reference for identifying key components of the Troy-Bilt TB200, such as the engine, blade, handlebar, and wheels.

7.1 Identifying Key Components

The illustrated parts diagram helps users identify essential components of the Troy-Bilt TB200, such as the engine, cutting deck, handlebar, wheels, and control levers. Engine: Powers the mower and is located at the rear. Cutting Deck: Houses the blade and adjusts for mowing height. Handlebar: Includes controls for speed and engagement. Wheels: Enable movement, with larger rear wheels for better traction. Understanding these components aids in maintenance and troubleshooting.

Warranty and Support Information

This section outlines the warranty coverage for your Troy-Bilt TB200, including duration and scope, and provides details on how to contact customer support for assistance or inquiries.

8.1 Warranty Coverage Details

The Troy-Bilt TB200 is backed by a comprehensive warranty program designed to protect your investment. The warranty typically covers defects in materials and workmanship for a specified period, ensuring your mower is repaired or replaced if issues arise. Specific terms, including duration and covered components, are outlined in the manual. Proper maintenance and adherence to guidelines are required to maintain warranty validity. For detailed information, refer to the warranty section or contact Troy-Bilt support directly.

8.2 Contacting Customer Support

For assistance with your Troy-Bilt TB200, contact customer support through their official website or helpline. The website offers resources, FAQs, and downloadable manuals. You can also reach support via phone or email for troubleshooting or warranty inquiries. Ensure you have your model number and specific details ready for efficient assistance. Troy-Bilt’s support team is available to address your concerns and provide solutions, helping you maintain your mower effectively. Visit their site or call today for reliable support.

Additional Features and Tips

Explore mulching and bagging options to enhance your mowing experience. Discover tips for optimal results, including blade maintenance and efficient cutting techniques.

9.1 Mulching and Bagging Options

The Troy-Bilt TB200 offers versatile mulching and bagging features. Mulching returns nutrients to the soil for a healthier lawn, while bagging neatly collects grass clippings. For optimal mulching, use the included mulch kit and ensure the blade is sharp. When bagging, attach the grass catcher securely and empty it frequently to maintain performance. Regularly clean the mower deck to prevent clogging. Proper use of these features enhances efficiency and keeps your lawn looking its best.

9.2 Tips for Optimal Mowing Results

For the best mowing experience with your Troy-Bilt TB200, maintain a sharp blade to ensure clean cuts and prevent tearing. Mow in a pattern to avoid missing spots, and keep the mower deck clean to prevent clogging. Adjust the mowing height based on grass type and season for a healthy lawn. Regularly check and replace worn parts to maintain performance. Follow safety guidelines and recommended maintenance schedules for long-lasting results and a perfectly manicured lawn.

Storage and Winterization

Properly store your Troy-Bilt TB200 in a dry, protected area. Drain fuel and oil, clean the mower deck, and protect moving parts. Follow winterization guidelines.

10.1 Proper Storage Techniques

To ensure your Troy-Bilt TB200 remains in excellent condition, store it in a clean, dry, and protected area. Drain the fuel tank or stabilize the fuel to prevent degradation. Clean the mower deck thoroughly to remove dirt and debris. Apply a rust-inhibiting coating to metal parts and protect moving components with lubricant. Store the mower on a level surface, away from direct sunlight and moisture. Proper storage will safeguard your equipment and ensure optimal performance when you resume mowing.

10.2 Winter Maintenance Checklist

Prepare your Troy-Bilt TB200 for winter with a comprehensive maintenance checklist. Drain the fuel tank or use a fuel stabilizer to prevent corrosion. Replace the oil and filter to protect the engine. Sharpen and clean the mower blade, then apply a rust-resistant coating. Inspect and replace worn belts or cables. Store the battery in a cool, dry place and charge it periodically. Cover the mower to shield it from dust and moisture. Regular winter maintenance ensures your mower is ready for the next mowing season.

the all american slurp questions and answers pdf

The All-American Slurp explores cultural nuances of slurping, blending tradition and societal norms. It delves into the Lin family’s journey, highlighting their adaptation to American dining customs and the subtle yet significant role of sound in meals, revealing a fascinating interplay of heritage and modern etiquette.

1.1 Cultural Significance of Slurping in America

In America, slurping carries dual perceptions, reflecting cultural dynamics. While formal settings often view it as impolite, casual dining embraces it as a natural expression of enjoyment. This duality highlights the complex interplay between tradition and modern norms, with slurping becoming a subtle yet significant marker of cultural identity. The Lin family’s experience illustrates how such habits can lead to misunderstandings, yet also foster cross-cultural understanding and adaptation. Slurping, thus, serves as a fascinating lens through which to explore broader societal attitudes toward food, noise, and communal dining experiences in the American context.

1.2 Overview of the PDF Resource

The PDF resource, The All-American Slurp Questions & Answers, serves as a comprehensive guide to understanding the cultural nuances of slurping in America. It explores the Lin family’s experiences, offering insights into their adaptation to American dining customs. The document delves into historical perspectives, modern attitudes, and the significance of food in shaping identity. It also addresses specific questions, such as the avoidance of raw vegetables in China and the challenges of eating celery in America. This resource provides a detailed analysis of cultural differences and their impact on everyday life, making it a valuable tool for cross-cultural understanding.

The Perception of Slurping in American Culture

Slurping in America is viewed differently across settings. While formal dining discourages it, casual environments often accept it, reflecting evolving cultural and social attitudes toward eating noises.

2.1 Formal Dining Etiquette and Slurping

In formal American dining settings, slurping is generally discouraged and considered impolite; Western table manners emphasize quiet, controlled eating, associating loud noises with a lack of refinement. Slurping, seen as disruptive, violates these norms, making it unacceptable in upscale restaurants or professional gatherings. This contrasts sharply with casual environments, where attitudes are more relaxed. The societal expectation for decorum in formal meals underscores the cultural significance of subtle, polite behavior, highlighting how sound plays a role in perceived etiquette.

2.2 Casual Dining and the Acceptance of Slurping

In casual American dining, slurping is often more accepted and even embraced as a natural expression of enjoyment. Informal settings, like family gatherings or casual restaurants, tend to be more forgiving of noisy eating habits. Slurping, in these contexts, is seen as a sign of savoring delicious food rather than a breach of etiquette. This relaxed attitude contrasts sharply with formal dining norms, reflecting the diverse cultural influences and evolving societal views on what constitutes proper behavior. The acceptance of slurping in casual settings highlights the adaptability of cultural norms in different social contexts.

The Lin Family’s Experience with American Dining

The Lin family’s journey in American dining began with an embarrassing celery incident, highlighting cultural differences in eating habits and their initial struggles with cultural adaptation.

3.1 The First Dinner Invitation and the Celery Incident

The Lin family’s first dinner invitation in America turned awkward when they encountered raw celery. Unfamiliar with this Western crudité, they mistakenly bit into it loudly, drawing attention. This incident underscored their initial struggles with American dining customs, highlighting the cultural gap in food etiquette. The embarrassment was palpable, yet it became a pivotal moment in their adaptation journey, teaching them the nuances of Western table manners and the subtleties of blending in.

3.2 Cultural Differences in Eating Habits

The Lin family’s transition to America revealed stark cultural differences in eating habits. In China, they avoided raw vegetables due to concerns about safety and texture, while in America, raw celery was a novelty. The crunch and loud sound of biting into it caused embarrassment. These contrasts highlighted the cultural gap in food preferences and etiquette. The family’s adaptation involved learning to navigate these differences, embracing new foods, and understanding the social nuances of dining in America. This journey reflected their broader effort to assimilate into American culture while preserving their heritage. Their experiences became a testament to the challenges and richness of cultural exchange.

Questions and Answers from the PDF

This section addresses key questions about the Lin family’s experiences, including their avoidance of raw vegetables, the issue with raw celery, and their English learning methods. It provides insights into cultural adaptation and dining habits.

4.1 Why Did the Lin Family Avoid Raw Vegetables in China?

The Lin family avoided raw vegetables in China primarily due to concerns about food safety and hygiene. In their native country, the risk of bacterial contamination and parasitic infections from uncooked vegetables was higher, making cooked options safer. Additionally, cultural preferences and traditional cooking methods emphasized thorough preparation of food to ensure safety and flavor. This habit persisted as they navigated their new life in America, influencing their dietary choices and social interactions, particularly during their first dinner invitation where raw celery became a focal point of cultural misunderstanding.

4.2 The Problem with Eating Raw Celery in America

The Lin family’s discomfort with raw celery stemmed from cultural and culinary differences. In China, raw vegetables were often avoided due to safety concerns, making the practice uncommon. Upon moving to America, they encountered raw celery as a standard component of salads and snacks. During their first dinner invitation, the crunch and texture of raw celery startled them, leading to an unintended slurping sound while trying to manage it discreetly. This incident highlighted the clash between their habits and American dining norms, where raw vegetables are not only accepted but expected in certain contexts.

4.3 How Did the Lin Family Learn English?

The Lin family learned English through a combination of practical immersion and dedicated effort. The daughter quickly picked up the language by befriending an American peer, immersing herself in daily conversations, and engaging in cultural exchanges. The parents attended community language classes and practiced diligently with phrasebooks and dictionaries. The family also relied on mutual support, helping each other refine their skills; This gradual process of learning English became a cornerstone of their cultural adaptation, fostering deeper connections with their new community and easing their transition into American life.

The Evolution of Slurping in American Society

Slurping in America has evolved from a stigmatized act to a casual, socially accepted practice. Historical roots in immigrant traditions and modern trends in informal dining have redefined its perception.

5.1 Historical Perspectives on Slurping

Historically, slurping in America was often viewed as impolite, rooted in Western etiquette emphasizing quiet dining. However, early immigration brought diverse culinary traditions, including those where slurping was normative. Asian cultures, for instance, embraced slurping as a sign of enjoyment, influencing American perceptions. Over time, societal shifts and cultural exchange softened attitudes, with casual settings like noodle bars normalizing the practice. This evolution reflects how immigrant traditions have reshaped American dining norms, blending global influences into a unique cultural identity.

5.2 Modern Trends and Changing Attitudes

Modern attitudes toward slurping in America reflect a growing cultural openness. While formal dining still frowns on loud slurping, casual settings like noodle bars and home gatherings increasingly embrace it. Social media and foodie culture have normalized the act, celebrating its association with delicious, often international cuisines. Younger generations, exposed to diverse foods, are more accepting, viewing slurping as a natural expression of enjoyment. This shift highlights how global influences are reshaping American dining norms, making slurping a symbol of cultural exchange and evolving etiquette.

Food, Identity, and Cultural Adaptation

Food is a cornerstone of cultural identity, reflecting traditions and values. The adaptation of eating habits signifies broader cultural shifts, as communities embrace new norms and flavors, fostering unity.

6.1 The Role of Food in Shaping Cultural Identity

Food serves as a powerful symbol of cultural identity, reflecting a community’s history and values. It binds people together, preserving traditions while adapting to new environments. The Lin family’s experience illustrates how culinary practices evolve, blending heritage with new cultural influences. Their journey highlights the role of food in bridging gaps between different worlds, showcasing how shared meals foster understanding and connection. Through dietary changes, they navigate identity, balancing old customs with new norms, exemplifying the dynamic interplay between food and culture.

6.2 The Lin Family’s Journey to Fit into American Culture

The Lin family’s journey to fit into American culture was marked by challenges and adaptation. Their initial embarrassment during a dinner invitation, due to misunderstanding celery etiquette, highlighted cultural differences. They learned to navigate these gaps, embracing new customs while preserving their heritage. Language barriers were overcome through dedication, with each family member finding unique ways to learn English. Their story reflects the universal struggle of immigrants to balance cultural identity with integration, illustrating how everyday experiences, like dining habits, play a crucial role in shaping their new life in America.

The All-American Slurp reflects cultural exchange and adaptation, highlighting the evolution of societal norms. It underscores the significance of food, sound, and etiquette in shaping cultural identity and unity.

7.1 The Significance of the All-American Slurp

The All-American Slurp represents more than just a sound; it embodies a cultural phenomenon. It reflects the blending of heritage and modern societal norms, as seen in the Lin family’s journey. Slurping, often viewed as a simple act, carries deep cultural significance, symbolizing adaptation and exchange. It highlights how food and sound can bridge cultural divides, fostering unity. The slurp becomes a metaphor for navigating differences, showing how small gestures can reflect broader societal shifts. Ultimately, it reminds us that cultural identity is shaped by shared experiences, including the sounds of enjoyment at the table.

7.2 Final Thoughts on Cultural Exchange and Etiquette

Cultural exchange is a cornerstone of understanding, as highlighted by the All-American Slurp. Etiquette evolves, blending traditions with modern norms. The Lin family’s journey underscores the importance of adapting while preserving heritage. Slurping, once seen as impolite, now symbolizes the beauty of cultural fusion. It reminds us that respect for differences fosters connection. By embracing diverse practices, we create a more inclusive society. The All-American Slurp serves as a reminder that cultural exchange enriches our lives, transforming everyday actions into meaningful bridges between communities.

nec phone manual user guides

NEC phone manuals provide comprehensive guides for users to navigate features‚ troubleshoot issues‚ and optimize their communication experience with clarity and precision‚ ensuring seamless functionality and user satisfaction.

Overview of NEC Phone Systems

NEC phone systems offer advanced communication solutions for businesses‚ featuring digital‚ IP‚ and DECT cordless technologies. These systems are designed for scalability‚ reliability‚ and ease of use‚ catering to organizations of all sizes. With models like the SV8100‚ SL2100‚ and DT800 series‚ NEC provides versatile options for office communication. The systems support essential features such as call transfer‚ hold functions‚ and voicemail setup‚ ensuring efficient workflow. Whether for small offices or large enterprises‚ NEC phone systems deliver exceptional performance and adaptability to meet diverse communication needs.

Importance of User Guides for NEC Phones

NEC phone user guides are essential for maximizing the functionality of your telephone system. They provide detailed instructions for understanding advanced features‚ troubleshooting common issues‚ and optimizing communication workflows. These manuals act as a bridge between users and the phone’s capabilities‚ ensuring that everyone can utilize the system efficiently. By following the guides‚ users can resolve problems independently‚ access step-by-step setup instructions‚ and make the most of their NEC phone’s potential. This enhances productivity and overall user satisfaction with the system.

Key Features of NEC Phone Manuals

NEC phone manuals offer detailed instructions‚ troubleshooting sections‚ and visual guides to help users master their phone systems. They include setup procedures‚ feature explanations‚ and maintenance tips.

Structure and Organization of NEC Manuals

NEC phone manuals are meticulously structured to ensure ease of use‚ with a logical flow from basic setup to advanced features. They typically begin with a table of contents‚ followed by detailed sections on installation‚ operation‚ and troubleshooting. The manuals often include visual diagrams and step-by-step guides to clarify complex functions. Appendices provide additional resources‚ such as technical specifications and warranty information. This clear organization allows users to quickly locate specific guidance‚ making the manuals both practical and user-friendly. Regular updates ensure the content remains relevant and accurate.

Visual Guides and Diagrams in Manuals

NEC phone manuals incorporate detailed visual guides and diagrams to simplify complex features. These visuals include labeled images of phone layouts‚ showcasing components like the handset‚ call indicator lamp‚ and programmable keys. Color-coded diagrams illustrate proper cable connections‚ while step-by-step illustrations guide users through tasks like setting up voicemail or transferring calls. The manuals also feature screenshots of display screens for digital models‚ helping users understand menu navigation. Such visual aids enhance comprehension‚ making it easier for users to master both basic and advanced phone functions effectively.

Troubleshooting Sections in NEC Manuals

Troubleshooting sections in NEC manuals provide step-by-step solutions for common issues‚ such as connection problems or display malfunctions. These guides help users identify and resolve errors quickly‚ minimizing downtime. They include diagnostic tools‚ error code explanations‚ and reset procedures. Visual aids like flowcharts and diagrams further assist in pinpointing issues. The manuals also offer tips for maintaining optimal performance and preventing future problems. This section empowers users to address challenges independently‚ ensuring efficient and effective communication system operation.

Popular NEC Phone Models and Their Manuals

NEC offers manuals for models like SV8100‚ SL2100‚ DT800 Series‚ and G266 DECT Cordless Phone‚ providing detailed setup‚ feature navigation‚ and troubleshooting guidance for each device.

NEC SV8100 Phone Manual

The NEC SV8100 phone manual is a detailed guide for users‚ covering features like call transfer‚ hold‚ and voicemail setup. It includes instructions for programmable keys‚ troubleshooting common issues‚ and system updates. Designed for both basic and advanced users‚ the manual ensures smooth operation of the SV8100 system. It provides clear instructions on display navigation‚ button functions‚ and software updates‚ making it an essential resource for maintaining optimal communication performance. Regular updates and maintenance tips are also included to enhance user experience and system reliability.

NEC SL2100 Phone Manual

The NEC SL2100 phone manual offers a comprehensive guide for users‚ detailing features like call forwarding‚ voicemail setup‚ and customizable programmable keys. It provides step-by-step instructions for system installation‚ advanced call handling‚ and troubleshooting; The manual also covers maintenance tips and software updates‚ ensuring optimal performance. With clear sections for both basic and advanced functionalities‚ it serves as an essential tool for users to maximize their communication experience with the SL2100 system‚ ensuring efficiency and reliability in daily operations.

NEC DT800 Series Manual

The NEC DT800 Series manual provides detailed guidance for users‚ covering essential features and advanced functionalities. It includes descriptions of the handset‚ call indicator lamp‚ LCD display‚ and programmable keys. The manual also explains how to use soft keys for shortcuts and access help functions. Additionally‚ it outlines procedures for call transfer‚ hold‚ and retrieval‚ ensuring efficient communication management. With clear instructions and visual aids‚ the manual helps users optimize their experience with the DT800 Series‚ making it an indispensable resource for both basic and advanced operations.

NEC G266 DECT Cordless Phone Manual

The NEC G266 DECT Cordless Phone manual offers a detailed guide for setup and operation. It covers inserting the battery‚ charging the phone‚ and basic functionalities. The manual also includes troubleshooting tips and maintenance advice to ensure optimal performance. With clear instructions‚ it helps users navigate advanced features like call transfer and voicemail. Designed for user-friendly navigation‚ the manual provides step-by-step solutions for common issues‚ ensuring a seamless communication experience. It is an essential resource for both initial setup and ongoing use of the G266 DECT phone.

How to Effectively Use NEC Phone Manuals

NEC phone manuals are designed to help users master their phone’s features and troubleshoot issues efficiently. Utilize quick reference guides‚ troubleshooting sections‚ and firmware update instructions for optimal performance.

Understanding the Table of Contents

NEC phone manuals begin with a detailed table of contents‚ ensuring users can quickly locate information on setup‚ features‚ and troubleshooting. This section is key for identifying specific guides for models like the SV8100 or SL2100. Users can easily navigate through chapters dedicated to call transfer‚ voicemail setup‚ and programmable keys. The table of contents also highlights sections for firmware updates and troubleshooting‚ making it a vital tool for mastering your NEC phone system efficiently.

Utilizing Quick Reference Guides

Quick reference guides within NEC phone manuals offer concise instructions for everyday operations‚ saving users time. These sections highlight essential features like call transfer‚ voicemail setup‚ and programmable keys. They often include visual aids‚ such as diagrams‚ to simplify complex tasks. Users can quickly access troubleshooting tips and shortcuts‚ ensuring efficient problem-solving. These guides are particularly useful for new users or those needing a refresher on specific functions‚ making them an indispensable resource for mastering NEC phone systems effectively and efficiently.

Updating Firmware and Software

Regularly updating your NEC phone’s firmware and software ensures access to the latest features‚ security patches‚ and performance improvements. To update‚ go to the phone’s settings menu‚ typically found under System or About Phone. Check for available updates and download them when prompted. Ensure the phone is sufficiently charged or plugged in before proceeding with the installation. After installation‚ the phone may restart to apply the updates. It’s advisable to back up important data beforehand to prevent loss. Refer to the manual for specific instructions and troubleshooting tips to resolve any update-related issues. Always keep your software up to date to maintain optimal functionality and security.

Advanced Features Explained in Manuals

NEC phone manuals detail advanced features like call transfer‚ voicemail setup‚ and programmable keys‚ offering clear instructions to enhance communication efficiency and user experience.

Call Transfer and Hold Functions

NEC phone manuals explain how to efficiently use call transfer and hold features. The hold function allows users to pause calls‚ with the line flashing green‚ and retrieve them by pressing the line button. Call transfer enables moving calls to other stations without requiring attendant assistance‚ streamlining office communication. These features are detailed with step-by-step instructions‚ ensuring users can manage calls seamlessly and enhance productivity. The manuals also highlight how these functions integrate with other advanced capabilities‚ providing a comprehensive guide for optimal phone system utilization.

Voicemail and Call Forwarding Setup

NEC phone manuals detail the setup process for voicemail and call forwarding‚ ensuring users can manage calls efficiently. Voicemail allows users to record greetings and retrieve messages‚ while call forwarding directs calls to other numbers or voicemail. Manuals provide step-by-step guides for activating these features‚ including setting up forwarding conditions and accessing voicemail remotely. Troubleshooting sections help resolve common issues‚ ensuring uninterrupted communication. These features enhance flexibility and productivity‚ making NEC phone systems adaptable to various user needs and preferences.

Customizing Programmable Keys

NEC phone manuals provide detailed instructions for customizing programmable keys‚ allowing users to tailor their phone systems to specific needs. These keys can be assigned functions like call forwarding‚ voicemail access‚ or speed dialing. Manuals guide users through accessing programming modes‚ selecting keys‚ and assigning features. Step-by-step instructions ensure ease of customization‚ enabling users to streamline workflows and enhance productivity. Troubleshooting tips are also included to resolve common issues‚ ensuring seamless operation of customized settings.

Online Resources for NEC Phone Manuals

NEC phone manuals are available on the official NEC website‚ third-party repositories‚ and interactive guides‚ offering easy access to user guides‚ troubleshooting‚ and setup instructions online.

Official NEC Website Downloads

The official NEC website provides direct access to comprehensive phone manuals‚ user guides‚ and setup instructions for various models‚ including the NEC SV9100‚ SL2100‚ and DT800 Series. These resources are available in downloadable PDF formats‚ ensuring easy access for users to troubleshoot‚ configure‚ and optimize their phone systems. The website is organized by product category‚ making it simple to locate specific manuals. Additionally‚ some resources require user registration or login for access‚ ensuring authenticated and secure downloads tailored to customer needs.

Third-Party Manual Repositories

Third-party websites offer a convenient alternative for downloading NEC phone manuals‚ often providing access to a wide range of models‚ including legacy systems. These repositories organize user guides by product category‚ making it easy to locate specific manuals. Many sites‚ such as ManualsLib or ManualsOnline‚ host NEC manuals in PDF format‚ allowing users to download or view them online. While these platforms can be helpful‚ it’s essential to verify the authenticity and safety of the source to avoid downloading unauthorized or outdated materials.

Interactive and Digital User Guides

NEC offers interactive and digital user guides‚ providing enhanced navigation‚ search functionality‚ and real-time updates. These guides are accessible via official websites and mobile apps‚ ensuring users stay informed.

Benefits of Interactive Manuals

Interactive NEC phone manuals offer enhanced user experiences with features like search functionality‚ clickable navigation‚ and real-time updates. They provide visual guides‚ videos‚ and step-by-step instructions‚ making complex tasks easier. These manuals are accessible on multiple devices‚ ensuring convenience. They also reduce clutter by eliminating physical copies and allow for instant access to troubleshooting solutions. Interactive manuals are eco-friendly and cost-effective‚ catering to diverse learning preferences with customizable layouts and zoom features. They are ideal for both novice and advanced users‚ fostering efficiency and productivity in communication systems.

Accessing Digital Versions

Digital versions of NEC phone manuals are readily available online‚ offering instant access to user guides‚ setup instructions‚ and troubleshooting tips. Users can download PDF manuals from NEC’s official website or third-party repositories‚ ensuring compatibility with various devices. These digital guides are searchable‚ customizable‚ and eco-friendly‚ reducing the need for physical copies. They are accessible on computers‚ tablets‚ and smartphones‚ providing convenience and flexibility. Regular updates ensure users have the latest information‚ enhancing their ability to optimize phone functionality effectively.

NEC phone manuals are essential resources for optimizing communication systems‚ offering detailed guidance for setup‚ troubleshooting‚ and feature utilization. By providing clear instructions and visual aids‚ these manuals empower users to maximize their phone’s potential. Whether accessed in print or digital formats‚ NEC manuals ensure seamless functionality and enhanced user experience. Regular updates and interactive guides further cater to evolving needs‚ making NEC manuals indispensable tools for efficient and effective communication solutions.

nikon f3 instruction manual

This comprehensive guide provides detailed instructions for mastering the Nikon F3 camera, covering basic operations, advanced features, maintenance, and troubleshooting. Designed for both novice and experienced photographers, it ensures optimal use of the camera’s capabilities.

1.1 Overview of the Nikon F3 Camera

The Nikon F3 is a professional-grade 35mm film SLR camera introduced in 1980 and produced until 2001. Designed by Yoshihisa Maitani, it combines durability, reliability, and advanced features, making it a favorite among photographers. The camera supports a wide range of Nikkor lenses and offers manual controls for shutter speed, aperture, and focus. Its high-eyepoint viewfinder and robust build ensure comfort and precision. The F3’s longevity and versatility have solidified its legacy in photography history, appealing to both professionals and enthusiasts. This manual provides detailed guidance for unlocking its full potential.

1.2 Importance of the Instruction Manual

The instruction manual is essential for maximizing the Nikon F3’s capabilities. It provides clear, step-by-step guidance on basic operations, advanced features, and troubleshooting. This comprehensive guide ensures users understand the camera’s intricate functions, such as exposure controls and manual focusing. By following the manual, photographers can optimize image quality and maintain the camera’s performance. It serves as a valuable resource for both new and experienced users, helping to unlock the full potential of the Nikon F3 and enhance their photography skills effectively.

Basic Operation of the Nikon F3

Mastering the Nikon F3 begins with understanding its fundamental operations, including loading film, setting ASA speed, and making exposures. These steps ensure proper camera function and image capture.

2.1 Parts Nomenclature

Understanding the Nikon F3’s components is essential for effective operation. Key parts include the shutter speed dial, aperture ring, viewfinder, lens mount, and exposure memory lock button. The camera features a durable build with intuitive controls, designed for professional use. Familiarizing yourself with these elements ensures smooth functionality and precise control over exposures. Proper identification of each part aids in troubleshooting and maintenance, enhancing your overall photography experience with the Nikon F3.

2.2 Loading Film

Loading film into the Nikon F3 is straightforward. Open the camera back by pulling the release lever. Insert the film cartridge, aligning it with the spool. Gently pull the film leader to seat it properly. Advance the film lever to ensure correct loading. Close the back and check the rewind knob rotates. Finally, set the ASA film speed to match your roll. Proper loading ensures accurate exposures and smooth operation.

2.3 Setting ASA Film Speed

Setting the ASA film speed on the Nikon F3 ensures optimal exposure. Locate the ASA dial on the camera’s top plate. Lift and rotate it to match the film’s ISO rating. For precise control, align the dial with the desired ASA value. This step is crucial for accurate exposure settings. Always verify the film speed before shooting to ensure your images are correctly exposed. Proper ASA setting is essential for achieving the best results with your Nikon F3 camera.

2.4 Making Exposures

Making exposures with the Nikon F3 involves using the camera’s metering system for accurate results. Frame your subject in the viewfinder, ensuring the metering display is visible. Set the desired aperture and shutter speed manually or rely on the camera’s automatic mode. Press the shutter release halfway to activate the meter, then fully press it to take the photo. The F3’s advanced metering system ensures precise exposures, while its ergonomic design makes it easy to handle. Always check the meter readings to achieve the best results for your shots.

Detailed Instructions for Advanced Features

Explore advanced techniques like exposure memory lock, multiple exposures, and manual focusing to enhance your photography with the Nikon F3’s sophisticated capabilities.

3.1 Exposure Memory Lock

The Exposure Memory Lock feature allows photographers to capture consistent lighting across multiple shots. By locking the exposure settings, the camera ensures uniformity even when lighting conditions vary. This function is particularly useful in scenarios like landscapes or group portraits, where maintaining a consistent look is crucial. The process involves metering the scene, pressing the exposure lock button, and then recomposing the shot. This advanced feature enhances creative control and delivers professional results. Photographers can rely on this tool to achieve precise exposures effortlessly.

3.2 Multiple Exposure Functionality

The Nikon F3 offers a multiple exposure feature, enabling photographers to create artistic effects by capturing multiple images on a single frame. This function is ideal for experimenting with unique compositions. To use it, set the multiple exposure mode, adjust the number of frames, and shoot. The F3’s mechanical design ensures precise control, even without batteries. This feature adds versatility, allowing photographers to push creative boundaries and achieve distinctive results with ease. It’s a powerful tool for those seeking to explore advanced photographic techniques. The camera’s robust construction supports this feature reliably.

3.3 Manual Focusing Techniques

The Nikon F3 allows for precise manual focusing, offering photographers full control over their composition. To focus manually, use the focus ring on compatible Nikkor lenses, ensuring sharpness in your images. The camera’s high-eyepoint viewfinder provides a clear view for accurate focusing. For enhanced precision, photographers can use interchangeable focusing screens, such as the split-image prism, to achieve razor-sharp results. Manual focusing on the F3 is smooth and intuitive, making it a preferred method for photographers seeking creative control. This feature is particularly useful for achieving unique depth-of-field effects and artistic compositions. The F3’s manual focus system remains a testament to its professional-grade design, emphasizing tactile control and optical excellence.

Camera Controls and Settings

The Nikon F3 features intuitive controls, including the shutter speed dial, aperture ring, and exposure memory lock button. These settings allow precise control over exposure and focusing modes, ensuring versatility for photographers. The camera’s ergonomic design makes it easy to adjust settings while maintaining a firm grip, enabling seamless operation during shoots. Advanced photographers will appreciate the manual controls and customizable options available on the F3, enhancing their creative workflow and image quality.

4.1 Shutter Speed Dial

The Nikon F3’s shutter speed dial offers manual control of all shutter speeds from 1/2000 sec. to 8 sec., including X, B, and T modes. To adjust the dial, press and hold the release button while turning it. In automatic mode, the camera selects the optimal speed, while manual mode allows for precise control. The dial’s design ensures smooth operation, enabling quick adjustments for changing lighting conditions. This feature is essential for photographers seeking creative control over exposure settings to achieve desired visual effects in their images.

4.2 Aperture Control

The Nikon F3 allows manual aperture control through the lens aperture ring, enabling precise light regulation. Aperture settings range from f/1.4 to f/32, depending on the lens. To adjust, rotate the aperture ring until the desired f-stop value aligns with the index mark. Proper aperture control is crucial for exposure accuracy and depth of field management. The camera’s metering system works in conjunction with the aperture to ensure optimal results. This feature provides photographers with creative flexibility, allowing them to balance light intake and focus effects effectively.

4.3 Exposure Memory Lock Button

The Exposure Memory Lock Button on the Nikon F3 allows photographers to store a specific exposure reading. By pressing the button, the camera retains the metered exposure value, enabling consistent results across multiple shots. This feature is particularly useful for capturing scenes with varying lighting conditions, ensuring that the chosen exposure remains constant. The locked exposure can be released by pressing the button again, making it an invaluable tool for achieving precise control over image brightness and maintaining creative intent.

Maintenance and Troubleshooting

Regular cleaning and proper care ensure the Nikon F3’s longevity. Troubleshooting common issues like shutter malfunctions or light leaks is addressed in the manual, guiding users to solutions or professional assistance.

5.1 Cleaning the Camera

Regular cleaning is essential to maintain the Nikon F3’s performance. Use a soft, dry cloth to wipe the camera body, viewfinder, and lens surfaces. For stubborn marks, dampen the cloth slightly but avoid harsh chemicals. Clean the mirror and prism gently with a microfiber cloth and avoid touching the shutter curtains. Lubricate hinges sparingly if needed. Store the camera in a dry, cool place to prevent moisture damage. Refer to the manual for detailed cleaning techniques to ensure optimal functionality and longevity of your Nikon F3.

5.2 Common Issues and Solutions

The Nikon F3 may occasionally encounter issues such as inaccurate metering or jammed shutters. For metering errors, recalibrate the light meter or replace the battery. If the shutter sticks, clean the camera’s internal mechanisms or lubricate moving parts. Film advance problems can often be resolved by checking for proper film loading or replacing worn components. Always refer to the manual for specific troubleshooting steps to address common issues effectively and maintain the camera’s reliability and performance over time.

Technical Specifications

The Nikon F3 is a professional 35mm film SLR with manual shutter speeds (1/2000-8 sec), high-eyepoint viewfinder, and compatibility with Nikkor lenses, offering advanced features.

6.1 Shutter Speed Range

The Nikon F3 features a versatile shutter speed range, offering manual control from 1/2000 sec to 8 sec, including B and T modes. This allows precise control over exposure, suitable for various lighting conditions. The electronic shutter provides automatic stepless control, while the mechanical shutter ensures reliability in manual mode. The F3’s shutter system is designed for professional use, delivering consistent and accurate results across its entire range. This flexibility makes it ideal for both creative and technical photography applications.

6.2 Compatibility with Lenses and Accessories

The Nikon F3 is compatible with a wide range of Nikkor and Nikon Series E lenses, ensuring versatility in photography. It supports both manual-focus and autofocus lenses, including AF-Nikkors, when paired with the F3AF body. The camera also works seamlessly with various accessories like the SB-24 flash unit, enhancing its functionality. Additionally, the F3 accommodates different viewfinders, such as the DE-2 and DE-3, offering customization to suit individual preferences. This broad compatibility makes the F3 a flexible tool for photographers, allowing them to expand their creative possibilities with ease.

Downloading the Nikon F3 User Manual

The Nikon F3 instruction manual is readily available online as a free PDF download. Visit Nikon’s official website or reputable sources like manualslib to access the comprehensive guide.

7.1 Online Resources for the Manual

Several online platforms offer the Nikon F3 manual for free. Websites like ManualsLib and Nikon’s official website provide easy access to download the PDF version. Additionally, Mike Butkus’s collection hosts a wide range of Nikon manuals, including the F3; These resources ensure that users can easily find and download the manual without any registration or payment requirements. They are ideal for photographers seeking detailed instructions or troubleshooting guides for their F3 camera.

The Nikon F3 instruction manual is an essential resource for photographers, offering detailed insights into camera operations, advanced features, and maintenance. By following the manual, users can unlock the full potential of their camera, ensuring exceptional photography experiences. Whether you’re a professional or an enthusiast, this guide empowers you to master the F3, making it an indispensable tool for anyone seeking to enhance their photographic skills and capture high-quality images with precision and creativity.

aperture shutter speed iso chart pdf

The Exposure Triangle is the foundation of photography, consisting of aperture, shutter speed, and ISO. These three elements work together to control light and create balanced exposures. A chart simplifies understanding their relationships, helping photographers master manual settings and achieve desired effects in various lighting conditions.

Understanding the Basics of Aperture, Shutter Speed, and ISO

Aperture controls how much light enters the lens, with smaller f-stops (like f/2.8) allowing more light and creating a shallower depth of field. Shutter speed determines how long the camera’s shutter stays open, affecting motion capture—faster speeds freeze action, while slower speeds create blur. ISO adjusts the camera’s sensitivity to light, with lower values (ISO 100) best for bright conditions and higher values (ISO 6400) for low light. Together, they balance exposure, ensuring images are neither too bright nor too dark.

Why a Chart is Essential for Mastering Photography Fundamentals

A chart is a valuable tool for visualizing the relationships between aperture, shutter speed, and ISO. It simplifies the complexity of the Exposure Triangle, making it easier to understand how each setting affects the overall exposure. By providing a quick reference, the chart helps photographers make informed decisions and troubleshoot common issues. It’s especially useful for beginners, as it accelerates the learning process and enhances mastery of manual mode. A printed chart can also serve as a handy guide during photo shoots, ensuring optimal settings in any lighting condition.

Aperture Explained

Aperture is a camera setting controlling light entry through the lens. It regulates depth of field, focusing sharpness, and background blur, enhancing creative control in photography.

What is Aperture and How Does it Affect Photos?

Aperture is a lens opening controlling light entry and depth of field. A lower f-stop (f/2.8) means a larger aperture, more light, and a shallower focus, blurring backgrounds. A higher f-stop (f/16) results in a smaller aperture, less light, and a deeper focus, keeping more of the image sharp. This balance is crucial for achieving desired effects, as shown in an aperture chart, helping photographers master light and composition effectively in various shooting scenarios. Using a chart simplifies understanding aperture’s impact on photos, enabling better control over creative outcomes.

How to Use Aperture for Depth of Field Control

Aperture directly influences depth of field, determining how much of the image is in focus. A wide aperture (low f-stop, e.g., f/2.8) creates a shallow depth of field, isolating subjects and blurring backgrounds, ideal for portraits. A narrow aperture (high f-stop, e.g., f/11) keeps more of the image sharp, perfect for landscapes or group photos. By adjusting aperture, photographers can emphasize subjects or ensure everything is in focus, using the aperture chart as a guide to achieve desired effects in various compositions and lighting scenarios.

Shutter Speed Explained

Shutter speed is the duration the camera’s shutter remains open, controlling light exposure and motion capture. It ranges from fast speeds (1/10000th of a second) to slow (several minutes), affecting image sharpness and blur.

What is Shutter Speed and Its Impact on Motion Capture

Shutter speed is the time the camera’s shutter stays open, measured in seconds or fractions of a second. It directly impacts how motion is captured: fast speeds freeze action, while slow speeds create blur. For sharp images, faster speeds (e.g., 1/2000th of a second) are ideal, especially with telephoto lenses. Slower speeds (e.g., 1/50th of a second) can artistically blur moving subjects. Mastering shutter speed is key to controlling motion effects and achieving creative outcomes in photography.

How to Choose the Right Shutter Speed for Sharp Images

Choosing the right shutter speed is crucial for capturing sharp images. A faster shutter speed (e.g., 1/500th of a second) freezes motion, ideal for sports or wildlife photography. Slower speeds (e.g., 1/60th of a second) can introduce blur, creating artistic effects. Use a shutter speed of at least 1/focal length (e.g., 1/50th for a 50mm lens) to avoid camera shake; Adjust based on lighting conditions and desired effects to ensure clarity and sharpness in your photos.

ISO Explained

ISO (International Organization for Standardization) regulates light sensitivity. Lower ISO (e.g., ISO 100) reduces noise, ideal for bright scenes, while higher ISO (e.g., ISO 6400) captures images in low light but increases noise.

What is ISO and How Does it Affect Image Quality?

ISO (International Organization for Standardization) measures a camera’s light sensitivity. Lower ISOs (e.g., ISO 100) provide less sensitivity, reducing noise and grain, ideal for bright lighting. Higher ISOs (e.g., ISO 6400) increase sensitivity, capturing images in low light but introducing noise and grain, which can degrade image quality. Proper ISO settings balance light capture and detail retention, crucial for achieving professional results. Managing ISO effectively is key to mastering exposure in various conditions.

Best Practices for Using ISO in Different Lighting Conditions

In bright lighting, use the lowest ISO (e.g., ISO 100-400) to minimize noise and grain. In low light, higher ISOs (e.g., ISO 6400-12800) capture images without flash but may introduce noise. For medium light, ISO 800-3200 balances detail and noise. Always prioritize the lowest ISO needed for the scene to maintain image quality. Adjusting ISO alongside aperture and shutter speed ensures optimal exposure. Using a chart helps photographers quickly identify the ideal ISO for various conditions, enhancing creativity and technical accuracy in their work.

How to Balance Aperture, Shutter Speed, and ISO

Balancing aperture, shutter speed, and ISO is crucial for proper exposure. Adjusting one element affects the others, requiring a reciprocal approach to maintain desired brightness and clarity.

Understanding the Reciprocal Relationship Between Exposure Elements

The reciprocal relationship between aperture, shutter speed, and ISO ensures that changing one element necessitates adjusting another to maintain consistent exposure. For instance, increasing aperture (lower f-stop) allows more light, requiring faster shutter speed or lower ISO to avoid overexposure. This interplay is fundamental for achieving desired results, whether capturing motion, depth of field, or minimizing noise. A chart visualizes these relationships, aiding photographers in making precise adjustments for optimal image quality across various lighting scenarios.

Practical Tips for Achieving Perfect Exposure

Use a chart to visualize how aperture, shutter speed, and ISO interact. Start by setting aperture for desired depth of field, then adjust shutter speed and ISO to balance light. Meter your scene to determine baseline settings. Bracket shots to capture a range of exposures. Adjust in increments, compensating for changes in one element with another. Practice these steps to master manual mode and consistently achieve well-exposed images in any lighting condition.

Using the Aperture, Shutter Speed, and ISO Chart

Refer to the chart to understand how aperture, shutter speed, and ISO interact. It provides a visual guide to adjust settings for optimal exposure in various lighting conditions.

How to Read and Apply the Chart for Better Photography

The chart visually organizes aperture, shutter speed, and ISO values in 1/3-stop increments. Start by identifying your desired aperture for depth of field, then adjust shutter speed to freeze or blur motion. Finally, set ISO based on lighting conditions. Use the chart to balance these elements for proper exposure. For sharper images, match shutter speed to your lens focal length. This guide helps troubleshoot common issues like overexposure or blur, ensuring consistent results in various lighting scenarios. It’s a quick reference for mastering the exposure triangle effectively.

Troubleshooting Common Exposure Issues with the Chart

Use the chart to diagnose overexposed or underexposed images. If photos are too bright, decrease ISO or aperture, or increase shutter speed. For dark images, do the opposite. Motion blur? Increase shutter speed or use a tripod. Sharpness issues? Ensure shutter speed matches lens focal length. The chart helps adjust settings systematically, preventing trial-and-error mistakes. It’s a practical tool for resolving exposure problems and refining your photography skills efficiently in any lighting situation, ensuring better results every time you shoot.

Downloading and Printing the Chart

The aperture, shutter speed, and ISO chart is available as a free PDF download. Visit the website, select the chart, and print it on standard paper. Ensure it’s in portrait orientation for easy reference. Laminate it for durability and use it as a quick guide for mastering exposure settings.

Step-by-Step Guide to Accessing the PDF Chart

To access the aperture, shutter speed, and ISO chart, visit the website and locate the download section. Click on the provided link to open the PDF file. Save it to your device and ensure you have a PDF reader installed. Open the file, review the content, and print it on standard-sized paper. Adjust print settings if needed for clarity. Once printed, use the chart as a handy reference guide for balancing exposure settings during your photography sessions.

How to Use the Chart as a Quick Reference Guide

Use the aperture, shutter speed, and ISO chart to quickly find balanced exposure settings. Start by selecting a desired aperture and locate corresponding shutter speed and ISO combinations. For example, if using f/8, find matching shutter speed and ISO values to maintain proper exposure. Adjust based on lighting conditions or creative goals. Laminate the chart for durability and keep it in your camera bag for easy access during shoots. This ensures you can make informed decisions efficiently, enhancing your photography workflow.

Additional Resources for Learning

  • Explore recommended books like “Understanding Exposure” by Bryan Peterson for in-depth insights.
  • Check out online courses on Udemy or Coursera for structured learning.
  • Watch YouTube tutorials from channels like Tony Northrup for practical tips.
  • Join photography communities like 500px for inspiration and feedback.
  • Download the Exposure Triangle PDF Guide for quick reference.

Recommended Tutorials and Videos for Exposure Triangle Mastery

  • Watch Tony Northrup’s “Exposure Triangle Explained” for a clear breakdown of aperture, shutter speed, and ISO.
  • Peter McKinnon’s YouTube tutorials offer practical examples for mastering manual mode.
  • Check out Mango Street Lab’s “Exposure Triangle Cheat Sheet” for visual learners.
  • SLR Lounge provides detailed video guides on balancing exposure settings.
  • Download the Exposure Triangle PDF Guide for quick reference and practice exercises.

Books and Online Courses for Advanced Photography Skills

  • “Understanding Exposure” by Bryan Peterson is a must-read for mastering aperture, shutter speed, and ISO.
  • Udemy’s “Mastering the Exposure Triangle” course offers in-depth lessons and practical exercises.
  • Coursera’s “Photography Basics and Beyond” provides a structured approach to advanced techniques.
  • Skillshare’s “Advanced Photography Workshops” cover specialized topics like low-light shooting.
  • CreativeLive’s “Exposure Mastery” features live sessions with industry experts.
  • Download the “Exposure Triangle eBook” from Photography Life for detailed insights and visual guides.

first alert professional security system manual

Congratulations on owning the First Alert Professional Security System, a comprehensive solution for home and business protection. This advanced system offers reliable security features, including smoke detection, carbon monoxide alarms, and remote monitoring capabilities. Designed with user-friendly controls, it ensures early warning systems and seamless integration with smart home devices. This manual will guide you through its setup, operation, and maintenance to maximize your security experience.

1.1 Overview of the System

The First Alert Professional Security System is a state-of-the-art solution designed to provide comprehensive protection for homes and businesses. It integrates advanced detection capabilities, including smoke and carbon monoxide alarms, with remote monitoring options. The system is user-friendly, offering intuitive controls and compatibility with smart home devices. Its modular design allows for customization, ensuring tailored security solutions. With reliable performance and cutting-edge technology, it delivers enhanced safety and peace of mind for users.

1.2 Importance of Reading the Manual

Reading the manual is essential to fully understand the First Alert Professional Security System’s features, operation, and maintenance. It provides step-by-step guides for installation, arming/disarming, and troubleshooting. The manual explains how to customize protection zones, integrate with smart devices, and respond to emergencies. By following the manual, users can optimize system performance, ensure proper functionality, and maximize security. It serves as a critical reference for achieving the best results from your investment.

Installation and Setup

The First Alert Professional Security System requires careful installation to ensure optimal performance. Follow the step-by-step guide for proper setup, including configuring protection zones.

2.1 Step-by-Step Installation Guide

Begin by mounting the control panel and sensors at recommended locations. Connect all components, ensuring proper wiring and alignment. Activate the system by entering your security code. Test each zone to confirm functionality. Refer to the manual for specific instructions on configuring protection zones and integrating additional features like smoke detectors and carbon monoxide alarms. Follow the guide carefully to ensure a secure and reliable setup.

2.2 Configuring Protection Zones

Start by defining each protection zone, assigning labels for easy identification. Use the keypad to program zone types, such as perimeter or interior areas. Ensure all sensors are linked correctly to their respective zones. Test each zone to confirm proper detection and alert functionality. Refer to the manual for detailed instructions on zone configuration and troubleshooting common issues during setup. Proper zone setup ensures reliable system performance and accurate alerts.

Key Features of the First Alert Professional Security System

The system offers advanced detection capabilities, remote monitoring, and integration with smart devices. It includes smoke and carbon monoxide alarms for comprehensive safety and security solutions.

3.1 Advanced Detection Capabilities

The First Alert Professional Security System boasts cutting-edge detection features, including smoke and carbon monoxide alarms. These components utilize advanced sensing technologies to provide early warnings for potential threats. The system’s smoke detectors are designed to quickly identify fire-related hazards, while carbon monoxide alarms ensure protection against invisible dangers. Together, they create a robust safety network, enhancing home and business security with reliable, real-time monitoring and alerts.

3.2 User-Friendly Interface and Controls

The First Alert Professional Security System features an intuitive interface designed for ease of use. The keypad and display provide clear system status updates, allowing users to arm, disarm, and monitor zones effortlessly. The system’s controls are straightforward, ensuring quick access to essential functions. This user-friendly design makes it simple for everyone to navigate and operate the system effectively, enhancing overall security management and convenience.

Remote Monitoring and Dealer Programs

Honeywell’s First Alert Professional Dealer Program supports dealers with advanced tools and training for remote monitoring and system integration, enhancing security solutions for users nationwide.

4.1 Honeywell’s First Alert Professional Dealer Program

Honeywell’s First Alert Professional Dealer Program provides dealers with advanced tools, training, and support to deliver top-tier security solutions. The program includes resources for sales techniques, marketing strategies, and system integration. Dealers like ASI and Sonitrol Security Services have joined, offering customized security systems and remote monitoring services. This program ensures high-quality installations and maintenance, enhancing customer satisfaction and system performance nationwide.

4.2 Remote Video Monitoring Station Setup

Setting up a remote video monitoring station with the First Alert Professional Security System enhances security oversight. Dealers, such as ASI and Pacific Alarm Systems, integrate advanced video surveillance with the system. This setup allows real-time monitoring, instant alerts, and customized responses to threats. The station can be tailored to specific security needs, ensuring comprehensive protection and efficient incident management for homes and businesses.

Arming and Disarming the System

Arm or disarm the system using your security code for enhanced protection. Enter the code to activate or deactivate, ensuring zones are protected or bypassed as needed.

5.1 Basic Arming/Disarming Procedures

The system must be disarmed first by entering your security code. To arm, press the appropriate button for your preferred mode. For disarming, re-enter your code. Bypass zones selectively by pressing the BYPASS button and selecting unprotected zones. Ensure all zones are secure before arming. Follow the keypad prompts for confirmation, and verify the system status on the display. Always refer to the manual for specific arming/disarming sequences.

5.2 Bypassing Zones Selectively

To bypass zones selectively, ensure the system is disarmed. Enter your security code and press the BYPASS button. Select the zones you wish to bypass using the keypad. Confirm your selection, and the system will update its status. Bypassed zones will not trigger alarms but will remain monitored. Always re-arm the system when leaving the premises to ensure full protection. Refer to the manual for detailed bypass procedures.

Maintenance and Troubleshooting

Regular system checks ensure optimal performance; Clean smoke detectors, replace batteries, and inspect wires for damage. Refer to the manual for troubleshooting common issues.

6.1 Regular System Maintenance Tips

Regular maintenance ensures your First Alert Professional Security System operates effectively. Clean smoke detectors monthly to avoid false alarms and replace batteries annually. Inspect wires for damage and test backup power systems. Check system status regularly and update software if needed. Schedule professional inspections annually for optimal performance. Refer to the manual for detailed maintenance schedules and procedures to keep your system reliable and efficient.

6.2 Common Issues and Solutions

Common issues with the First Alert system include false alarms from smoke detectors due to dust or cooking fumes. Clean detectors monthly and ensure proper ventilation. Keypad errors may occur if the system isn’t disarmed; enter your code to reset. Connectivity problems can arise from outdated software or poor internet connection; restart the system and check for updates. For battery-related issues, replace batteries annually or as indicated by low-battery alerts.

System Components and Functions

The First Alert Professional Security System includes keypads, smoke detectors, carbon monoxide alarms, and a central control unit. These components work together to monitor and protect your property, providing real-time alerts and ensuring your safety through advanced detection and notification features.

7.1 Understanding the Keypad and Display

The keypad is the primary interface for controlling the First Alert Professional Security System. It features a clear display showing system status, zone information, and alarm messages. The keypad allows users to arm, disarm, and bypass zones effortlessly. LED indicators provide visual feedback, while the display offers real-time updates on the system’s condition. This user-friendly design ensures intuitive operation and quick access to essential security functions, enhancing overall system management and responsiveness.

7.2 Role of Smoke Detectors and Carbon Monoxide Alarms

The First Alert Professional Security System includes advanced smoke detectors and carbon monoxide alarms, designed to provide early warnings of potential threats. These devices monitor air quality and detect dangerous levels of smoke or carbon monoxide, ensuring timely alerts to protect occupants. Integrated with the system, they offer a comprehensive safety solution, enhancing home and business security by preventing unnoticed hazards from escalating into emergencies.

Emergency Procedures

The First Alert system detects threats, enabling immediate response. Plan emergency exits and stay calm. Follow alarm signals like “FIRE 95” for safe evacuation. Contact authorities promptly.

8.1 Responding to Fire Alarms

When the First Alert system triggers a fire alarm, immediate action is crucial. Stay calm and evacuate the premises following pre-planned escape routes. Do not delay or investigate the cause. Once safely outside, contact emergency services and await further instructions. The system’s “FIRE 95” alert signals a detected threat, ensuring timely response to prevent potential dangers. Always prioritize safety and avoid re-entering the building until cleared by authorities.

8.2 Planning Emergency Exit Routes

Plan emergency exit routes to ensure quick and safe evacuation during a fire alarm. Identify at least two escape paths from each room, avoiding potential obstacles. Designate a safe meeting point outside the building to account for all occupants. Regularly review and practice these routes to ensure everyone is prepared. Clear signage and unobstructed pathways are essential for efficient evacuation, as highlighted in the system’s fire protection guidelines.

Integration with Smart Home Devices

The First Alert Professional Security System seamlessly integrates with smart home devices, enhancing convenience and security. Compatible with automation systems, it allows control of lights, thermostats, and more through a unified interface, ensuring a connected and protected living environment.

9.1 Compatibility with Home Automation Systems

The First Alert Professional Security System integrates smoothly with popular home automation systems, enhancing convenience and security. Compatible with systems like Honeywell’s Total Connect 2.0, it allows seamless control of security, lights, thermostats, and door locks through a single interface. This compatibility ensures a unified smart home experience, enabling users to monitor and manage their security settings alongside other smart devices effortlessly, improving overall home safety and efficiency.

9.2 Enhancing Security Through Integration

Integrating the First Alert Professional Security System with smart home devices amplifies security and convenience. By connecting to platforms like Honeywell’s Total Connect 2.0, users gain enhanced monitoring capabilities, real-time alerts, and remote control of security settings. This integration allows for automated responses to potential threats, such as locking doors or activating lights, creating a robust and user-friendly security framework that adapts to modern smart home demands.

Congratulations on completing the manual. The First Alert Professional Security System ensures reliable protection and peace of mind. Follow the guidelines for optimal performance and security.

10.1 Final Tips for Optimal System Performance

For peak performance, regularly test smoke and carbon monoxide detectors, update software, and clean sensors. Plan emergency exits and ensure all users understand the system. Schedule professional maintenance annually and review alarm codes with household members. Keep the manual handy for quick reference. By following these steps, your First Alert Professional Security System will provide reliable protection and peace of mind for years to come.

quince size guide

Discover the ultimate guide to finding your perfect fit with Quince. Our size guide offers detailed measurements, fabric insights, and tips for a flattering, custom-like fit. Ensure your Quince dress matches your unique style and body type with our expert advice and size charts.

1.1 Understanding the Importance of Proper Sizing for Quince

Proper sizing is crucial for a Quince dress to ensure a flawless, comfortable fit. Accurate measurements guarantee the dress complements your body type and fabric choice, enhancing both style and confidence. Ill-fitting dresses can alter the overall aesthetic, making proper sizing essential for a polished look. By understanding your measurements, you can select a dress that flatters your figure and aligns with your personal style, creating a memorable and elegant appearance for your special occasion.

1.2 Overview of Quince Sizing Charts and Measurements

Quince sizing charts provide detailed measurements to help you find your perfect fit. Standard and plus-size options are available, ensuring inclusivity for all body types. The charts typically include bust, waist, hip, and inseam measurements, guiding you to select the right size. Height considerations are also factored in, with options like 30-inch or 32-inch inseams for taller individuals. Fabric type can influence fit, so measurements are tailored to specific materials. Using these charts ensures a dress that aligns with your body proportions and personal style.

How to Measure for Your Quince Dress

Measure your bust, waist, and hips for the best fit. Use a flexible tape measure and consider undergarments for accuracy. Ensure proper alignment and double-check measurements for reliability.

2.1 Essential Measurements for a Perfect Fit

To ensure a flawless fit, measure your bust, waist, hips, and inseam. Bust: Measure around the fullest part. Waist: Find your natural waistline. Hips: Measure 7-9 inches below the waist. Inseam: Length from groin to ankle. Use a flexible tape measure and consider undergarments worn with the dress. Double-check measurements for accuracy and consult Quince’s size chart to match your numbers with the ideal fit.

2.2 Common Mistakes to Avoid When Measuring

Ensure accurate measurements by avoiding common errors. Don’t measure over bulky clothing or pull the tape too tight or loose. Avoid using a rigid ruler for curved body parts. Measure your inseam correctly by standing straight and placing the tape from groin to ankle. Double-check your numbers and compare them to Quince’s size chart for the best fit. Consider having someone assist for precise readings, especially for hard-to-reach areas like the back.

Factors Affecting Quince Dress Size

Your body type, height, and fabric choice significantly impact your dress fit. Body type influences how fabric drapes, while height determines inseam length. Fabric stretch and weight also affect sizing accuracy.

3.1 Body Type and Its Impact on Dress Fit

Your body type plays a crucial role in how your Quince dress fits. Hourglass figures may emphasize waistlines, while pear-shaped bodies benefit from A-line styles. Petite frames should consider shorter inseams, and taller individuals may need longer lengths. Quince’s size-inclusive options cater to all shapes, ensuring a flattering fit. Understanding your body type helps you choose styles that accentuate your features, making the dress feel tailored to you. Use Quince’s size guide to match your measurements and body type for the perfect fit.

3.2 Fabric and Material Considerations

Fabric choice significantly impacts the fit and comfort of your Quince dress. Stretchy materials like jersey or knits offer flexibility, while structured fabrics such as satin or tulle provide a more defined silhouette. Chiffon and organza create a lightweight, flowing effect, ideal for airy designs. Leather and suede, as seen in Quince collections, add a luxurious touch but may require precise sizing. Always consider fabric drape and stretch when selecting your size to ensure a flattering and comfortable fit. Proper care for your fabric ensures longevity and maintains the dress’s shape and quality.

Quince Dress Size Chart Breakdown

Navigate Quince’s size chart with ease, featuring standard and plus-size options. Height and inseam measurements guide size selection, ensuring a tailored fit for every body type and preference.

4.1 Standard Sizing vs. Plus-Size Options

Quince offers a range of sizes to cater to all body types, with standard sizing typically fitting petite to medium frames and plus-size options accommodating curvier silhouettes. Both collections feature similar styling but are tailored to ensure a flattering fit. The size charts provide detailed measurements, including bust, waist, and hip sizes, to help you choose accurately. Plus-size dresses often have slightly adjusted proportions for a more comfortable and elegant look. Consider your height and inseam when selecting sizes, as Quince provides guidelines for the best fit. Always refer to the official size chart for precise measurements.

4.2 How to Choose the Right Size for Your Height

Height plays a crucial role in selecting the perfect Quince dress size. For taller individuals (over 5’7″), Quince recommends opting for a 32-inch inseam to ensure the dress skims the floor elegantly. Those under 5’8″ may prefer shorter inseams for a more proportionate fit. Consider the dress style—floor-length or tea-length—and how it complements your frame. Always refer to the size chart for precise measurements and to ensure a balanced, polished look that flatters your height and body type.

Tips for Choosing the Right Quince Dress Size

Selecting the right Quince dress size involves measuring accurately, considering fabric drape, and matching your height. For those over 5’7″, a 32-inch inseam ensures a balanced, polished look.

5.1 Understanding Inseam and Its Importance

Inseam is the length of the dress from the waist to the hem, crucial for proportion. Quince recommends a 32-inch inseam for taller individuals (over 5’7″) to ensure balance. For shorter frames, slightly shorter lengths prevent overwhelming the silhouette. Correct inseam enhances the overall fit, ensuring the dress flatters your height and body proportions. This tailored approach guarantees a polished look, making inseam a key factor in your Quince dress selection for a custom-like fit.

5.2 How to Ensure a Flattering Fit for Your Body Type

Flattering your body type starts with understanding its unique features. For pear-shaped frames, A-line dresses balance hips and waist. Petite frames benefit from tailored fits and V-necks. Tall individuals can embrace floor-length gowns with V-necklines to elongate the silhouette. Hourglass figures shine in mermaid or trumpet styles that accentuate curves. Consider stretch fabrics for comfort and flexibility. Pairing the right dress style with your body type ensures a confident, polished look. Quince’s size guide helps you find a dress that complements your shape perfectly, ensuring a beautiful fit for your celebration.

Care and Maintenance for Your Quince Dress

Preserve your Quince dress with gentle washing and proper storage. Use cold water and mild detergents to maintain fabric quality. Store in a breathable bag to prevent damage and wrinkles. Regular steaming keeps the dress fresh and maintains its shape.

6.1 Washing and Storage Tips to Preserve Size and Quality

Wash your Quince dress in cold water using a mild detergent to prevent fabric damage. Avoid bleach or harsh chemicals, as they can alter colors or textures. Gently scrub stains before washing, and avoid soaking for extended periods. For storage, use a breathable fabric bag and keep the dress in a cool, dry place to maintain its shape and quality. Hanging can stretch the material, so fold the dress neatly if storage space is limited. Steam the dress occasionally to refresh it without causing wear.

6.2 Alteration Options for a Custom Fit

For a tailored look, consider professional alterations to adjust hemlines, waistlines, or sleeves. Quince dresses can be modified to fit your body perfectly, ensuring comfort and style. Common alterations include shortening or lengthening inseams, especially for taller individuals, who may opt for the 32-inch inseam as recommended. Fabric choice and body type play a role in how alterations are approached. Proper fit enhancements can elevate the dress’s appearance, making it uniquely yours. Always consult a skilled tailor for precise adjustments to maintain the dress’s quality and design integrity.

Top Retailers for Size-Inclusive Quince Dresses

Explore popular retailers offering size-inclusive Quince dresses, including Quince and other brands, providing options for all body types and preferences. Their collections ensure a perfect fit for everyone.

7.1 Popular Brands Offering Plus-Size and Custom Sizing

Discover top brands like Quince, Azazie, and JJ’s House, which specialize in size-inclusive designs. Quince offers plus-size collections with sizes up to 3X, ensuring a perfect fit for all body types. These retailers provide custom sizing options, including adjustable inseams, to cater to individual preferences. Their diverse collections feature trendy and elegant styles, making it easy to find a dress that flatters your figure. Whether you’re looking for plus-size or custom-fit options, these brands deliver quality and style for every quinceañera.

7.2 Where to Find the Best Deals and Sizes

Find the best deals on size-inclusive quince dresses at retailers like Quince, Azazie, and JJ’s House. These brands offer plus-size and custom sizing options, ensuring a perfect fit. Check for seasonal sales and discounts to save on your dream dress. Many retailers provide free shipping and easy returns, making online shopping hassle-free. Use size filters on their websites to narrow down options and discover styles that match your measurements. Sign up for newsletters to stay updated on promotions and new arrivals.

shark stratos manual

The Shark Stratos manual is a comprehensive guide for users, detailing features, installation, operation, and maintenance. It ensures optimal performance and safety for various Shark Stratos models.

What is the Shark Stratos Manual?

The Shark Stratos manual is an essential instructional guide designed to help users understand and optimize their vacuum cleaner. It provides detailed information on features like DuoClean technology, Anti-Hair Wrap PLUS, and Clean Sense IQ. Available as a downloadable PDF, the manual covers various models, including the IZ400UK, IZ420UKT, and IZ800 series. It includes step-by-step instructions for assembly, operation, and maintenance, ensuring safe and effective use of the Shark Stratos vacuum cleaner.

Why is the Manual Important for Users?

The Shark Stratos manual is crucial for users as it provides clear instructions for setup, operation, and troubleshooting. It helps users unlock the full potential of their vacuum, ensuring proper use of advanced features like DuoClean and Anti-Hair Wrap. Additionally, it highlights safety precautions and maintenance tips, such as filter cleaning and dust cup emptying, to maintain performance and longevity. By following the manual, users can avoid common issues and optimize their cleaning experience.

Key Features of the Shark Stratos Vacuum

The Shark Stratos features advanced technologies like DuoClean, Anti-Hair Wrap PLUS, and MultiFLEX design, offering superior cleaning performance across various surfaces with ease and efficiency.

DuoClean Technology

DuoClean Technology combines two brush rolls in one cleaning path, capturing large debris and fine dust simultaneously. This innovative system ensures efficient cleaning on both hard floors and carpets, providing a deeper clean with less effort. The dual brushes work together to pick up everything from small particles to larger messes, making it ideal for versatile cleaning needs. This feature is a key highlight of the Shark Stratos vacuum, enhancing overall performance and user satisfaction.

Anti-Hair Wrap PLUS Feature

The Anti-Hair Wrap PLUS feature is designed to prevent hair from tangling around the brush roll, reducing maintenance and improving performance. This technology captures long and short hair effortlessly, leaving the brush roll clean. It enhances suction power and ensures a smoother cleaning experience, especially for pet owners and those with long hair. By minimizing hair buildup, it prolongs the vacuum’s efficiency and reduces the need for frequent cleaning. This feature is a standout in the Shark Stratos manual, addressing a common user concern effectively.

MultiFLEX Design

The MultiFLEX Design offers unparalleled flexibility, allowing the vacuum to bend and reach into tight spaces like furniture and stairs. This feature enhances maneuverability, making it easy to clean hard-to-reach areas without losing suction power. The design enables seamless transitions between different surfaces, such as hardwood floors and carpets, ensuring a thorough cleaning experience. This innovative technology is a key highlight in the Shark Stratos manual, emphasizing versatility and ease of use for various cleaning tasks.

Installation and Setup

Unboxing and assembling the Shark Stratos is straightforward, with clear instructions provided in the manual. Charging the battery beforehand ensures a smooth setup process for first-time use.

Unboxing and Assembly

Unboxing the Shark Stratos reveals a neatly packaged vacuum with essential accessories. Carefully remove all components, including the motorized brush, crevice tool, and filters. Assembly is tool-free, requiring simple attachment of parts like the handle and cleaning head. Ensure all connections are secure for optimal performance; The manual provides step-by-step visuals to guide users through the process, making it easy to prepare the vacuum for its first use.

Charging the Battery

Before first use, charge the Shark Stratos battery for at least 4 hours. Use only the provided charger to ensure safety and compatibility. Plug the charger into a power outlet and connect it to the vacuum’s battery. The LED indicator will show charging progress. Avoid exposing the battery to water or extreme temperatures. Store the battery in a cool, dry place when not in use. Always follow the manual’s guidelines for optimal charging and battery longevity.

Operating the Shark Stratos

Start by pressing the power button, then select the desired mode for your cleaning task. Gently maneuver the vacuum, adjusting settings as needed for different surfaces and debris.

Using Different Modes

The Shark Stratos offers multiple operating modes to suit various cleaning needs. Use the Eco mode for quiet, energy-efficient cleaning on hard floors. Switch to Normal mode for everyday cleaning tasks, providing balanced suction power. For tough messes, activate Boost mode to maximize suction strength. Additionally, some models feature a Hair Pro mode, designed to tackle pet hair and large debris efficiently. Always choose the appropriate mode based on the surface and type of cleaning required for optimal results.

Navigating Various Surfaces

The Shark Stratos excels on multiple surfaces, adapting seamlessly to hard floors, carpets, and pet hair. DuoClean Technology captures debris on hard floors and deep-cleans carpets. Use the MultiFLEX design to effortlessly transition between surfaces. For hard floors, Eco mode ensures quiet operation, while carpets benefit from Normal or Boost modes. Adjust suction settings and brush rolls according to surface type for optimal cleaning results. This versatility makes the Shark Stratos ideal for diverse cleaning environments and user preferences.

Maintenance and Care

Regular maintenance ensures optimal performance. Clean filters, empty the dust cup, and check for blockages. Proper care extends the lifespan and efficiency of your Shark Stratos vacuum.

Cleaning the Filters

Cleaning the filters regularly is essential for maintaining your Shark Stratos vacuum’s performance. Tap loose debris from the pre-filter and rinse the primary filter with water. Allow both to dry completely before reinstalling. This ensures optimal suction power and prevents dust buildup. Refer to your manual for specific cleaning instructions, as improper maintenance may reduce efficiency. Regular filter care extends the lifespan of your vacuum and keeps it functioning at its best. Always follow the recommended cleaning schedule for optimal results.

Emptying the Dust Cup

To empty the dust cup, press the release button located at the top or side, depending on your model. Carefully pull it away from the vacuum and dispose of the collected debris in a trash bin. For thorough cleaning, rinse the cup with warm water if needed, but ensure it is completely dry before reattaching. Avoid compressing or forcing debris back into the cup, as this can reduce suction power. Regular emptying maintains efficiency and prevents dust buildup. Always refer to your Shark Stratos manual for specific instructions.

Troubleshooting Common Issues

Troubleshooting common issues with your Shark Stratos? Check for blockages, ensure the dust cup is empty, and clean filters regularly. Address battery drainage by charging properly and avoid overloading the vacuum.

Addressing Suction Problems

Experiencing reduced suction with your Shark Stratos? Check for blockages in the vacuum’s inlet, hose, or cleaner head. Ensure the dust cup is empty and filters are clean. If issues persist, inspect for damaged or clogged parts. Regular maintenance, like washing filters and ensuring proper assembly, can prevent suction loss. Refer to the manual for detailed troubleshooting steps to restore optimal performance. Always follow safety guidelines during diagnostics and repairs.

Fixing Battery Issues

Encountering battery problems with your Shark Stratos? Ensure the battery is charged correctly using the provided charger. Check for loose connections and clean the contacts. If the battery doesn’t hold charge, it may need replacement. Refer to the manual for compatible battery models. Avoid overcharging, as it can reduce battery life. Always follow safety precautions when handling electrical components to prevent damage or injury. Proper care extends the battery’s lifespan and maintains performance.

Safety Precautions

Always follow guidelines to ensure safe operation. Keep the appliance and its cord out of children’s reach. Avoid exposing parts to water or liquids. Use only as described.

Regularly inspect for damage and ensure proper charging. Store the vacuum in a dry, cool place. Follow all warnings and recommendations in the manual carefully.

General Safety Guidelines

To ensure safe operation, always follow these guidelines: keep the appliance and its cord out of children’s reach, avoid exposing any parts to water or liquids, and use only as described in the manual. Regularly inspect the vacuum for damage, ensure proper charging, and store it in a dry, cool place. Never allow children to operate the device without adult supervision. Follow all warnings and recommendations provided in the manual carefully to maintain safety and functionality.

Child Safety Tips

To ensure child safety, keep the Shark Stratos out of children’s reach and avoid letting them operate it unsupervised. Store the vacuum and its accessories in a secure location. Prevent children from playing with the cord or attachments. Teach older children to handle the device responsibly and understand its functionality. Always supervise minors during operation to prevent accidents and misuse, adhering to the manual’s guidelines for safe and effective cleaning.

Comparing Shark Stratos Models

Shark Stratos models offer varied features and technologies, catering to different cleaning needs. The manual helps users compare and choose the best model suited for their preferences.

IZ400UK Series vs. IZ800 Series

The IZ400UK Series features DuoClean technology for multi-surface cleaning, while the IZ800 Series includes MultiFLEX design for enhanced versatility. Both models support various SKUs, with IZ400UKT and IZ420UKT in the IZ400UK Series, and IZ840H, IZ862H, and UZ865H in the IZ800 Series. The manuals highlight their unique features, such as Anti-Hair Wrap PLUS and Clean Sense IQ for the IZ420UKT. These models cater to different user preferences, ensuring optimal cleaning performance across various surfaces and needs.

QS3000Q Series vs. AZ3000 Series

The QS3000Q Series offers a corded stick design with DuoClean PowerFins and HairPro technology, ideal for pet owners. The AZ3000 Series features DuoClean Lift-Away with Odor Neutralizer, suitable for upright cleaning needs; Both series are supported by detailed manuals, ensuring users understand their advanced features and operation. These models cater to different cleaning preferences, providing effective solutions for various home environments and cleaning challenges, as outlined in their respective guides.