brow shape guide

Your eyebrows frame your face and define your personal style. This guide will help you master the techniques and tools needed to achieve perfectly shaped brows tailored to your face shape and preferences.

1.1 Importance of Brow Shape

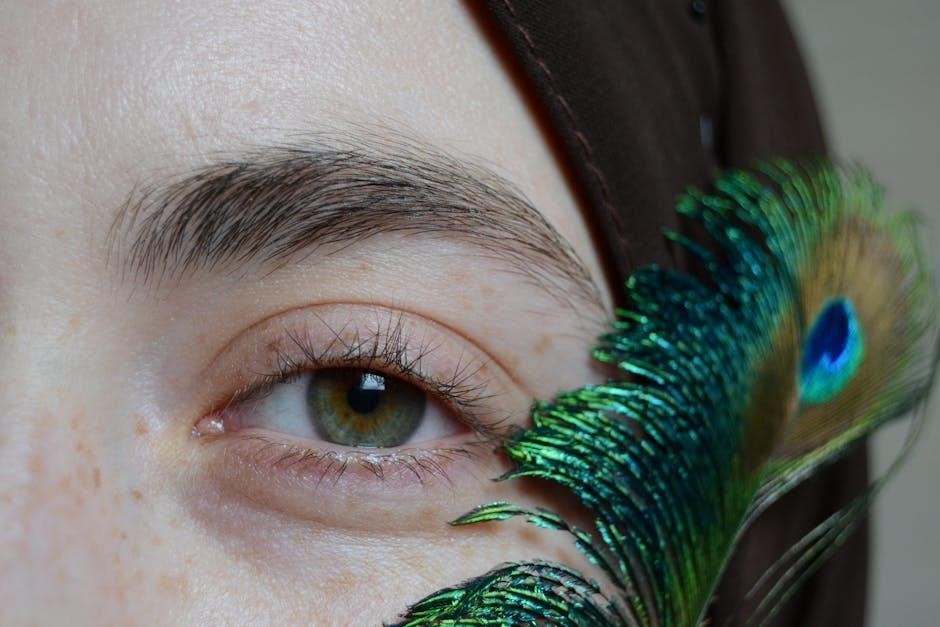
Your brow shape plays a crucial role in framing your face and enhancing your natural features. Well-defined brows can create symmetry, balance, and harmony in your facial structure. They also help express emotions effectively, making them a key element of your appearance. A properly shaped brow can boost confidence, complement your eye shape, and even make other facial features stand out. Understanding the importance of brow shape is the first step toward achieving a polished, professional look that enhances your individuality and personal style.

1.2 Benefits of Proper Brow Grooming

Proper brow grooming enhances your facial features, boosts confidence, and creates a polished look. Well-maintained brows can make your eyes appear larger, balance your face shape, and complement your makeup. Regular upkeep prevents overgrowth and maintains a clean, defined appearance. Groomed brows also frame your face, drawing attention to your eyes and other facial features. Whether you prefer natural or structured brows, proper grooming ensures a professional and put-together look that aligns with your personal style and beauty goals.

Tools and Supplies Needed

Essential tools include tweezers, a brow pencil, spoolie, and mirror. Optional supplies are stencils, brow gel, and growth serum. Good lighting ensures precise shaping for professional results.

2.1 Essential Tools for Brow Shaping

The must-have tools for brow shaping include an angled brow pencil for precise outlining, a spoolie for combing and blending, and round-tipped tweezers for safe plucking. A magnifying mirror helps spot stray hairs, while stencils guide beginners. Optional tools like brow scissors and a trimmer aid in maintaining length. Brow gels and pomades add hold and definition. Investing in quality products ensures better results and easier application. Proper tools make the process efficient and help achieve desired brow shapes. Good lighting is also crucial for accurate shaping. These tools work together to enhance your natural brow beauty.

2.2 Recommended Products for Best Results

High-quality products are key to achieving professional-looking brows. A good brow pencil provides precise strokes for filling gaps, while brow powder offers a natural, soft finish. Brow gels help keep hairs in place and add shine, and pomades are great for creating sharp, defined looks. Brow serums can enhance hair growth, and highlighters brighten the brow bone. Stencils guide beginners for accurate shaping. Invest in a Brow kit for versatility. Choose products that match your natural brow color and texture for a seamless look. Proper product selection ensures long-lasting and polished results.

Brow Mapping

Brow mapping is a technique to determine your ideal brow shape based on your facial features, ensuring balanced and symmetrical results that enhance your natural beauty.

3.1 What is Brow Mapping?

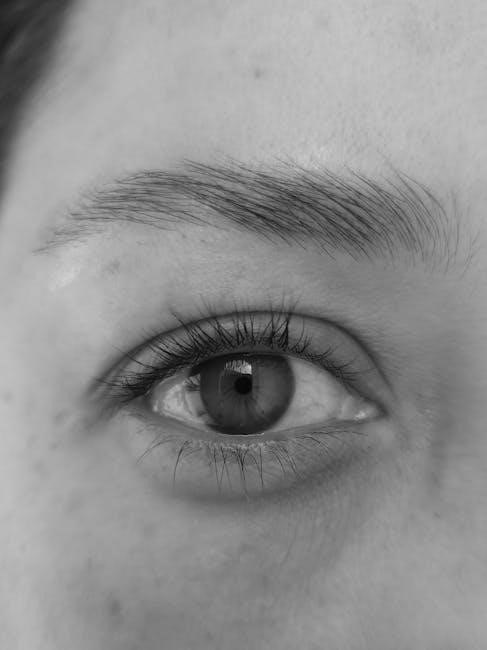
Brow mapping is a precise technique used to determine the ideal shape and structure of your eyebrows based on your facial measurements. By identifying key points—such as the starting point (above the inner eye corner), the arch (aligned with the outer nostril), and the endpoint (diagonally from the outer eye corner)—this method ensures symmetry and balance. It helps create a personalized brow template, making it easier to achieve professional-looking results at home. Brow mapping is a foundational step in shaping and styling, enhancing your natural beauty while maintaining a tailored look.

3.2 How to Perform Brow Mapping

To perform brow mapping, start by identifying three key points: the beginning of your brow (aligned with the inner corner of your eye), the arch (above the outer edge of your nostril), and the endpoint (diagonally from the outer corner of your eye). Use a pencil or tweezers as a guide to mark these points. Connect them to create a soft outline, ensuring symmetry. Measure and adjust as needed to align with your facial structure; This technique helps define a natural, balanced shape, making it easier to tweeze, trim, or fill in your brows with precision and confidence.

Step-by-Step Brow Shaping Process

Master the brow shaping process by preparing the area, tweezing for precise definition, trimming excess hair, and filling sparse spots for a polished and professional look.

4.1 Preparing the Area

Begin by gathering essential tools like tweezers, a brow pencil, and a mirror. Ensure natural light illuminates your face for accuracy. Cleanse the brow area to remove dirt or makeup. Brush your brows upward to visualize their natural shape. For comfort, apply a numbing cream if needed. Mark the starting point, arch, and tail of your brows using a pencil. This step ensures precision and helps maintain symmetry. Keep tissues nearby for any stray hairs. Proper preparation sets the foundation for a flawless brow shaping experience, making the process easier and more effective. Cleanliness and clarity are key to achieving professional results.

4.2 Tweezing for Shape

Tweezing is a precise method for shaping brows. Start with clean, prepared skin and use a mirror for clear visibility. Hold the tweezers firmly, plucking hairs in the direction of growth to avoid irritation. Begin at the arch, removing stray hairs outside your marked shape. Focus on one brow at a time to maintain symmetry. Pluck sparingly, checking your progress frequently. Over-tweezing can lead to unevenness, so work carefully. Use a soothing product afterward to calm the skin. Tweezing creates a clean, defined shape, enhancing your natural brow structure for a polished look that lasts. Patience ensures the best results, so take your time during this step.

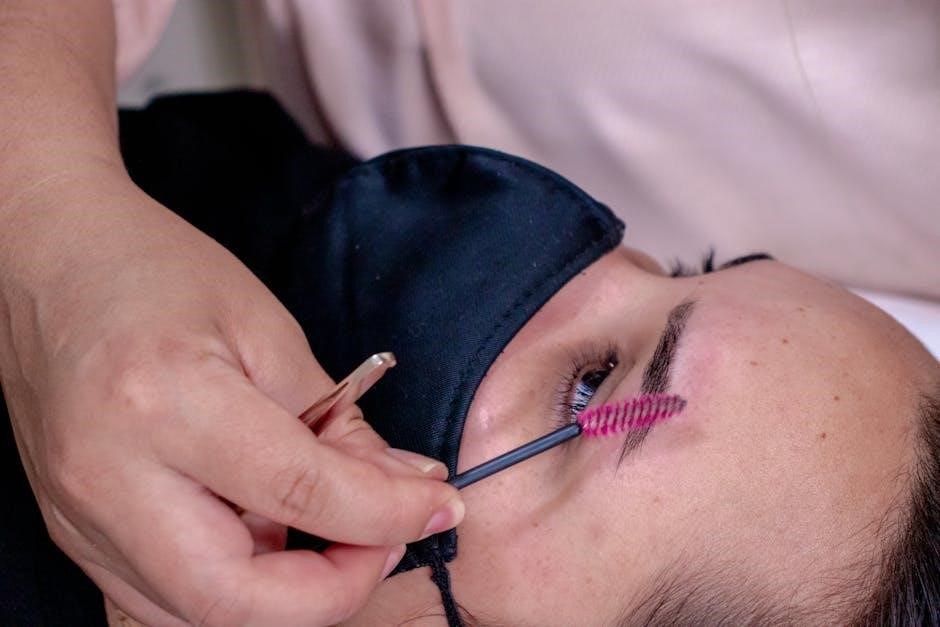
4.3 Trimming Brow Hair

Trimming brow hair helps maintain neatness and definition. Start by brushing your brows upward with a spoolie or fine-tooth comb. Identify any hairs that extend beyond your desired shape or are noticeably longer. Using small scissors or brow trimmers, carefully trim these hairs at the tips, following the natural direction of growth. Avoid cutting too close to the root to prevent unevenness. After trimming, brush your brows again to blend the lengths and achieve a smooth, polished appearance. Trimming is a subtle yet effective step in refining your brow shape and keeping it well-groomed.

4.4 Filling In Sparse Areas

Filling in sparse areas enhances brow fullness and defines shape. Use a brow pencil or powder that matches your hair color. Lightly outline the brow shape, then fill in sparse spots with short, feathery strokes. Start at the arch and work toward the tail, following the natural hair direction. Gently blend the product with a spoolie to avoid harsh lines. For a natural look, focus on building gradual coverage rather than overfilling. Set the look with a brow gel to keep hairs in place and extend wear. This step ensures a balanced, polished finish to your brow shape.

Choosing the Right Products

Selecting the right products ensures your brow shape looks natural and polished. Opt for brow pencils or powders that match your hair color for precise detailing and fullness. Brow gels and pomades add hold and definition, while brow mascaras enhance natural texture. Choose products that suit your brow type and desired finish, whether soft and natural or bold and defined.

5.1 Brow Pencils vs. Powders

Brow pencils are excellent for creating precise strokes and mimicking individual hairs, offering control for sparse areas. They often have a waxy texture for long-lasting hold. Brow powders, on the other hand, provide a softer, more natural look and are ideal for filling in sparse spots. Powders are easy to blend and buildable, making them perfect for achieving a fuller brow. Choose pencils for detail work and powders for an overall natural finish. Both tools can be used together for a polished, professional look that enhances your brow shape and definition.

5.2 Brow Gels and Pomades

Brow gels are lightweight and versatile, offering a natural hold to keep hairs in place while adding subtle color. They are perfect for enhancing sparse areas without looking too heavy. Pomades provide a richer, more pigmented finish and are ideal for creating bold, defined brows; They often come in a cream or gel formula and are great for filling in sparse spots or shaping the brow. Both products are easy to apply and can be layered for extra depth, making them essential for achieving polished, professional-looking brows that complement your natural shape.

Maintenance and Aftercare

Proper aftercare is crucial for maintaining your brow shape. Avoid touching the area after tweezing, apply soothing products like aloe vera, and schedule regular touch-ups for consistent results.

6.1 Routine Upkeep Tips

For consistent brow shape, maintain a regular grooming routine. Use a spoolie to comb hairs daily and trim stray hairs weekly. Apply brow serum to promote healthy growth and keep the area clean to prevent irritation. Schedule touch-ups every 3-4 weeks to maintain your desired shape. Avoid over-tweezing between appointments to prevent unevenness. Incorporate these simple steps into your beauty regimen for long-lasting, perfectly shaped brows that enhance your natural beauty and boost your confidence.

ninja air fryer user manual

The Ninja Air Fryer is a revolutionary kitchen appliance offering a healthier alternative to deep-frying. It combines functionality, versatility, and ease of use, making it a must-have for home cooks.

1.1 Overview of the Ninja Air Fryer and Its Benefits

The Ninja Air Fryer is a versatile kitchen appliance that offers a healthier way to cook crispy foods with minimal oil. It combines air circulation technology with intuitive controls, making it easy to achieve restaurant-quality results at home. The device is ideal for frying, baking, grilling, and dehydrating, providing endless meal options. Its compact design and user-friendly interface cater to both beginners and experienced cooks, ensuring a seamless cooking experience while promoting healthier eating habits.

1.2 Importance of Reading the User Manual

Reading the Ninja Air Fryer user manual is essential for safe and effective use. It provides detailed instructions on assembly, operation, and maintenance, ensuring you understand all functions and safety precautions. The manual also offers troubleshooting tips and maintenance advice to extend the appliance’s lifespan. By following the guidelines, you can optimize performance, avoid common mistakes, and explore the full potential of your air fryer for delicious, healthy meals.

Getting Started with Your Ninja Air Fryer

Unbox, wash, and dry your air fryer. Plug it in, select your basket, and adjust settings as needed. Follow manual guidelines for initial setup and operation.

2.1 Unboxing and Initial Setup

When unboxing your Ninja Air Fryer, carefully remove all components and accessories. Wash the basket and pan with warm, soapy water. Dry thoroughly before first use. Place the air fryer on a heat-resistant surface, ensuring proper ventilation. Plug it in and familiarize yourself with the control panel. Refer to the user manual for specific setup instructions and safety guidelines to ensure optimal performance and longevity of your appliance.

2.2 Understanding the Control Panel and Basic Functions

The control panel features intuitive buttons and dials for easy operation. Use the function dial to select modes like Air Fry, Bake, Roast, or Dehydrate. Adjust temperature and time using the respective arrows. The start/stop button begins or pauses cooking, while the crisp button enhances browning. Ensure you understand each function before use. Refer to the manual for detailed explanations of symbols and settings to optimize your cooking experience with the Ninja Air Fryer.

Cooking Modes and Functions

The Ninja Air Fryer offers versatile cooking modes, including Air Fry, Bake, Roast, and Dehydrate. These functions provide flexibility for achieving crispy, golden, or evenly cooked results effortlessly.

3.1 Air Fry Mode: Crispy Results Without Oil

The Air Fry mode is designed to deliver crispy results with minimal oil. It uses high-speed air circulation technology to evenly cook food, achieving a golden texture. Perfect for fries, chicken, and snacks, this mode ensures healthy yet delicious meals. Simply select the temperature and time, and let the Ninja Air Fryer do the rest for a guilt-free frying experience.

3.2 Bake, Roast, and Dehydrate Functions

The Ninja Air Fryer offers versatile baking, roasting, and dehydrating options. The bake function ensures even cooking for cakes, cookies, and bread. Roast mode delivers tender, caramelized results for meats and vegetables. Dehydrate function preserves food naturally, perfect for snacks like jerky or dried fruits. These modes provide precise temperature control, allowing you to achieve professional-quality dishes at home with minimal effort and maximum flavor.

3.3 Grill Function for Smoky Flavor

The Ninja Air Fryer’s grill function replicates the smoky flavor of outdoor grilling indoors. Achieve char-grilled results on burgers, steaks, and vegetables with precise temperature control. Preheat to 400°F (200°C) for optimal searing. Use the crisper plate for crispy textures and even browning. For best results, pat food dry and season before grilling. Cleaning is easy—wipe the grill plate with a damp cloth after use to maintain its non-stick coating. Experiment with marinades and spices for authentic grill taste year-round.

Safety Precautions and Tips

Always read the manual before use. Ensure the air fryer is placed on a heat-resistant surface. Avoid overheating and never leave it unattended while in use.

4.1 Essential Safety Guidelines

Ensure the Ninja Air Fryer is placed on a heat-resistant, stable surface; Avoid overheating by monitoring temperature settings. Never leave the appliance unattended while in operation. Keep children away from the air fryer during use. Use oven mitts or tongs to handle hot foods and baskets. Avoid touching the exterior during cooking, as it may get hot. Regularly clean the air fryer to prevent food residue buildup. Always follow the user manual’s guidelines for safe operation and maintenance.

4.2 Cleaning and Maintenance Tips

Regular cleaning is essential for optimal performance. Wash the basket, crisper plate, and pan with mild soap and warm water after each use. Avoid using abrasive cleaners or metal utensils, as they may damage the non-stick coating. Dry all parts thoroughly to prevent rust. Wipe the exterior with a damp cloth and dry immediately. Clean food residue from the heating element to maintain efficiency. For tough stains, soak parts in warm soapy water before scrubbing. Refer to the user manual for specific maintenance instructions to ensure longevity.

Advanced Features and Customization

The Ninja Air Fryer offers advanced features like dual-zone technology and smart integration, enabling simultaneous cooking and precise digital controls for enhanced cooking efficiency and customization.

5.1 Dual-Zone Technology for Simultaneous Cooking

Dual-zone technology allows users to cook different foods at varying temperatures and times within the same unit. This feature is ideal for preparing complex meals, as it enables simultaneous cooking of two dishes without flavor transfer. By selecting different functions for each zone, users can achieve perfect results for both items. This innovative design maximizes efficiency, making it perfect for large families or entertaining guests, ensuring every dish is cooked to perfection simultaneously.

5.2 Smart Integration and Digital Controls

The Ninja Air Fryer features advanced digital controls and smart integration, enhancing user convenience. With a user-friendly interface, users can effortlessly navigate settings, adjust temperatures, and set timers. Smart integration allows for seamless connectivity to mobile apps, enabling remote monitoring and control. This technology ensures precise cooking results and adds a modern touch to your culinary experience, making it easier than ever to achieve professional-grade dishes at home with minimal effort and maximum efficiency.

Popular Recipes and Meal Ideas

The Ninja Air Fryer enables countless delicious recipes, from crispy snacks to tender proteins. Explore healthy meal ideas, including roasted vegetables and gourmet dishes effortlessly.

6.1 Quick and Easy Meal Preparations

The Ninja Air Fryer simplifies meal prep with its user-friendly interface and versatile cooking modes. Prepare crispy chicken wings, golden fries, or tender vegetables in minutes. Utilize the air fry mode for oil-free snacks or the bake function for homemade pizza. The dual-zone technology allows simultaneous cooking, saving time. Reheat leftovers evenly without overcooking, ensuring perfectly crispy results. With minimal cleanup and precise temperature control, the Ninja Air Fryer makes quick, delicious meals effortless for any skill level.

6.2 Healthy Alternatives to Fried Foods

The Ninja Air Fryer offers a guilt-free way to enjoy crispy foods with minimal oil. Achieve golden, fried-like results using the air fry mode, perfect for chicken, fries, and vegetables. The dual-zone technology allows cooking multiple dishes simultaneously, ensuring balanced meals. With precise temperature control, you can prepare healthier versions of fried favorites while retaining nutrients. Experiment with marinades and seasonings for flavorful dishes without the extra calories. This appliance is ideal for health-conscious individuals seeking delicious, low-oil meals.

Troubleshooting Common Issues

Address common challenges like uneven cooking or smoke by ensuring proper food arrangement and preheating. Clean the air fryer regularly to prevent residue buildup and noise issues.

7.1 Addressing Common Challenges

The Ninja Air Fryer is generally reliable, but issues like uneven cooking or excessive smoke can occur. Ensure proper food arrangement and preheating to avoid these problems. If smoke appears, check for overcrowding or fatty foods. Strange noises may indicate food particles in the fan—clean regularly. For unresolved issues, consult the user manual or contact customer support. Regular maintenance and adherence to guidelines can prevent most challenges and ensure optimal performance.

7.2 Resetting and Maintaining Your Air Fryer

To reset your Ninja Air Fryer, unplug it, wait 30 seconds, and plug it back in. Regular cleaning is essential—wipe the basket and pan with a damp cloth after each use. For tougher messes, soak them in warm soapy water. Avoid abrasive cleaners to prevent damage. Descale periodically if you notice mineral buildup. Proper maintenance ensures longevity and optimal performance, keeping your air fryer in great working condition for years to come.

Frequently Asked Questions

Users often ask about optimal temperatures, cooking times, and cleaning tips. The Ninja Air Fryer’s manual provides detailed guidance for troubleshooting and maintenance, ensuring smooth operation.

8.1 Answers to Common Queries

Common questions include ideal temperatures for specific foods and troubleshooting tips. The manual advises preheating for even cooking and using the crisper plate for crispy results. Cleaning is straightforward with soap and water. For dual-zone models, users can cook different dishes simultaneously. Always refer to the guide for precise settings and maintenance to ensure longevity and optimal performance of your Ninja Air Fryer.

anxiety iceberg pdf

The Anxiety Iceberg Concept is a powerful metaphor that illustrates the layers of anxiety‚ with visible symptoms above the surface and deeper emotional struggles beneath․

1․1․ The Iceberg as a Metaphor for Anxiety

The Anxiety Iceberg metaphor compares anxiety to an iceberg‚ where the visible tip represents obvious symptoms like worry or avoidance‚ while the hidden depths signify underlying emotional triggers and past experiences․ This visual tool helps individuals and caregivers understand that anxiety goes far beyond surface-level signs‚ emphasizing the need to address root causes for effective management․

1․2․ Purpose of the Anxiety Iceberg Model

The Anxiety Iceberg Model aims to help individuals and therapists identify the root causes of anxiety by distinguishing between visible symptoms and hidden emotional struggles․ It serves as a tool for understanding the complexity of anxiety‚ facilitating deeper self-reflection‚ and guiding the development of personalized coping strategies to address both surface-level and underlying issues effectively․

The Tip of the Anxiety Iceberg

The tip represents the visible symptoms of anxiety‚ such as worry‚ restlessness‚ and avoidance‚ which are often the most noticeable and easily identifiable aspects of anxiety․

2․1․ Common Symptoms People Notice

Common symptoms of anxiety include visible signs like worry‚ restlessness‚ and avoidance behaviors․ These surface-level expressions often manifest as procrastination or physical reactions such as rapid heartbeat․ They are the observable indicators that others may notice‚ helping to identify anxiety’s presence in daily life․ These symptoms serve as clues‚ prompting further exploration of deeper emotional struggles․

2․2․ External Manifestations of Anxiety

External manifestations of anxiety include visible behaviors and physical reactions‚ such as avoidance‚ rapid speech‚ or fidgeting․ These signs are often noticeable to others and can interfere with daily activities․ They may also include procrastination or heightened alertness‚ serving as indicators of underlying emotional struggles․ These observable expressions are the visible “tip” of the anxiety iceberg․

The Hidden Part of the Anxiety Iceberg

The hidden part of the anxiety iceberg represents internal struggles‚ such as deep-rooted fears‚ emotional triggers‚ and past experiences that lie beneath the surface of visible symptoms․

3․1․ Internal Struggles and Deep-Rooted Fears

Internal struggles and deep-rooted fears are the unseen forces driving anxiety‚ often stemming from past experiences or unresolved emotions․ These hidden layers include unaddressed traumas‚ self-doubt‚ or irrational beliefs that fuel anxiety‚ making it complex to manage without understanding their origin․

3․2; Emotional Triggers and Past Experiences

Emotional triggers and past experiences play a significant role in shaping anxiety․ These triggers‚ often rooted in unresolved events or traumas‚ can activate deep-seated fears and irrational beliefs․ Understanding these connections helps identify how past experiences influence current emotional responses‚ providing insight into the underlying causes of anxiety symptoms and their persistence over time․

Understanding the Iceberg Model in Therapy

The Anxiety Iceberg Model helps therapists uncover hidden emotional struggles and triggers‚ guiding clients to confront underlying issues and develop tailored strategies for managing anxiety effectively․

4․1․ How Therapists Use the Iceberg to Identify Root Causes

Therapists use the Anxiety Iceberg to distinguish surface-level symptoms from deeper emotional struggles․ By exploring hidden fears and past experiences‚ they help clients uncover root causes‚ enabling targeted interventions and fostering meaningful progress in anxiety management․

4․2․ Case Studies and Examples

Case studies reveal how the Anxiety Iceberg helps identify root causes․ For example‚ a child’s procrastination may seem like laziness but stems from deeper fears of failure․ Therapists use this model to connect surface symptoms to hidden emotional struggles‚ providing clarity and effective interventions for lasting change․

Practical Applications of the Anxiety Iceberg

The Anxiety Iceberg offers practical tools like worksheets‚ posters‚ and visual aids to help individuals and therapists visualize and address anxiety effectively․

5․1․ Worksheets and Tools for Self-Reflection

Worksheets and tools‚ like the Anxiety Iceberg diagram‚ help individuals identify visible symptoms and hidden emotional struggles․ These resources enable users to write down worries‚ emotions‚ and triggers‚ fostering self-awareness and structured reflection․ They are particularly useful in therapy‚ offering a visual framework to articulate feelings and address root causes effectively․

5․2․ Visual Aids like Posters for Better Understanding

Visual aids‚ such as the Anxiety Iceberg Poster‚ provide a clear and relatable way to understand anxiety․ These posters can be displayed in therapy offices or calm corners‚ helping individuals visualize the concept․ They serve as reminders of the importance of addressing both visible symptoms and underlying emotions‚ making the Anxiety Iceberg Model more accessible and actionable for daily use․

The Role of Caregivers and Parents

Caregivers and parents play a vital role in supporting individuals with anxiety by creating a safe‚ understanding environment and guiding them to recognize and address hidden emotional struggles․

6․1․ Recognizing Hidden Signs of Anxiety

Caregivers and parents must recognize subtle signs of anxiety‚ such as internal struggles‚ emotional triggers‚ and deep-rooted fears‚ which may not be immediately visible․ By understanding the Anxiety Iceberg Concept‚ they can identify hidden symptoms like avoidance behaviors‚ withdrawal‚ or excessive perfectionism․ Using tools like the Emotions Wheel and visual aids helps pinpoint these underlying issues‚ enabling early intervention and fostering a supportive environment for emotional well-being․

6․2․ Supporting Loved Ones with Anxiety

Supporting individuals with anxiety involves creating a safe‚ non-judgmental space for open communication․ Caregivers should encourage the use of tools like the Anxiety Iceberg Poster and the Emotions Wheel to help identify hidden struggles․ Active listening‚ patience‚ and validating feelings are crucial․ By fostering emotional awareness and offering practical strategies‚ caregivers can empower their loved ones to manage anxiety effectively and build resilience over time;

The Connection Between Anxiety and Emotional Awareness

Anxiety is deeply linked to emotional awareness‚ as tools like the Emotions Wheel and Iceberg Model help individuals identify and address underlying feelings‚ fostering better self-awareness․

7․1․ Tools Like the Emotions Wheel and Iceberg Model

The Emotions Wheel and Iceberg Model are essential tools for understanding anxiety․ The Emotions Wheel helps identify specific emotions‚ while the Iceberg Model visualizes anxiety’s visible symptoms and hidden causes․ Together‚ they enable individuals to explore and communicate their feelings effectively‚ fostering self-awareness and therapeutic growth․

7․2․ Techniques for Managing Emotional Arousal

Techniques like mindfulness‚ deep breathing‚ and grounding exercises help manage emotional arousal․ These strategies encourage individuals to focus on the present‚ reducing anxiety by calming the mind and body․ Regular practice of these methods can lead to better emotional regulation‚ making it easier to navigate anxiety-provoking situations with greater control and clarity․

Addressing Anxiety in Children and Adolescents

Addressing anxiety in children and teens involves tailored strategies to help them manage emotions and develop coping skills․ Age-specific tools like the Anxiety Iceberg Model and mindfulness exercises can foster emotional regulation and resilience‚ creating a safe space for young individuals to express and navigate their feelings effectively․

8․1․ Age-Specific Strategies for Managing Anxiety

Age-specific strategies help children and teens manage anxiety effectively․ For younger kids‚ visual tools like the Anxiety Iceberg Poster and interactive exercises encourage emotional expression․ Older adolescents benefit from mindfulness practices‚ self-reflection worksheets‚ and coping skill development․ These approaches address their unique developmental needs‚ fostering resilience and emotional regulation tailored to their age and understanding level․

8․2․ The Importance of Early Intervention

Early intervention is crucial for addressing anxiety in children and adolescents․ Identifying and managing anxiety early can prevent it from escalating and improve long-term mental health outcomes; Tools like the Anxiety Iceberg Poster and age-specific strategies help caregivers and therapists intervene effectively‚ fostering emotional resilience and healthier coping mechanisms from a young age․

Cultural and Individual Variations in Anxiety Expression

Cultural and individual variations significantly influence how anxiety is expressed and perceived; Understanding these differences is key to effective‚ personalized anxiety management strategies․

9․1․ How Different Cultures Perceive Anxiety

Different cultures perceive anxiety varying from stigmatization to normalization‚ influencing how individuals express and seek help for their symptoms․ Some societies encourage open discussion‚ while others may view anxiety as a personal failing‚ impacting emotional expression and help-seeking behaviors․ Cultural norms significantly shape anxiety awareness and management approaches‚ highlighting the need for tailored strategies․

9․2․ Personalized Approaches to Anxiety Management

Personalized approaches to anxiety management involve tailoring strategies to an individual’s unique needs and circumstances․ Techniques like CBT‚ mindfulness‚ and lifestyle changes can be adapted to suit cultural contexts and personal histories․ This ensures interventions are effective and empowering‚ fostering a safe space for individuals to explore and manage their anxiety effectively․

Therapeutic Techniques for Anxiety Reduction

Therapeutic techniques like CBT and mindfulness are effective in addressing anxiety by targeting both visible symptoms and underlying causes‚ promoting long-term emotional balance and resilience․

10․1․ Cognitive Behavioral Therapy (CBT) and the Iceberg Model

CBT effectively addresses anxiety by identifying and challenging negative thought patterns‚ while the Iceberg Model highlights underlying emotional struggles․ Together‚ they help individuals understand both visible symptoms and hidden causes‚ fostering practical strategies to reduce anxiety and build resilience․

10․2․ Mindfulness and Relaxation Practices

Mindfulness and relaxation practices‚ such as meditation‚ deep breathing‚ and progressive muscle relaxation‚ help reduce anxiety symptoms by promoting emotional awareness and calming the mind․ These techniques complement the Iceberg Model by addressing both surface-level anxiety and deeper emotional struggles‚ fostering a holistic approach to managing anxiety effectively․

The Importance of Open Communication

Open communication fosters a supportive environment‚ allowing individuals to share feelings and concerns‚ which is crucial for understanding and addressing both visible and hidden anxiety layers․

11․1․ Sharing Feelings and Experiences

Sharing feelings and experiences helps individuals express both visible and hidden layers of anxiety‚ fostering deeper understanding and connection․ Tools like worksheets and visual aids encourage open dialogue‚ while caregivers and therapists create safe spaces for emotional expression‚ aiding in the recognition and management of anxiety․

11․2․ Creating a Safe Environment for Expression

Creating a safe environment for expression involves empathy‚ active listening‚ and non-judgmental support․ Caregivers and therapists use tools like visual aids and open-ended questions to encourage dialogue․ This space helps individuals feel comfortable sharing both surface-level symptoms and deeper emotional struggles‚ fostering trust and understanding in addressing anxiety effectively․

Overcoming Stigma and Seeking Help

Reducing stigma around anxiety encourages open conversations and help-seeking behavior․ Education and empathy help normalize seeking support‚ fostering a culture where mental health care is prioritized and embraced․

12․1․ The Role of Stigma in Anxiety

Stigma surrounding anxiety often intensifies emotional distress‚ discouraging individuals from seeking help due to fear of judgment or embarrassment․ This silence can deepen feelings of isolation‚ making anxiety more challenging to manage and reinforce harmful stereotypes about mental health․ Addressing stigma is crucial for fostering an environment where open conversations about anxiety are encouraged and supported․

12․2․ Encouraging Help-Seeking Behavior

Creating a supportive environment and normalizing help-seeking behaviors are key to reducing stigma․ Tools like the Anxiety Iceberg and Emotions Wheel can help individuals understand their feelings‚ fostering openness․ Encouraging self-reflection and offering practical resources empower individuals to seek help without shame‚ promoting healthier mental health outcomes and stronger support networks․

The Anxiety Iceberg Concept offers a profound understanding of anxiety‚ emphasizing the importance of addressing both visible symptoms and deeper emotional struggles for effective management․

13․1․ The Impact of Understanding the Anxiety Iceberg

Understanding the Anxiety Iceberg Concept provides clarity on the visible and hidden layers of anxiety‚ enabling individuals and caregivers to address root causes effectively․ It fosters empathy‚ improves communication‚ and encourages the use of practical tools like worksheets and visual aids․ This awareness helps create a supportive environment for open dialogue and meaningful interventions‚ promoting long-term emotional well-being and resilience․

13․2․ Moving Forward with Anxiety Management

Understanding the Anxiety Iceberg empowers individuals to move forward by addressing both visible and hidden layers of anxiety․ By using tools like worksheets‚ posters‚ and emotional awareness exercises‚ individuals can develop self-awareness and coping strategies․ Early intervention and a supportive environment foster resilience‚ helping individuals navigate anxiety effectively and improve their overall emotional well-being․

bro split workout plan pdf

The Bro Split workout plan is a proven, effective training method for building muscle and strength․ This 5-day program targets specific muscle groups daily, allowing optimal recovery and growth․ Perfect for lifters seeking a structured, goal-oriented routine, it balances intensity with rest, making it adaptable for various fitness objectives and experience levels․ Combined with proper nutrition and progressive overload, this split is ideal for achieving significant gains in muscle mass and overall physique development․

Weekly Schedule

The Bro Split follows a 5-day training cycle: Day 1 focuses on Chest, Day 2 on Back, Day 3 on Shoulders, Day 4 on Arms, and Day 5 on Legs․ Days 6 and 7 are reserved for rest and recovery, ensuring muscle growth and overall well-being․ This structured approach allows for targeted development of each muscle group while maintaining consistency and progression․

Day 1: Chest

Day 1 focuses on the chest, with a combination of compound and isolation exercises․ Start with the bench press for heavy lifts, targeting 4 sets of 8-12 reps․ Follow with incline dumbbell presses to hit the upper chest, aiming for 3 sets of 10-15 reps․ Chest dips and cable flyes can be added for deeper contractions and isolation, with 3 sets of 12-18 reps each․ Finish with push-ups or chest pullovers for endurance․ Rest for 60-90 seconds between sets and adjust weights to challenge your muscles progressively․ This routine ensures comprehensive chest development, balancing strength and hypertrophy effectively․

Day 2: Back

Day 2 targets the back, focusing on both width and thickness․ Begin with deadlifts for overall back engagement, aiming for 4 sets of 6-8 reps․ Bent-over barbell rows follow, targeting the middle back, with 4 sets of 8-10 reps․ Pull-ups or lat pulldowns are next, emphasizing the lats, for 3 sets of 8-12 reps․ Accessory exercises like face pulls and hyperextensions can be added for detailed development, with 3 sets of 12-15 reps each․ Maintain strict form to prevent injury and ensure full muscle activation․ Rest for 60-90 seconds between sets, progressively increasing weights to build strength and muscle mass effectively․

Day 3: Shoulders

Day 3 focuses on building strong, defined shoulders through a combination of compound and isolation exercises․ Start with overhead barbell or dumbbell presses for overall shoulder development, aiming for 4 sets of 6-8 reps․ Follow with lateral raises to target the deltoids, completing 3 sets of 10-12 reps․ Face pulls are next to enhance rear delt and upper back engagement, with 3 sets of 12-15 reps․ Finish with front raises or upright rows for additional front delt focus, doing 3 sets of 10-12 reps․ Maintain strict form to avoid injury and ensure balanced development․ Rest for 60-90 seconds between sets, progressively increasing weights to maximize hypertrophy and strength gains․

Day 4: Arms

Day 4 targets the biceps and triceps, focusing on both compound and isolation exercises for balanced arm development․ Begin with bench dips or close-grip bench presses for triceps, performing 4 sets of 6-8 reps․ Follow with barbell or dumbbell bicep curls for the biceps, aiming for 4 sets of 8-10 reps․ Include tricep pushdowns and hammer curls for isolation, completing 3 sets of 10-12 reps each․ Maintain strict form to prevent injury and maximize engagement․ Rest for 60-90 seconds between sets, gradually increasing weights to enhance hypertrophy and strength․ This structured approach ensures comprehensive arm development while allowing for progressive overload over time․

Day 5: Legs

Day 5 focuses on building strong, powerful legs through a mix of compound and isolation exercises․ Begin with squats or leg presses for 4 sets of 6-8 reps, targeting quadriceps and glutes․ Follow with Romanian deadlifts for hamstrings, completing 4 sets of 8-10 reps․ Include leg curls and extensions for isolation, performing 3 sets of 10-12 reps each․ Add lunges or bulgarian split squats for variety, aiming for 3 sets of 10-12 reps per leg․ Rest for 60-90 seconds between sets and gradually increase weights to promote hypertrophy․ Proper form and consistency are key to maximizing leg development and overall lower body strength․

Rest Days: Importance of Recovery

Rest days are crucial in the Bro Split workout plan, allowing your muscles to recover and grow․ After five intense days of training, your body needs time to heal and rebuild․ Neglecting rest can lead to overtraining, fatigue, and decreased progress․ Use these days to relax, stretch, or engage in light cardio to promote blood flow without stressing your muscles․ Recovery is when muscle growth and strength improvements occur, making it as important as the workouts themselves․ Proper rest ensures you return to training with full intensity, supporting long-term gains and overall performance․ Consistency in recovery habits will enhance your results and prevent burnout․

Benefits of the Bro Split

The Bro Split offers simplicity, consistency, and effectiveness․ It prevents boredom by targeting different muscle groups daily, while rest days enhance recovery․ Ideal for building lean mass and improving body composition, this split suits various fitness goals and experience levels, ensuring balanced growth and sustained progress over time․

Muscle Growth and Strength

The Bro Split is renowned for its ability to enhance muscle growth and strength․ By dedicating each day to a specific muscle group, lifters can target areas intensively, promoting significant hypertrophy․ The focus on compound movements, such as bench presses and squats, maximizes muscle engagement and strength gains․ Progressive overload, a cornerstone of this split, ensures consistent progress over time․ The structured routine allows for adequate recovery, preventing overtraining while optimizing muscle synthesis․ This approach is particularly effective for natural lifters, as it aligns with biological recovery processes, making it a reliable choice for achieving substantial increases in both muscle size and overall strength․

Simplicity and Consistency

The Bro Split’s simplicity is a key factor in its popularity․ The clear, straightforward structure—training one muscle group per day—makes it easy to follow and maintain consistency․ With a fixed weekly schedule, such as chest on Day 1, back on Day 2, and so on, lifters can establish a routine without confusion․ This consistency is crucial for progressive overload and muscle adaptation․ The lack of complexity reduces decision fatigue, allowing individuals to focus on execution and progression․ Over time, this predictable structure builds discipline and habits, making it easier to stick to the program long-term and achieve steady gains in muscle growth and strength․

Choosing the Right Exercises

Selecting exercises that target each muscle group effectively is essential․ Compound movements like bench presses and rows build strength and muscle efficiently, while isolation exercises refine details․ Balance free weights and machines for variety and progress, ensuring a well-rounded workout that prevents plateaus and promotes consistent gains․

Compound Movements

Compound movements are foundational exercises that engage multiple muscle groups simultaneously, maximizing efficiency and promoting overall muscle growth․ Bench presses, squats, deadlifts, and rows are prime examples, as they effectively target large muscle groups like the chest, back, and legs․ These exercises recruit multiple joints and muscles, making them ideal for building strength and mass․ Incorporating compound movements into your Bro Split ensures a balanced development of muscle groups, enhances functional strength, and supports progressive overload․ They are essential for creating a robust foundation for your workout routine and should be prioritized to achieve significant gains in muscle size and overall physique․

Isolation Exercises

Isolation exercises target specific muscles, allowing precise focus on individual muscle groups․ These exercises, such as bicep curls, tricep pushdowns, and lateral raises, are excellent for addressing muscle imbalances and enhancing definition․ They complement compound movements by isolating smaller muscle groups that may not be fully engaged during multi-joint exercises; Incorporating isolation exercises into your Bro Split helps improve muscle symmetry and aesthetics․ While they are beneficial, they should not overshadow compound lifts, as the latter remain foundational for overall strength and mass․ Balancing both types ensures a well-rounded physique and maximizes the effectiveness of your workout routine․ Proper form is key to avoid injury and maximize results․

Progressive Overload

Progressive overload is a cornerstone of the Bro Split workout plan, ensuring continuous muscle growth and strength gains․ It involves gradually increasing the weight, resistance, or intensity of your exercises over time․ This concept is essential for challenging muscles and avoiding plateaus․ Consistently applying progressive overload helps maintain muscle engagement and promotes long-term progress․ Tracking your workouts and logging weights, reps, and sets allows you to monitor improvements and adjust your routine accordingly․ By implementing progressive overload, you ensure that each session builds on the last, driving consistent gains in strength and muscle mass․ This principle is vital for maximizing the effectiveness of the Bro Split and achieving your fitness goals․

Nutrition and Supplementation

Proper nutrition and supplementation are key to maximizing results in a Bro Split workout․ Focus on a balanced diet rich in protein, carbs, and healthy fats to fuel workouts and recovery․ Supplements like protein powder, creatine, and BCAAs can enhance muscle growth and performance․ Consistency in nutrition ensures sustained energy and supports muscle recovery, helping you achieve your fitness goals effectively․

Caloric Intake and Macronutrients

Caloric intake is crucial for muscle growth and recovery in a Bro Split workout․ Aim for a caloric surplus to support muscle hypertrophy, with macronutrient balance being key․ Protein intake should be around 1․6-2․2 grams per kilogram of body weight to promote muscle repair and growth․ Carbohydrates provide energy for intense workouts, while healthy fats support hormonal function․ Adjusting your macronutrient ratios can help optimize body composition and performance․ Tracking your intake ensures you meet daily goals, supporting both strength gains and muscle development throughout the program․ Proper nutrition planning is essential for achieving the desired results from your training efforts․

Recovery Strategies

Rest and sleep are crucial for muscle recovery․ Active recovery, stretching, and hydration support muscle repair․ Proper nutrition ensures optimal growth and recovery․

Rest and Sleep

Rest and sleep are vital for muscle recovery and growth․ Aim for 7-9 hours of quality sleep nightly to support muscle repair and hormonal balance․ Consistency in sleep schedule enhances recovery efficiency, while poor sleep can hinder progress․ Create a restful environment, avoid screens before bed, and consider naps if needed․ Active recovery, like light cardio or stretching, can also aid muscle repair without stressing the body․ Adequate rest ensures muscles rebuild stronger, making it a cornerstone of the Bro Split program․ Prioritizing sleep and recovery is essential for maximizing gains and maintaining overall health․

Sample Bro Split Workout Plan PDF

A downloadable Bro Split Workout Plan PDF provides a structured, easy-to-follow guide for your fitness journey․ It outlines a 5-day workout schedule, detailing exercises, sets, and reps for each muscle group․ The PDF includes a daily breakdown, such as Chest Day, Back Day, and Legs Day, with suggested exercises like bench presses, rows, and squats․ It also offers tips for progression, nutrition, and recovery․ This comprehensive resource is perfect for those seeking a clear, organized plan to maximize their gym time and achieve their fitness goals․ Download the PDF to have a portable, printable guide tailored to your Bro Split routine․

Troubleshooting Common Issues

Common issues with the Bro Split include plateaus, overtraining, and lack of motivation․ To overcome these, ensure progressive overload, adequate rest, varied routines, and proper nutrition․

Plateaus in Progress

A common issue with the Bro Split is hitting a plateau, where progress stalls despite consistent effort․ This often occurs due to inadequate progressive overload, poor nutrition, or insufficient rest․ To break through, increase weights gradually, adjust rep ranges, or modify exercises․ Ensure caloric intake supports growth, and prioritize recovery techniques like sleep and active recovery; Incorporating variety in routines, such as changing grips or adding accessory movements, can also reignite progress․Plateaus are normal but addressing them with strategic adjustments ensures continued gains and keeps the workout effective and engaging over time․ Consistency and adaptation are key to overcoming stagnation․

The Bro Split workout plan is a straightforward and effective approach for building muscle and strength․ By focusing on one muscle group per day, it allows for targeted development and recovery․ This structure is ideal for lifters seeking a consistent routine that balances intensity with rest․ Over time, the plan helps achieve significant gains in muscle mass and overall physique․ Remember, consistency, proper nutrition, and recovery are key to maximizing results․ Whether you’re a beginner or an experienced lifter, the Bro Split offers a clear path to achieving your fitness goals with its simple yet effective framework․

apc backup pro 1000 manual

The APC Backup Pro 1000 is a reliable Uninterruptible Power Supply (UPS) designed to provide backup power during outages, safeguarding your equipment and critical data.

1.1 Overview of the APC Backup Pro 1000

The APC Backup Pro 1000 is a high-performance Uninterruptible Power Supply (UPS) designed to deliver reliable backup power and surge protection for home and small office equipment. It ensures seamless power continuity during outages, safeguarding sensitive electronics like computers, routers, and gaming consoles. With its compact design and user-friendly interface, this UPS is ideal for protecting critical devices from power fluctuations and spikes. The APC Backup Pro 1000 offers a balanced combination of power capacity, efficiency, and advanced features, making it a versatile solution for everyday use. Its intuitive design and robust performance make it a trusted choice for users seeking dependable backup power.

1.2 Importance of Using a UPS for Backup Power

Using a UPS like the APC Backup Pro 1000 is essential for protecting your devices from unexpected power outages, surges, and spikes. A UPS provides a buffer of backup power, allowing you to save critical work and safely shut down equipment. Without a UPS, sudden power loss can result in data loss, corrupted files, and potential damage to sensitive electronics. Additionally, a UPS ensures continuous operation of essential systems during outages, minimizing downtime and maintaining productivity. It also safeguards your equipment from voltage fluctuations, which can degrade hardware over time. Investing in a UPS is a proactive step to secure your devices and ensure uninterrupted performance in unpredictable power conditions.

Key Features of APC Backup Pro 1000

The APC Backup Pro 1000 offers 1000VA capacity, Pure Sine Wave output, and multiple USB ports for charging devices. It provides reliable backup power and surge protection.

2.1 Hardware Specifications

The APC Backup Pro 1000 is a high-performance UPS with a capacity of 1000VA and 600W. It features a pure sine wave output, ensuring compatibility with sensitive electronics. The unit is equipped with 6 x NEMA 5-15R outlets, offering a mix of battery-backed and surge-protected ports. It includes 2 x USB-A and 1 x USB-C ports for convenient device charging. The UPS is powered by a maintenance-free, sealed lead-acid battery, designed for reliability and long lifespan. The compact design measures 11.8 x 7.1 x 12.8 inches and weighs approximately 25 pounds, making it suitable for home or office use. Energy-efficient mode reduces power consumption when idle.

2.2 Software and Connectivity Options

The APC Backup Pro 1000 is compatible with PowerChute Personal Edition software, offering advanced monitoring and control of UPS settings. It supports USB and serial connectivity for seamless integration with computers. The UPS features Smart-UPS On-Line technology, providing high efficiency and pure sine wave output. Connectivity options include 2 x USB-A ports and 1 x USB-C port for enhanced device management. The device also supports remote monitoring via web interface, enabling users to track performance and receive alerts. These features ensure optimized power protection and easy system integration, making it ideal for both home and office environments.

Installation and Setup

The APC Backup Pro 1000 installation is straightforward, requiring basic tools. Place it on a flat surface, connect your devices, and ensure a stable power supply;

3.1 Preparing the Environment for Installation

Before installing the APC Backup Pro 1000, ensure the environment is suitable. Choose a well-ventilated, dry, and stable surface away from direct sunlight or moisture. The area should be free from dust and debris to prevent overheating. Ensure the power source is reliable and nearby, with a dedicated circuit if possible. Gather all necessary tools, such as a screwdriver, and unpack the UPS carefully to avoid damage. Read the manual thoroughly to understand the installation process. Disconnect the main power supply before starting the installation to ensure safety. Proper preparation ensures a smooth and secure setup for your UPS.

3.2 Step-by-Step Installation Guide

Begin by connecting the UPS battery to the unit, ensuring it is securely attached. 2. Plug the UPS into a nearby power outlet and allow it to charge for at least 4 hours. 3. Connect your devices to the UPS outlets, prioritizing critical equipment like computers or routers. 4. Install the provided PowerChute software to monitor and control the UPS settings. 5. Configure shutdown settings and alerts through the software. 6. Test the UPS by simulating a power outage to ensure proper functionality. Always refer to the manual for specific connection diagrams and safety precautions. This step-by-step guide ensures a safe and effective installation process for your APC Backup Pro 1000.

Configuring the APC Backup Pro 1000

Configuration involves adjusting settings like backup time, shutdown sequences, and alert preferences. Use the PowerChute software to customize these options for optimal performance and reliability.

4.1 Initial Configuration Settings

Start by connecting the UPS to your computer and power source. Install the PowerChute software from the provided CD or download it from APC’s website. Open the software and follow the wizard to set basic preferences. Configure the backup time, shutdown sequences, and sensitivity settings according to your needs. Enable notifications for low battery, overload, or fault conditions. Set up scheduled shutdowns or tests if required. Save your configuration to ensure settings are applied. Finally, perform a quick system test to verify everything is functioning correctly. These initial settings will ensure your UPS operates efficiently and protects your equipment during power disruptions.

4.2 Advanced Configuration Options

Access advanced settings via the PowerChute interface by navigating to the Advanced tab. Adjust the UPS sensitivity to optimize battery life or prioritize power quality. Configure smart charging to extend battery longevity. Set custom thresholds for voltage regulation and overload protection. Enable network monitoring if you’re using the UPS in a shared environment. Customize notification alerts to include email or SMS updates for critical events. Schedule automatic self-tests to ensure the UPS remains functional. For multiple devices, set up load sequencing to control power distribution. Experiment with these options to tailor the UPS performance to your specific needs, ensuring optimal power management and system reliability.

Maintenance and Upkeep

Regular maintenance ensures UPS reliability. Check the battery and ensure proper ventilation. Update software and perform self-tests. A clean, stable environment prolongs device lifespan.

5.1 Routine Maintenance Checks

Regular maintenance is crucial for optimal performance. Check the battery health, ensure proper ventilation, and inspect cables for damage. Clean dust from vents and test the UPS with a self-test. Monitor environmental conditions, such as temperature and humidity, to ensure they remain within recommended levels. Update the UPS software periodically and review event logs to identify potential issues early. Replace worn-out components promptly. These routine checks help prevent unexpected failures and ensure your APC Backup Pro 1000 operates efficiently during power outages, protecting your connected devices and data.

5.2 Battery Replacement and Recycling

Replace the battery every 3-5 years or when the UPS indicates a weak battery. Turn off the UPS, unplug it, and discharge the battery. Open the unit carefully, following safety guidelines. Remove the old battery, ensuring no contacts touch metal. Install the new battery securely, matching the polarity. Dispose of the old battery responsibly, adhering to local recycling regulations. Many retailers offer battery recycling programs. After replacement, recalibrate the UPS and test it under load. Proper recycling helps protect the environment and complies with safety standards. Always store replacement batteries in a cool, dry place and keep packaging for the old battery until disposal is arranged.

Troubleshooting Common Issues

Troubleshooting common issues with the APC Backup Pro 1000 ensures optimal performance and reliability. Identify problems like power outages or battery faults quickly. Use error notifications and indicators to diagnose and resolve issues promptly. Regular checks and maintenance can prevent many common faults. Refer to the manual or manufacturer support for detailed solutions and guidelines.

6.1 Identifying and Diagnosing Problems

Identifying and diagnosing issues with the APC Backup Pro 1000 is crucial for maintaining reliability; Start by observing LED indicators and alarm sounds, which signal specific faults. Check for common issues like battery failure, overload, or improper connections. Review error messages displayed on connected devices or through software. Use the UPS’s diagnostic mode to run self-tests and assess battery health. Ensure the unit is properly ventilated and not overloaded. Consult the manual for error code meanings and follow troubleshooting steps to isolate the problem. If issues persist, contact technical support for further assistance. Early detection and resolution prevent data loss and ensure uninterrupted power supply;

6.2 Solutions for Common Faults and Errors

For common faults with the APC Backup Pro 1000, start by addressing the root cause. If the battery fails, replace it with a compatible APC model. For overload issues, reduce the connected load and ensure the UPS is rated for the equipment. If the UPS does not turn on, check the power source and circuit breaker. Faulty connections can often be resolved by re-plugging cables securely. For firmware-related errors, update the UPS software using the PowerChute tool. If the unit overheats, ensure proper ventilation and avoid placing it in enclosed spaces. Finally, if issues persist, reset the UPS or contact APC support for professional assistance. Always refer to the manual for specific troubleshooting steps.

The APC Backup Pro 1000 is a robust and reliable UPS solution, offering excellent protection for your devices. Its ease of use and durability ensure long-term peace of mind.

7.1 Summary of Key Points

The APC Backup Pro 1000 is a high-quality UPS designed to ensure uninterrupted power supply during outages. It offers reliable protection for sensitive electronics, with features like automatic voltage regulation and surge protection. The device is user-friendly, with a clear LCD display and intuitive controls. Proper installation and configuration are essential for optimal performance. Regular maintenance, including battery checks and firmware updates, is crucial for longevity. Troubleshooting common issues can often resolve problems quickly. By following the guidelines outlined in this manual, users can maximize the efficiency and lifespan of the APC Backup Pro 1000, ensuring their devices remain protected and operational.

7.2 Best Practices for Long-Term Use

For optimal performance and longevity of the APC Backup Pro 1000, follow these best practices:

  • Conduct regular battery tests to ensure reliability during power outages.
  • Store the UPS in a cool, dry environment, avoiding extreme temperatures and humidity.
  • Ensure good ventilation to prevent overheating, which can degrade internal components.
  • Keep the firmware updated to benefit from the latest features and improvements.
  • Adhere to the recommended maintenance schedule for battery replacements and system checks.
  • Avoid overloading the UPS beyond its specified capacity to prevent damage.
  • Disconnect and allow the battery to discharge fully every 3–6 months to maintain health.
  • Consult a professional for complex installations or repairs to avoid voiding the warranty.

By following these guidelines, you can ensure the APC Backup Pro 1000 remains a reliable and efficient power protection solution for years to come.

manual de manejo de nevada 2023

The Nevada Driver’s Manual 2023 is a comprehensive guide designed to educate drivers on traffic laws, safe driving practices, and licensing procedures in Nevada. It prepares drivers for theoretical and practical exams, ensuring adherence to state-specific rules and regulations for safe and legal driving.

Overview of the Manual

The Nevada Driver’s Manual 2023 serves as a comprehensive guide for drivers, detailing traffic laws, road signs, and licensing procedures. It covers essential topics such as safe driving practices, exam preparation, and state-specific regulations. Designed for both new and experienced drivers, the manual ensures a thorough understanding of Nevada’s driving requirements for safe and lawful driving.

Importance of the Manual for Safe Driving

The Nevada Driver’s Manual 2023 is crucial for safe driving as it provides detailed information on traffic laws, road signs, and safe practices. It helps drivers understand their responsibilities, reducing accidents and ensuring compliance with Nevada’s driving regulations. The manual also covers licensing procedures, making it an essential resource for all drivers to stay safe and informed.

Eligibility Requirements for Obtaining a Nevada Driver’s License

To obtain a Nevada driver’s license, applicants must meet specific age, residency, and documentation requirements. These criteria ensure legal compliance and readiness for safe driving in Nevada.

Age Requirements

In Nevada, applicants must be at least 16 years old to apply for a provisional license and 18 years old for a full driver’s license. Those under 18 must complete driver’s education and provide parental consent. These age requirements ensure readiness and safety for new drivers on Nevada roads.

Residency Requirements

New Nevada residents must apply for a driver’s license within 30 days of establishing residency. Non-residents, including students and military personnel, may drive with a valid out-of-state license. Temporary residents must meet specific requirements to maintain driving privileges in Nevada without obtaining a state license.

Documentation Needed

To obtain a Nevada driver’s license, applicants must provide proof of identity, residency, and legal status. Required documents include a valid ID, Social Security card, and two proofs of residency. Additional documentation may be needed for non-citizens or name changes, ensuring compliance with state and federal regulations.

Types of Driver’s Licenses in Nevada

Nevada offers various driver’s licenses, including Class C for passenger vehicles, CDL for commercial vehicles, and Motorcycle licenses, each with specific requirements and privileges.

Class C (Passenger Vehicle)

The Class C license allows operation of passenger vehicles, including cars, trucks, and SUVs, with a Gross Vehicle Weight Rating (GVWR) under 26,001 pounds. It is the most common license for personal use and does not permit commercial driving. Applicants must meet age requirements and pass vision, written, and driving tests.

Commercial Driver’s License (CDL)

A Commercial Driver’s License (CDL) is required to operate vehicles over 26,001 pounds GVWR or those designed to transport 16+ passengers. Applicants must pass a vision test, knowledge exam, and skills test. The Nevada DMV manual details CDL classifications, endorsements, and restrictions, ensuring safe and regulated commercial driving practices statewide.

Motorcycle License

To obtain a Nevada motorcycle license, applicants must be at least 16 years old and pass a vision test, written exam, and motorcycle skills test. The manual provides detailed requirements, safety tips, and rules for motorcyclists, emphasizing safe riding practices and adherence to Nevada traffic laws specific to two-wheeled vehicles.

Nevada Traffic Laws and Regulations

Nevada’s traffic laws regulate speed limits, right-of-way rules, and seat belt use to ensure road safety. They are enforced to reduce accidents and maintain orderly traffic flow across the state.

Speed Limits

Nevada sets speed limits to ensure road safety, varying by location and road type. Urban areas typically have lower limits, while rural roads and highways allow higher speeds. Drivers must adhere to posted limits to avoid penalties and maintain traffic order, contributing to a safer driving environment across the state.

Right-of-Way Rules

Nevada’s right-of-way rules ensure orderly traffic flow. Drivers must yield to pedestrians, emergency vehicles, and others with the right-of-way. At four-way stops, the first to arrive goes first. When two vehicles arrive simultaneously, the vehicle on the left yields. Understanding these rules is crucial for safe and lawful driving in Nevada.

Seat Belt and Child Restraint Laws

Nevada law requires all drivers and passengers to wear seat belts. Children under 6 years old or weighing less than 60 pounds must use a child restraint system. Violations can result in fines and penalties, emphasizing safety and compliance with these critical traffic regulations.

Understanding Road Signs in Nevada

The Nevada Driver’s Manual 2023 educates drivers on traffic signs, focusing on regulatory, warning, and informational signs. Understanding these signs ensures safe driving and compliance with state laws.

Types of Traffic Signs

The Nevada Driver’s Manual 2023 categorizes traffic signs into regulatory, warning, and informational signs. Regulatory signs enforce traffic laws, such as speed limits. Warning signs alert drivers to potential hazards. Informational signs provide guidance, like directions or road conditions, helping drivers navigate safely and efficiently across Nevada’s roads.

Interpreting Sign Meanings

Interpreting traffic sign meanings is crucial for safe driving. The Nevada Driver’s Manual 2023 explains that understanding shapes, colors, and symbols helps drivers recognize and respond to road conditions. This knowledge is vital for adhering to traffic laws and ensuring safety on Nevada’s roads, preventing accidents, and facilitating smooth traffic flow.

Common Signs and Their Importance

Safe Driving Practices in Nevada

Safe driving in Nevada requires staying alert, following traffic laws, and being courteous to all road users, ensuring a secure environment for everyone and using safety features.

Defensive Driving Techniques

Defensive driving techniques emphasize anticipation and caution, such as maintaining a safe distance, scanning the road, and being prepared for unexpected actions by other drivers. These practices reduce accident risks and promote a safer driving environment in Nevada, aligning with the state’s traffic laws and safety guidelines.

Dangerous Driving Conditions

Dangerous driving conditions in Nevada include inclement weather, road hazards, and low visibility. Drivers should reduce speed, increase following distance, and use caution when encountering fog, rain, or icy roads. Being aware of these conditions and adjusting driving behavior can significantly enhance safety and reduce accident risks on Nevada’s roads.

Sharing the Road with Other Users

Sharing the Road with Other Users

Sharing Nevada’s roads requires courtesy and awareness. Drivers must yield to pedestrians, cyclists, and motorcyclists, respecting their space and right-of-way. Understanding lane usage and signaling ensures smooth traffic flow and safety for all road users, fostering a harmonious and collision-free environment for everyone.

Details of the Nevada Driver’s License Exams

The Nevada driver’s license exams include a theoretical test, vision exam, and practical driving test. These assessments ensure applicants understand traffic laws, safety practices, and can drive competently.

Theoretical Exam

The theoretical exam in Nevada tests knowledge of traffic laws, signs, and safe driving practices. It features multiple-choice questions covering state-specific rules, ensuring applicants understand how to operate a vehicle legally and safely. Preparation using the driver’s manual and online practice tests is highly recommended to achieve success.

Vision Test

A vision test is mandatory for obtaining a Nevada driver’s license. It assesses visual acuity and peripheral vision to ensure drivers can safely operate a vehicle. Applicants must meet minimum vision standards, with or without corrective lenses, to pass this essential requirement for licensing.

Practical Driving Test

The practical driving test evaluates your ability to safely operate a vehicle, adhering to Nevada’s traffic laws. You must demonstrate competence in vehicle control, parking, turning, and following traffic signals. A DMV examiner will assess your driving skills to ensure you can navigate roads safely and responsibly.

Study Resources for the Nevada Driver’s Manual

The Nevada Driver’s Manual offers essential study resources, including the official guide, online practice tests, and driver’s education courses, to help prepare effectively for licensing exams.

Using the Official Manual

The Nevada Driver’s Manual is the primary study resource for licensing exams. It covers traffic laws, road signs, and safe driving practices. Available in PDF format, it’s accessible online, ensuring comprehensive preparation for both theoretical and practical tests, aligning with Nevada’s specific driving regulations and requirements;

Online Practice Tests

Online practice tests are an essential study tool for Nevada driver’s license applicants. These tests simulate real exam questions, covering traffic laws, road signs, and safe driving practices. They help reinforce understanding of the manual and prepare applicants for the actual theoretical exam, ensuring confidence and readiness for the DMV test.

Driver’s Education Courses

Driver’s education courses provide structured lessons and expert instruction to help applicants master Nevada’s traffic laws and safe driving techniques. These courses complement the manual, offering interactive content and practical insights. Available online or in-person, they are ideal for new drivers seeking a thorough understanding of Nevada’s driving requirements.

Special Considerations for Non-Residents and Military Personnel

Active-duty military members with valid out-of-state licenses and non-residents, such as students or tourists, can drive in Nevada without obtaining a state license. Military personnel receive specific exceptions, while temporary residents and visitors must comply with age and licensing requirements to legally operate vehicles in Nevada.

Non-Resident Driving Privileges

Non-residents, such as students or tourists, can drive in Nevada with a valid out-of-state license. They are not required to obtain a Nevada license unless they establish residency. Non-residents must comply with Nevada traffic laws and meet the minimum age requirement of 16 years old to legally operate a vehicle in the state.

Military Personnel Exceptions

Active-duty military members with a valid out-of-state license do not need a Nevada license. Spouses and dependents of military personnel may also be exempt under certain conditions. Nevada honors valid military IDs and licenses, allowing service members to drive legally without obtaining a state-specific license during their assignment period.

Temporary Residents and Visitors

Temporary residents and visitors with a valid out-of-state license may drive in Nevada without obtaining a state license, provided their stay does not exceed 30 days. Non-residents, including tourists and seasonal residents, must be at least 16 years old to legally operate a vehicle in Nevada.

The Nevada Driver’s Manual 2023 is an essential resource for safe and legal driving in Nevada. Adhering to its guidelines ensures compliance with traffic laws and promotes responsible driving practices. Continuous learning and updating knowledge of driving regulations are crucial for maintaining road safety.

Importance of Adhering to the Manual

Adhering to the Nevada Driver’s Manual 2023 is crucial for understanding traffic laws, safe driving practices, and licensing procedures. It serves as a foundational guide for passing both theoretical and practical exams, ensuring compliance with state-specific regulations. By following the manual, drivers can reduce risks, avoid violations, and contribute to a safer road environment for all users.

Continuous Learning for Safe Driving

Continuous learning is essential for maintaining safe driving habits; Staying updated on Nevada’s traffic laws, participating in defensive driving courses, and understanding new road signs and technologies ensures drivers remain informed and adaptable. This ongoing education helps prevent accidents and promotes a culture of responsible and attentive driving on Nevada’s roads.

texas wholesale real estate contract pdf

A Texas wholesale real estate contract outlines the terms for buying and selling properties at a discounted rate. It streamlines transactions between investors and sellers, ensuring legality and transparency. Using a wholesale contract PDF in Texas provides a structured format, protecting all parties involved and facilitating smooth real estate deals.

What is a Wholesale Real Estate Contract?

A wholesale real estate contract is a legally binding agreement between a wholesaler and a property seller. It outlines the terms for the purchase of a property at a discounted price, often below market value. This contract is commonly used by real estate investors to facilitate quick transactions. Unlike traditional sales, wholesaling involves assigning the contract to a third-party buyer, typically another investor, who then closes the deal. The contract must comply with Texas real estate laws and include essential details like property description, purchase price, and payment terms. It is a critical tool for investors seeking to streamline the acquisition process while ensuring legal compliance and transparency. Wholesale contracts are popular in Texas due to their efficiency and profitability.

Importance of Using a Wholesale Real Estate Contract in Texas

Using a wholesale real estate contract in Texas is crucial for ensuring legal protection and clarity in transactions. It provides a structured framework that outlines the rights and obligations of all parties involved, reducing misunderstandings. The contract ensures compliance with Texas real estate laws, safeguarding investors and sellers alike. It also streamlines the process, allowing for faster and more efficient deals. By using a wholesale contract, investors can avoid costly disputes and ensure smooth transactions. Additionally, it provides transparency, detailing property specifics, pricing, and payment terms, which fosters trust and professionalism. A well-drafted contract is essential for a successful and legally binding wholesale real estate transaction in Texas.

Key Elements of a Texas Wholesale Real Estate Contract

A Texas wholesale contract includes details about the parties involved, property description, purchase price, payment terms, and assignment rights. It ensures clarity and legal compliance in transactions.

Parties Involved in the Contract

A Texas wholesale real estate contract typically involves three main parties: the seller, the buyer (often an investor), and the assignee (if rights are transferred). The seller is the property owner, while the buyer negotiates the purchase. In wholesaling, the buyer may assign their rights to an assignee, who closes the deal. Each party’s role and responsibilities must be clearly defined to ensure legal compliance and avoid disputes. Signatures from all parties are required to validate the agreement. Witnesses or notaries may also be involved to authenticate the contract. Clarity in identifying and detailing the roles of each party is crucial for a smooth and legally binding transaction.

Property Description and Details

The Texas wholesale real estate contract requires a detailed description of the property, including its legal address, parcel identification number, and physical boundaries. The property type, such as residential, commercial, or vacant land, must be specified. Any existing structures, improvements, or zoning classifications should also be noted. The contract may include attachments like surveys, appraisals, or inspection reports to provide a comprehensive understanding of the property’s condition. Accurate and thorough property details ensure clarity and prevent disputes. This section is critical for both buyers and sellers to confirm the scope of the agreement and align expectations. Proper documentation ensures the transaction is legally sound and transparent.

Purchase Price and Payment Terms

The Texas wholesale real estate contract specifies the total purchase price and outlines the payment structure. It details the amount of earnest money, deposit terms, and the balance due at closing. Payment methods, such as cash, financing, or third-party loans, are clearly defined. The contract also includes deadlines for payments and any applicable late fees. Additionally, it addresses who is responsible for closing costs, title fees, and other expenses. The payment terms must comply with Texas real estate laws and regulations. This section ensures both buyer and seller understand their financial obligations, preventing misunderstandings. Transparent payment terms are essential for a smooth and legally binding transaction.

Assignment of Rights and Obligations

In a Texas wholesale real estate contract, the assignment of rights and obligations allows the original buyer (assignor) to transfer their rights to another buyer (assignee). This section outlines the terms under which the assignor can legally transfer ownership interests. The contract must include written consent from the seller, ensuring all parties agree to the transfer. The assignee assumes all responsibilities, such as meeting payment deadlines and fulfilling contract conditions. The original buyer may remain liable unless the seller releases them. This clause ensures clarity and legal compliance, preventing disputes. Proper documentation and adherence to Texas real estate laws are crucial for a valid assignment. This provision is key to maintaining the integrity of the wholesale transaction.

Legal Requirements and Forms

Texas wholesale real estate contracts must comply with state laws and regulations. Specific forms, such as the Texas Real Estate Commission (TREC) contracts, are required for validity. Adherence to legal standards ensures enforceability and protects all parties involved in the transaction.

Compliance with Texas Real Estate Commission Regulations

Compliance with Texas Real Estate Commission (TREC) regulations is crucial when using a wholesale real estate contract in Texas. TREC mandates specific forms and disclosures to ensure transparency and fairness in real estate transactions. These forms, such as the TREC Wholesale Real Estate Contract, are designed to protect both buyers and sellers by outlining clear terms and conditions. Real estate license holders are required to use TREC-approved contracts, while non-licensed individuals must still adhere to state laws. Failure to comply with TREC regulations can result in legal consequences, including fines and invalidation of the contract. Ensuring all documentation meets TREC standards is essential for a smooth and legally binding transaction.

Necessary Disclosures and Addendums

Necessary disclosures and addendums are vital components of a Texas wholesale real estate contract. Sellers must provide detailed property information, including any known defects or issues, to ensure transparency. These disclosures protect both parties and prevent future disputes. Addendums may include additional terms or conditions specific to the transaction, such as repair requirements or contingencies. Properly executed disclosures and addendums ensure the contract is comprehensive and legally binding. Failure to include required disclosures can lead to contract termination or legal action. Ensuring all necessary documentation is included safeguards the interests of both buyers and sellers in the wholesale process.

Frequently Asked Questions About Texas Wholesale Contracts

Frequently Asked Questions About Texas Wholesale Contracts address common concerns, such as contract assignments, risks, and legal compliance. They provide clarity for investors and sellers, ensuring smooth transactions.

Can a Wholesale Contract Be Assigned to Another Buyer?

A wholesale contract in Texas can typically be assigned to another buyer, provided the original agreement permits it. This process allows wholesalers to transfer their rights and obligations to a new purchaser, often without needing the seller’s direct involvement. However, it’s crucial to review the contract terms to ensure there are no restrictions on assignment. If allowed, the assignment must be executed through a formal agreement, transferring the contract’s rights to the new buyer. This legal step ensures clarity and protects all parties involved, maintaining the integrity of the transaction under Texas real estate laws. Consulting a legal expert is advisable to navigate this process smoothly and avoid potential disputes.

What Are the Risks Involved in Wholesaling Real Estate?

Wholesaling real estate in Texas carries several risks that investors must carefully manage. One major risk is the potential for legal disputes if contracts are not properly executed or assigned. Non-disclosure of property conditions or misrepresentation can lead to liability issues. Additionally, reliance on finding a qualified buyer quickly can result in financial losses if the deal falls through. Market fluctuations may also reduce profit margins. Investors must ensure compliance with Texas real estate laws to avoid penalties. Proper due diligence and the use of legally sound wholesale contract PDFs are essential to mitigate these risks and protect all parties involved in the transaction.

Downloading and Using a Texas Wholesale Real Estate Contract PDF

Download a Texas wholesale real estate contract PDF for free from trusted sources like Real Estate Skills or DocHub. Fillable templates simplify the process, ensuring legal compliance and efficiency in real estate transactions.

Where to Find Reliable and Free Templates Online

Reliable and free Texas wholesale real estate contract PDF templates can be found on platforms like Real Estate Skills, DocHub, and pdfFiller. These websites offer customizable templates designed specifically for Texas, ensuring compliance with state regulations. Real Estate Skills provides pre-built fillable templates that can be completed in minutes, while DocHub allows for easy editing and signing without additional software. pdfFiller offers a range of fillable forms, including wholesale real estate contracts, which can be accessed from any device. These platforms are trusted sources for legal documents, offering convenience and efficiency for real estate investors and professionals. Always verify the template’s compliance with Texas laws before use.

How to Fill Out and Execute the Contract Properly

Filling out a Texas wholesale real estate contract PDF requires attention to detail and adherence to legal standards. Start by identifying all parties involved, including the buyer, seller, and property details. Use online tools like DocHub or pdfFiller to edit and fill in the template accurately. Ensure all fields, such as the property description, purchase price, and payment terms, are completed clearly. Once filled, review the document for any errors or omissions. Execute the contract by obtaining signatures from all parties, preferably in the presence of a notary to ensure legality. Finally, distribute copies to all involved and maintain a record for future reference. Proper execution ensures enforceability and protects all parties’ interests.

canon eos1300d manual

The Canon EOS 1300D is an entry-level DSLR camera designed for beginners and photography enthusiasts, offering high-quality images with an 18MP CMOS sensor and built-in Wi-Fi for easy connectivity and sharing.

Key Features and Technical Specifications

The Canon EOS 1300D features an 18MP APS-C CMOS sensor, built-in Wi-Fi, and NFC connectivity, offering high-quality imaging with precise details and vibrant colors, ideal for photography enthusiasts.

2.1 Sensor and Image Quality

The Canon EOS 1300D is equipped with an 18.0-megapixel APS-C CMOS sensor, delivering high-resolution images with vibrant colors and precise details. It supports up to 5184×3456 pixels, ensuring crisp and lifelike visuals. The sensor’s improved light-capturing capabilities enhance low-light performance, while the DIGIC 4+ image processor optimizes noise reduction and color accuracy. With an ISO range of 100-6400 (expandable to 12800), the camera captures sharp images in various lighting conditions. Its ability to shoot in RAW format allows for greater flexibility in post-processing, making it ideal for enthusiasts seeking high-quality photography.

Setup and Initial Configuration

Unboxing and setting up the Canon EOS 1300D involves charging the battery, mounting lenses, and configuring basic settings like date/time and language. Formatting memory cards is essential for optimal performance.

3.1 Unboxing and First Impressions

Unboxing the Canon EOS 1300D reveals the camera body, EF-S 18-55mm lens, battery, charger, neck strap, and a basic instruction manual. The camera feels solid and lightweight, with a comfortable grip. Initial impressions highlight its user-friendly design, making it accessible for beginners. The 3-inch LCD screen and intuitive controls provide a seamless first-time experience. The included manual offers a quick start guide, while detailed instructions are available online. This setup ensures photographers can begin capturing moments immediately after unboxing;

3.2 Charging the Battery and Initial Setup

The Canon EOS 1300D comes with a rechargeable LP-E10 battery and a charger. Before first use, charge the battery fully, which takes approximately 2 hours. Once charged, insert the battery into the camera. Turn on the camera and follow the on-screen prompts to set your language, date, and time. These settings are essential for organizing your photos. The 3-inch LCD screen guides you through the process. Ensure the camera is updated with the latest firmware for optimal performance. Refer to the manual or Canon’s support website for detailed setup instructions.

3.3 Mounting Lenses and Accessories

Mounting lenses and accessories on the Canon EOS 1300D is straightforward. Align the EF-S or EF lens with the camera’s mount, ensuring the white or red dot matches for correct alignment. Gently twist the lens clockwise until it clicks. For the kit lens (18-55mm), attach it securely. Additional accessories like the flash or grip can be connected via the hot shoe or tripod mount. Always handle lenses with care to avoid damage. The camera automatically recognizes compatible lenses, enabling features like image stabilization. Refer to the manual for specific accessory compatibility and mounting instructions.

Shooting Modes Explained

The Canon EOS 1300D offers various shooting modes, from automatic to manual, providing flexibility for beginners and experienced photographers to capture stunning images effortlessly.

4.1 Automatic Modes (Scene Intelligent Auto, etc.)

The Canon EOS 1300D features Scene Intelligent Auto mode, which automatically adjusts settings for optimal results. It also includes Portrait, Landscape, Close-up, and Night Portrait modes, simplifying photography for beginners by detecting and adapting to various shooting conditions. These modes ensure vibrant colors and sharp focus, making it easier to capture stunning images without manual adjustments. The camera analyzes the scene and selects the best settings, allowing users to focus on composition and creativity while achieving professional-looking results effortlessly.

4.2 Manual Modes (P, Av, Tv, M)

The Canon EOS 1300D offers manual modes for advanced control: Program AE (P), Aperture Priority (Av), Shutter Priority (Tv), and Manual (M). In P mode, the camera adjusts aperture and shutter speed, while Av mode lets users set the aperture for depth-of-field control. Tv mode allows manual shutter speed adjustment for motion effects. M mode provides full manual control over both aperture and shutter speed. These modes enable precise customization, catering to photographers seeking creative control and professional results, making the EOS 1300D versatile for both beginners and experienced shooters.

Customizing Your Camera

Customize your Canon EOS 1300D to suit your preferences, including button assignments and settings. Use the EOS Utility software for advanced customization and personalized camera control.

5.1 Customizing Buttons and Functions

The Canon EOS 1300D allows users to customize buttons and functions to enhance their shooting experience. Assign frequently used settings like ISO, AF Lock, or white balance to specific buttons for quick access. Use the camera’s menu to reassign functions, ensuring intuitive control. This feature is particularly useful for streamlining workflows and adapting the camera to individual preferences. Customization options are detailed in the manual, providing step-by-step guidance for personalizing button assignments and optimizing camera operation.

5.2 Using the EOS Utility Software

The EOS Utility Software enhances the functionality of your Canon EOS 1300D by enabling remote camera control and image transfer to a computer. It allows users to adjust settings, capture images, and review photos directly on a PC or Mac. The software also supports firmware updates, ensuring your camera stays up-to-date. Detailed instructions for downloading and installing the software are available in the manual, making it easy to integrate this tool into your workflow for improved efficiency and creativity in photography.

Troubleshooting Common Issues

Common issues with the Canon EOS 1300D include battery drainage, memory card errors, and autofocus malfunctions. The manual provides solutions like resetting the camera, formatting memory cards, and cleaning the sensor. For connectivity problems, resetting Wi-Fi settings often resolves the issue. Firmware updates can address software-related glitches. Referencing the troubleshooting section in the manual or Canon’s support website offers step-by-step guidance to restore functionality and ensure optimal performance, helping users overcome challenges efficiently and continue capturing high-quality images without interruption.

Tips for Getting the Best Results

To achieve the best results with the Canon EOS 1300D, experiment with manual modes for creative control. Use the built-in flash sparingly to avoid harsh lighting and opt for natural light when possible. Shoot in RAW format for better post-processing flexibility. Regularly clean the sensor and lenses to prevent dust spots. Familiarize yourself with the autofocus system for sharper images. Utilize the EOS Utility software for remote shooting and advanced settings. Practice composition and experiment with angles to enhance your photos. Stay updated with firmware for optimal performance and image quality.

Resources and Support

Canon EOS 1300D users can access comprehensive support through the official Canon website, including downloadable manuals, EOS Utility software, and active online communities for troubleshooting and tips.

8.1 Downloading the Manual and Additional Guides

The Canon EOS 1300D manual and additional guides are available for download on the official Canon website. Users can access the Basic Instruction Manual, which provides essential information for getting started, as well as more detailed PDF manuals for advanced features. These resources cover topics like camera settings, shooting modes, and troubleshooting. To download, visit www.canon.com, navigate to the support section, and search for the EOS 1300D. This ensures access to the most up-to-date guides and software for optimal camera performance.

8.2 Online Communities and Forums

Online communities and forums are invaluable resources for Canon EOS 1300D users. Platforms like Canon’s official forum, DPReview, and Reddit host active discussions where photographers share tips, ask questions, and exchange experiences. These communities are great for troubleshooting, learning advanced techniques, and staying updated on the latest firmware and software. Users can also find inspiration and feedback on their work. Engaging with these forums fosters a sense of camaraderie and provides access to a wealth of knowledge from both professionals and enthusiasts. Always follow community guidelines to ensure respectful and constructive interactions.

Comparison with Other Canon EOS Models

The Canon EOS 1300D stands out among entry-level DSLRs, offering a balance of affordability and performance. Compared to the EOS 1200D, it features built-in Wi-Fi and NFC for enhanced connectivity. While it lacks the weather-sealing of higher-end models like the EOS 80D, it remains a solid choice for beginners. Its 18MP sensor and DIGIC 4+ processor deliver consistent image quality, though it trails behind the EOS 200D in terms of Dual Pixel AF and touchscreen functionality. Overall, the EOS 1300D is a reliable option for those seeking a budget-friendly DSLR without compromising on essential features.

The Canon EOS 1300D is a versatile and user-friendly DSLR camera, ideal for beginners and hobbyists. With its 18MP sensor, built-in Wi-Fi, and intuitive controls, it offers excellent value for its price. While it may not match the advanced features of higher-end models, its simplicity and performance make it a great starting point for photography enthusiasts. The comprehensive manual and online resources ensure easy learning and troubleshooting. Overall, the EOS 1300D is a reliable choice for capturing high-quality images with minimal complexity.

mining wow guide cataclysm

Mining in WoW Cataclysm is a primary gathering profession that allows players to extract ores‚ gems‚ and other materials from mineral nodes․ It plays a crucial role in crafting professions like Blacksmithing‚ Engineering‚ and Jewelcrafting‚ making it an essential skill for both crafting and earning in-game gold․ Players can level Mining from 1 to 525‚ with various zones and strategies optimized for efficient progression․ This guide provides a comprehensive overview of Mining in Cataclysm Classic‚ including leveling tips‚ best zones‚ and associated professions․

1․1 What is Mining?

Mining is a primary gathering profession in World of Warcraft: Cataclysm that involves extracting ores‚ gems‚ and stones from mineral nodes․ Players use a mining pick to loot these resources‚ which are essential for crafting professions like Blacksmithing‚ Engineering‚ and Jewelcrafting․ Mining is a valuable skill for both crafting gear and earning gold by selling materials․ It is one of three primary gathering professions‚ making it a versatile choice for players․ The ability to gather resources directly from the game world makes Mining a popular and rewarding profession for many adventurers in Azeroth․

1․2 Importance of Mining in WoW Cataclysm

Mining is a cornerstone profession in World of Warcraft: Cataclysm‚ providing essential resources for crafting and gameplay progression․ It supplies materials for Blacksmithing‚ Engineering‚ and Jewelcrafting‚ making it vital for creating gear and items․ Mining also offers a unique advantage by granting experience points when gathering ores‚ aiding in character leveling․ Additionally‚ players can earn gold by selling mined materials on the Auction House‚ making it a profitable profession․ Its versatility and utility make Mining a valuable skill for both casual players and crafters‚ ensuring its importance in the in-game economy and character development․

Benefits of Mining

Mining provides valuable resources for crafting professions‚ grants experience points‚ and allows players to earn gold by selling ores and gems on the Auction House․

2․1 Mining as a Primary Profession

Mining is a primary gathering profession in WoW Cataclysm‚ enabling players to extract ores‚ gems‚ and other materials from mineral nodes․ It provides essential resources for crafting professions like Blacksmithing‚ Engineering‚ and Jewelcrafting․ Mining also grants experience points‚ aiding character progression․ By pairing Mining with these crafting professions‚ players can create items without relying on the Auction House․ Additionally‚ Mining can be profitable‚ as high-demand ores and gems can be sold for gold․ This profession offers flexibility‚ allowing solo players to gather resources efficiently‚ making it a valuable skill for both crafting and earning in-game currency․

2․2 Experience Gain Through Mining

Mining in WoW Cataclysm awards experience points‚ making it a valuable profession for character progression․ Each mined node grants XP‚ with higher-level zones offering greater rewards․ This system allows players to level their characters while gathering resources․ Mining also complements other activities‚ as the XP gained can contribute to overall leveling․ Additionally‚ smelting ores provides an alternative way to gain Mining skill and experience․ This unique feature makes Mining a versatile profession‚ enabling players to progress independently without relying solely on quests or group activities․ It’s an excellent way to level while preparing for crafting or earning gold․

Leveling Guide: 1-525

Presents a structured approach to advancing Mining skills from 1 to 525‚ highlighting key transitions between ore types and optimal zones for efficient leveling and progress․

3․1 Leveling from 1-300

Starting at level 1‚ focus on mining Copper Ore until reaching 50․ Transition to Tin and Silver veins until 100‚ then switch to Iron and Gold nodes up to 150․ From 150 to 200‚ mine Mithril and Truesilver․ Smelt ores to accelerate leveling‚ as this method grants more experience than gathering alone; Zones like Sholazar Basin offer abundant veins‚ making them ideal for efficient progression․ By 300‚ you’ll be ready to tackle higher-level ores‚ ensuring a smooth transition to the next phase of your Mining journey in Cataclysm Classic․

3․2 Leveling from 300-525

From 300 to 375‚ mine Thorium Ore‚ found in high-level zones like Searing Gorge and Burning Steppes․ At 350‚ switch to Fel Iron in Outland zones such as Hellfire Peninsula․ Reach 400 by mining Cobalt in Northrend areas like Howling Fjord․ Finally‚ from 400 to 525‚ focus on Obsidium and Elementium in Cataclysm zones like Mount Hyjal and Twilight Highlands․ Smelting ores at each stage provides significant experience‚ ensuring efficient progression․ Optimal routes and zone selection are key to reaching 525 quickly and effectively in Cataclysm Classic․

Best Zones for Mining

Sholazar Basin is renowned for its abundance of Titanium Ore‚ making it a prime location for high-level mining․ Other top zones include Icecrown‚ Ulduar‚ and Mount Hyjal‚ rich in Obsidium and Elementium․

4․1 Sholazar Basin

Sholazar Basin is a key zone for mining in WoW Cataclysm‚ particularly for gathering Titanium Ore․ Located in Northrend‚ it offers abundant mineral nodes‚ making it ideal for farming․ The zone’s layout allows for efficient route planning‚ maximizing ore collection․ Titanium Ore is highly sought after for crafting high-end items‚ making Sholazar Basin a hotspot for miners․ Its rich resources and strategic node placement ensure excellent experience gain and gold-making opportunities‚ especially during peak leveling phases․ This zone is indispensable for miners aiming to reach 525 skill level efficiently․

4․2 Other Recommended Zones

Beyond Sholazar Basin‚ other zones like Icecrown‚ Storm Peaks‚ and Uldum are excellent for mining․ Icecrown is rich in Titanium Ore nodes‚ while Storm Peaks offers abundant Cobalt and Saronite deposits․ Uldum‚ though contested‚ provides Obsidian and Electrium nodes․ These zones are less crowded than Sholazar Basin‚ offering a more relaxed farming experience․ Each zone caters to different skill levels and ore types‚ ensuring varied resources for crafting and selling․ Exploring these areas optimizes ore gathering and experience gain‚ making them indispensable for miners aiming to maximize efficiency and profit in Cataclysm Classic․

Mining and Associated Professions

Mining in WoW Cataclysm is a primary gathering profession that supports crafting professions like Blacksmithing‚ Engineering‚ and Jewelcrafting․ It provides essential materials for crafting armor‚ weapons‚ and gems‚ enhancing gameplay and economy․

5․1 Blacksmithing

Blacksmithing is a crafting profession that heavily relies on Mining․ It allows players to craft weapons‚ armor‚ and other metal items using ores like Copper‚ Tin‚ and Iron․ Mining provides the raw materials needed for Blacksmithing‚ making it an ideal paired profession․ By mining ores and smelting them into bars‚ players can craft powerful gear for themselves or sell it at the Auction House․ This synergy makes Mining and Blacksmithing a powerful combination for both progression and gold-making in WoW Cataclysm Classic․

5․2 Engineering

Engineering is a crafting profession that relies heavily on Mining for materials․ Players can create gadgets‚ explosives‚ and mechanical devices using ores like Copper‚ Tin‚ and Iron․ Mining provides the raw materials needed for Engineering recipes‚ making it an ideal complementary profession․ By mining ores and smelting them into bars‚ players can craft devices that provide combat advantages or convenience․ This synergy between Mining and Engineering allows players to create unique items‚ enhancing their gameplay experience and potentially generating gold through sales․ It’s a powerful combination for inventors and gatherers alike in WoW Cataclysm Classic․

5․3 Jewelcrafting

Jewelcrafting is a crafting profession that relies on Mining for precious gems and metals․ By mining ores like Mithril‚ Truesilver‚ and Thorium‚ players obtain materials to craft jewelry‚ gems‚ and decorative items․ This profession becomes particularly valuable at higher levels‚ as rare ores are required for powerful gemstone creations․ Mining ensures a steady supply of resources for Jewelcrafting‚ enabling players to create unique accessories and ornamental items․ This combination allows players to enhance their characters or generate income by selling crafted goods in WoW Cataclysm Classic․

Mining Strategies

Mining strategies focus on optimizing ore gathering and farming routes․ Efficient pathing and node prioritization maximize resource collection‚ ensuring quick leveling and high material yields in Cataclysm Classic․

6․1 Farming Routes

Farming routes are optimized paths designed to maximize ore collection efficiency․ Sholazar Basin is a top choice‚ with abundant veins and minimal competition․ Plan routes to circle the basin‚ focusing on high-traffic nodes․ Other zones like Icecrown and Uldum offer ample mining opportunities‚ with specific routes tailored to ore type and node density․ Use mounts to speed up travel and consider timing to avoid crowded areas․ Prioritize veins near flight points and major pathways for quick access․ Incorporate rare ore nodes for bonus materials․ Use in-game addons to track node respawns and enhance farming efficiency‚ ensuring minimal downtime and maximum resource gathering․

6․2 Optimizing Ore Gathering

Optimizing ore gathering involves efficient node tracking‚ route planning‚ and resource management․ Use smelting to convert ores into bars for faster leveling and gold-making․ Prioritize high-demand ores like Obsidium and Elementium․ Utilize addons like Gatherer to track node locations and improve route efficiency․ Focus on zones with dense mineral veins‚ such as Sholazar Basin and Icecrown․ Avoid competition by mining during off-peak hours․ Mounts significantly speed up travel between nodes․ Always check the Auction House for ore demand to maximize profits․ Combine mining with other activities‚ like questing‚ to optimize time․ Regularly empty bags to ensure space for ore storage and quick access to materials․

Mining in WoW Cataclysm is a rewarding and essential profession for crafting and gold-making․ By following this guide‚ players can efficiently level from 1 to 525‚ leveraging optimal zones and strategies․ Key areas like Sholazar Basin and Icecrown offer abundant resources‚ while smelting and farming routes accelerate progression․ Mining supports professions like Blacksmithing and Engineering‚ making it a valuable skill for any player․ Use the tips provided to maximize efficiency‚ earn gold‚ and enhance your in-game experience․ Happy mining‚ and may your ores always be plentiful in Azeroth!

twilight lord kelris sod guide

Twilight Lord Kelris is the third boss in Blackfathom Deeps‚ serving as the commander of the Twilights Hammer. Known for his formidable shadow magic‚ he presents a significant challenge to raid teams‚ marking a steep difficulty increase compared to earlier encounters in the instance.

Fight Mechanics and Key Abilities

Twilight Lord Kelris exhibits high magic resistance‚ reducing caster effectiveness. He employs shadow spells for AoE damage and summons Infernals‚ requiring precise add management. Interrupting his chain spells is crucial to control aggro and mitigate damage spikes during the encounter.

Magic Resistance and Its Impact on Casters

Twilight Lord Kelris possesses significant magic resistance‚ drastically reducing the effectiveness of spells cast against him. This makes casters less impactful compared to melee classes‚ who can deal direct physical damage. Mages‚ warlocks‚ and priests will find their spell damage mitigated‚ requiring them to adapt their strategies. To overcome this‚ casters must rely on high-damage spells and cooldowns to maximize their limited effectiveness. Additionally‚ coordinating with melee classes to focus on physical damage becomes crucial. While casters are not entirely ineffective‚ their contribution is significantly diminished‚ making this encounter challenging for magic-based players. Proper positioning‚ spell selection‚ and timing are essential to minimize wasted mana and optimize damage output.

Shadow Spells and Their Effects

Twilight Lord Kelris wields powerful shadow spells that are central to his offensive arsenal. His primary abilities include Shadow Bolt Volley‚ which unleashes a cascade of shadow energy‚ dealing significant damage to the raid‚ and Shadow Aura‚ a periodic damage effect that increases shadow damage taken by players. These spells create a challenging environment‚ especially for healers‚ who must manage sustained damage while maintaining raid health. Additionally‚ Kelris’s shadow magic can apply debuffs that amplify damage taken‚ further complicating the encounter. The periodic nature of these spells requires careful positioning and use of defensive cooldowns to mitigate damage spikes. Raiders must remain vigilant‚ as the cumulative effect of shadow spells can quickly overwhelm even well-coordinated teams. Effective communication and strategic use of healing resources are critical to countering Kelris’s shadow-based onslaught.

Infernal Spawns and Add Management

Infernal Spawns are a critical mechanic in the Twilight Lord Kelris encounter‚ as they periodically summon Infernals to bolster their forces. These adds must be prioritized and eliminated quickly to prevent the fight from spiraling out of control. Infernals possess high health and deal substantial damage to the raid‚ making them a significant threat if left unchecked. Assigning a dedicated team to focus on these adds is essential‚ while the main tank continues to manage Kelris. Utilizing area-of-effect abilities and coordinating cooldowns can help control add populations. Additionally‚ ensuring proper interrupt rotations on Kelris prevents further Infernals from being summoned. The key to success lies in balancing add management with consistent damage to the boss‚ as prolonged fights only exacerbate the challenge posed by these infernal spawns. Mismanagement of adds can quickly lead to a wipe‚ making this aspect of the fight crucial for victory.

Strategy Overview for the Encounter

Twilight Lord Kelris requires a well-coordinated strategy‚ focusing on two-tank setups‚ interrupting chains‚ and managing Infernal spawns. Melee classes carry damage‚ while casters must adapt to his magic resistance.

The Importance of Two Tanks in the Fight

Using two tanks is crucial for managing Twilight Lord Kelris’s aggressive behavior and ensuring consistent threat generation. This setup allows tanks to alternate aggro‚ preventing the boss from focusing on squishier targets. One tank can dedicate to handling the boss’s direct attacks‚ while the other focuses on picking up and controlling Infernal spawns. This dual approach minimizes damage taken by the raid team and ensures smooth transitions during phases with high add activity. Additionally‚ two tanks provide redundancy‚ ensuring the boss remains under control even if one tank is momentarily incapacitated. Proper tank coordination is vital to maintaining a stable and predictable fight rhythm‚ making it easier for the rest of the raid to focus on their roles. This strategy significantly reduces the risk of wipes and allows the team to better handle the encounter’s challenging mechanics.

Interrupting Chains and Controlling Aggro

Interrupting Twilight Lord Kelris’s Chain ability is critical‚ as it significantly boosts his damage output and healing if left unchecked. Assign interrupt duties to classes with reliable abilities‚ such as Warriors using Concussion Blow or Rogues employing Kick. Mages and Priests can also contribute with Counterspell and Silence‚ respectively. Coordination is key to ensuring Chains are consistently interrupted‚ as the boss will periodically recast the ability. Additionally‚ maintaining aggro control is vital. Tanks must generate high and consistent threat to prevent the boss from targeting healers or DPS. Use abilities like Thunder Clap or Demoralizing Shout to manage aggro‚ while the rest of the raid avoids overtaking the tank’s threat. If aggro is lost‚ quick reactions with Taunt or class-specific aggro management tools can prevent potential wipes.

Killing Infernals and Managing Trash

Killing Infernals and managing trash are pivotal aspects of the Twilight Lord Kelris encounter. Infernals spawn periodically and must be prioritized to prevent overwhelming the raid. Assign a dedicated team to handle Infernals‚ focusing on burst damage to eliminate them quickly. Ensure healers are prepared for the increased damage during these phases. Managing trash effectively involves clearing adds before they pile up‚ as they can quickly overwhelm the tank and healers. Use crowd control and area-of-effect spells to handle large groups. Designate a player to monitor and coordinate trash management‚ ensuring smooth transitions between phases. Proper positioning and communication are key to avoiding unnecessary damage. By efficiently managing Infernals and trash‚ the raid can maintain control and focus on the boss‚ ultimately leading to a successful kill.

Class-Specific Tips for Success

Melee classes should focus on maximizing damage output‚ while casters must adapt to overcome Kelris’s magic resistance. Healers need to be vigilant in managing consistent shadow spell damage.

Melee Classes: Carrying the Damage

Melee classes play a pivotal role in the Twilight Lord Kelris encounter‚ as his high magic resistance significantly reduces caster damage output. Warriors‚ rogues‚ and paladins must step up to carry the damage burden.

  • Positioning is key: Stay behind Kelris to avoid his frontal cleave and maximize damage output.
  • Use cooldowns strategically: Abilities like Avatar or Adrenaline Rush can greatly boost DPS during critical phases.
  • Focus on interrupting chains: Melee classes should prioritize interrupting Kelris’s spellcasting to reduce magical damage on the raid.
  • Manage aggro carefully: Avoid overstepping the tanks’ threat to prevent unnecessary damage and allow healers to focus on the group.
  • Optimize gear: Prioritize strength and attack power to maximize damage output against Kelris’s high armor.

With proper execution‚ melee classes can ensure the raid’s success by overwhelming Kelris with sustained‚ high-damage pressure.

Caster Classes: Overcoming Magic Resistance

Caster classes face a significant challenge against Twilight Lord Kelris due to his high magic resistance‚ which drastically reduces their damage output. However‚ there are strategies to mitigate this.

  • Focus on high-impact spells: Use spells with high base damage or those that bypass resistance‚ such as direct damage spells like Pyroblast or Lightning Bolt.
  • Optimize gear for spell penetration: Prioritize gear with spell penetration to reduce Kelris’s resistance and increase your effectiveness.
  • Coordinate with melee classes: Since melee classes will be the primary damage dealers‚ casters should focus on supporting them with buffs and debuffs.
  • Use crowd control on infernals: Help manage adds by using spells like Polymorph or Hex to control infernals and prevent them from overwhelming the raid.
  • Save cooldowns for critical moments: Use powerful cooldowns during phases where Kelris is vulnerable or when infernals are being killed to maximize damage.

While casters may not be the primary damage dealers in this fight‚ their ability to support the raid and manage adds is crucial for success.

Healers: Managing Shadow Spell Damage

Healers play a pivotal role in managing the consistent damage dealt by Twilight Lord Kelris’s shadow spells‚ which can quickly overwhelm the raid if not properly mitigated. The key to success lies in proactive healing and smart resource management.

  • Focus on area-of-effect (AoE) healing: Spells like Healing Rain or Holy Nova are essential for mitigating the widespread damage caused by shadow spells.
  • Coordinate with other healers: Assign one healer to focus on the tanks while others handle raid-wide damage to ensure no one is left unattended.
  • Use cooldowns strategically: Save major healing cooldowns for phases where shadow spells are at their peak to stabilize the raid.
  • Monitor aggro and movement: Be prepared to adapt your healing strategy if the tank loses aggro or if players need to reposition to avoid mechanics.
  • Communicate with the raid team: Call out when you need assistance or when damage is becoming overwhelming to ensure a coordinated response.

Effective communication and anticipation are crucial for healers to manage the relentless shadow damage and secure a successful encounter.

Additional Tips for Raid Teams

Ensure all players understand their roles and practice the encounter to improve coordination. Use cooldowns wisely and communicate clearly to manage challenging phases effectively during the fight.

Gear Recommendations for the Fight

For success against Twilight Lord Kelris‚ prioritize gear that enhances survivability and damage output. Caster classes should focus on items boosting spell power and magic penetration to overcome his resistance. Melee classes benefit from high agility and strength to maximize DPS. Tanks should ensure they have sufficient armor and stamina to withstand his relentless attacks‚ while healers should aim for gear with high intellect and mana regeneration to sustain throughput. Additionally‚ consider equipping armor kits from Leatherworking to bolster your defenses. Coordinate with your team to optimize gear choices‚ ensuring a balanced approach to tackle the encounter effectively. Proper gear preparation is crucial for overcoming Kelris’s challenging mechanics and emerging victorious.

Practice and Coordination: Key to Victory

Success against Twilight Lord Kelris hinges on meticulous practice and seamless team coordination. His complex mechanics‚ such as interrupting shadow chains and managing infernals‚ demand precise execution. Regular practice sessions allow players to refine their roles and reactions‚ ensuring fluid communication during critical moments. Assigning specific responsibilities‚ like interrupt duties or add management‚ is essential for minimizing errors. Utilize voice chat to coordinate strategies and call out key events‚ such as infernal spawns or chain casts; Analyzing wipes and adapting strategies based on mistakes fosters improvement. Over time‚ consistent practice builds muscle memory and teamwork‚ transforming the encounter from daunting to manageable. Patience and dedication are vital‚ as mastering Kelris’s mechanics requires time and repetition. A well-coordinated team will ultimately prevail‚ turning a challenging fight into a triumph of skill and teamwork.